TABLE OF CONTENTS
- General
- Documents List
- Smart Documents
- Document Sidebar
- Files
- Important: For Files, the system ensures:Only the currently effective version is stored locally.No outdated or superseded versions are retained offline.When a File is revised, the previous version is replaced locally after synchronization.This guarantees that no obsolete content remains accessible on the device and storage usage is minimized.SearchSearch is selecting search hits for the title of the file. Only exact words are found.Filter & Sort OptionsIt supports following filter and sort options:TagsDefined TagsFile TypeAll (default)DocumentsFormsFilesOwnerDocument OwnerSort ByDocument name (Default: A→Z / Z→A)
- Search
- Memos
- Forms
General
This page provides guidance on viewing your documents, navigating the outline, applying sorting and filtering options, and scrolling through virtual pages.
In the primary sidebar, you will find the Documents tab. Clicking on it opens a supporting sidebar that displays the documents list along with available sorting and filtering options, giving you quick access to the content you need.
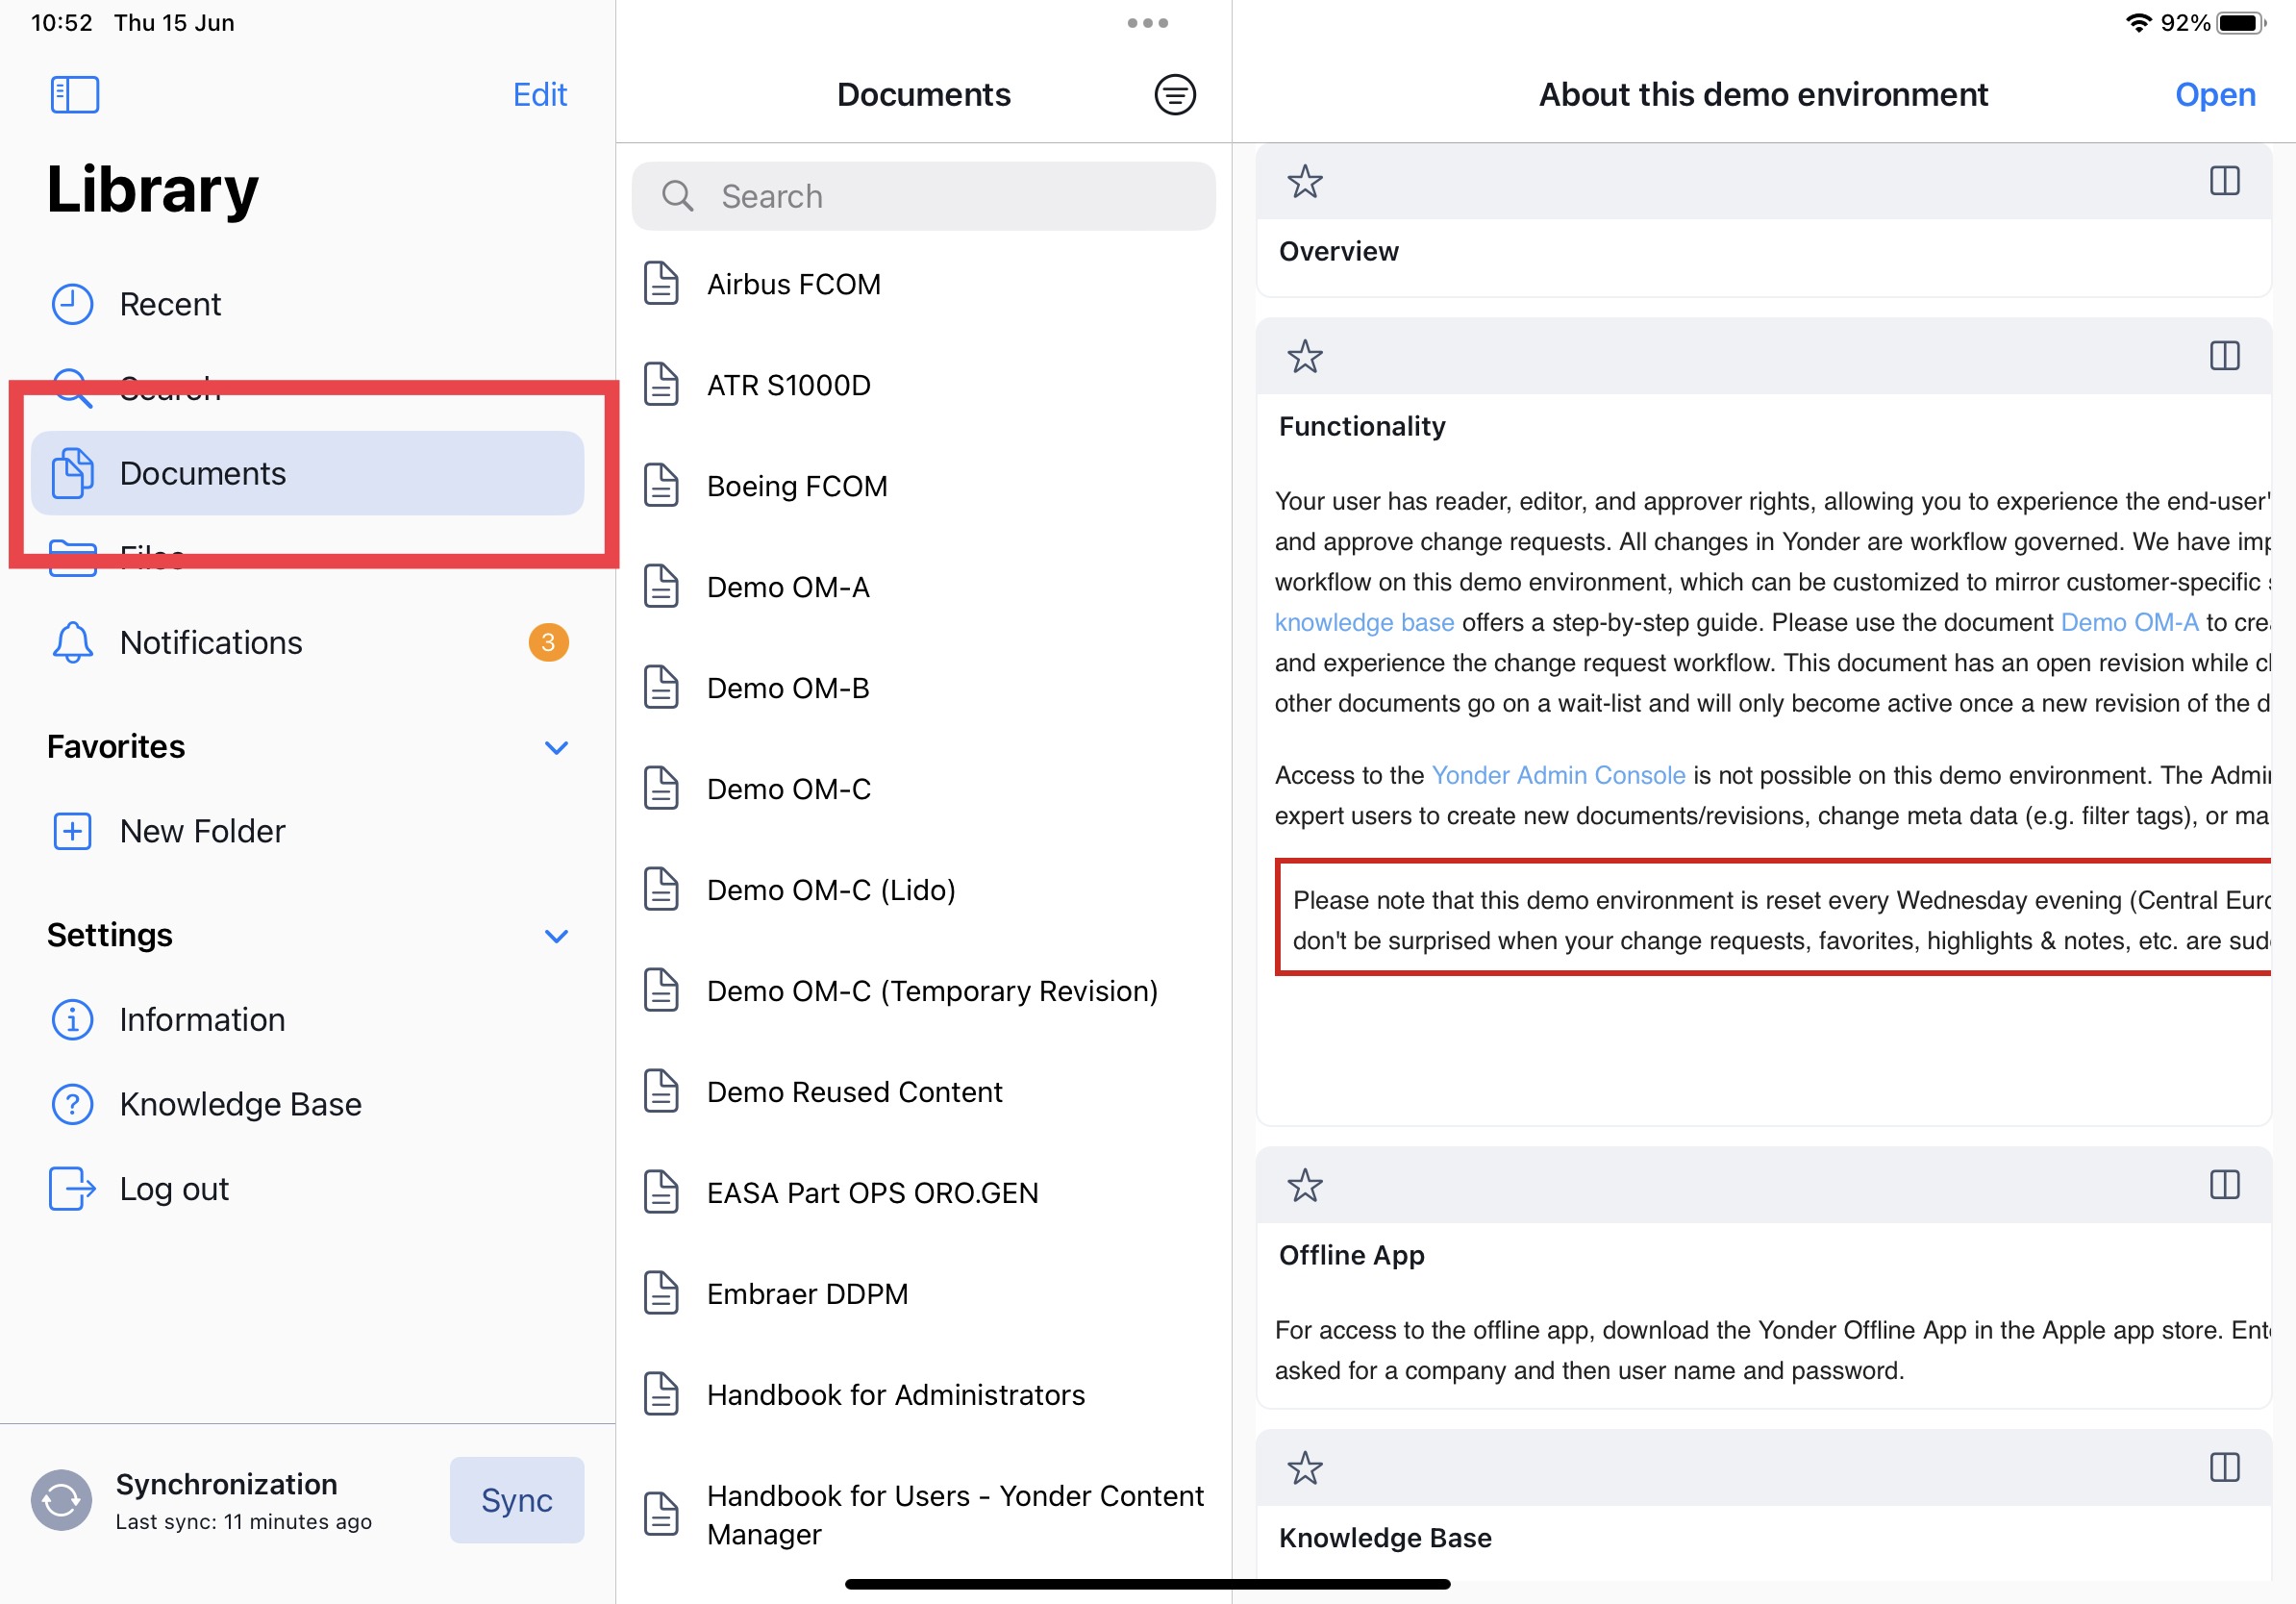
Documents List
In the 2nd sidebar, your content is listed. Here you can search and filter your documents.
Notes:
- Default all document types are listed (see Filter & Sorting Options below)
- The document content is opened and displayed depending on the document type (Smart Documents, Files (Memo, PDF, DOCX, XLSX, PPTX)
Navigating in Folders
In Yonder, documents can be organized into folders, which may also contain subfolders.
To navigate the folder structure, simply click on a folder. The contents of the folder will then be displayed. A folder may contain documents, additional folders, or both.
Because library structures can become complex, Yonder supports Apple’s standard navigation behavior to help you quickly move back through the folder hierarchy.
Navigating Back in the Folder Structure
You can navigate the folder structure of your library using the stacked folder icon.
- Select a folder in your library and the stacked folder icon to open the folder structu

- The pop-over displays the current navigation path in an indented hierarchy.
Each folder in the hierarchy is clickable. - Select any folder entry to navigate directly to that location within the same folder branch.

This allows you to quickly jump to any previous location in the folder structure without navigating step by step.
Note: The stacked folder icon is available when you have navigated into a folder or when you open an additional tab.
Filter the Documents List
In Yonder, the Secondary Sidebar provides multiple ways to filter the document list, helping you quickly narrow down and find the content you need.
Find in List
The “Find in list” feature allows you to quickly search for documents by typing part of their name. The search dynamically filters the list and displays matching results as you type.
Users can enter part of a document name in the “Find in list” field to locate documents quickly. Matching results appear instantly, making it easy to find the document you need without scrolling through the entire list.
Steps to Use:
Navigate to the list view containing your documents.
Locate the “Find in list” search field.
Begin typing part of the document name (e.g.,
document_MMorBo7).The list updates dynamically to show only documents that match your input.
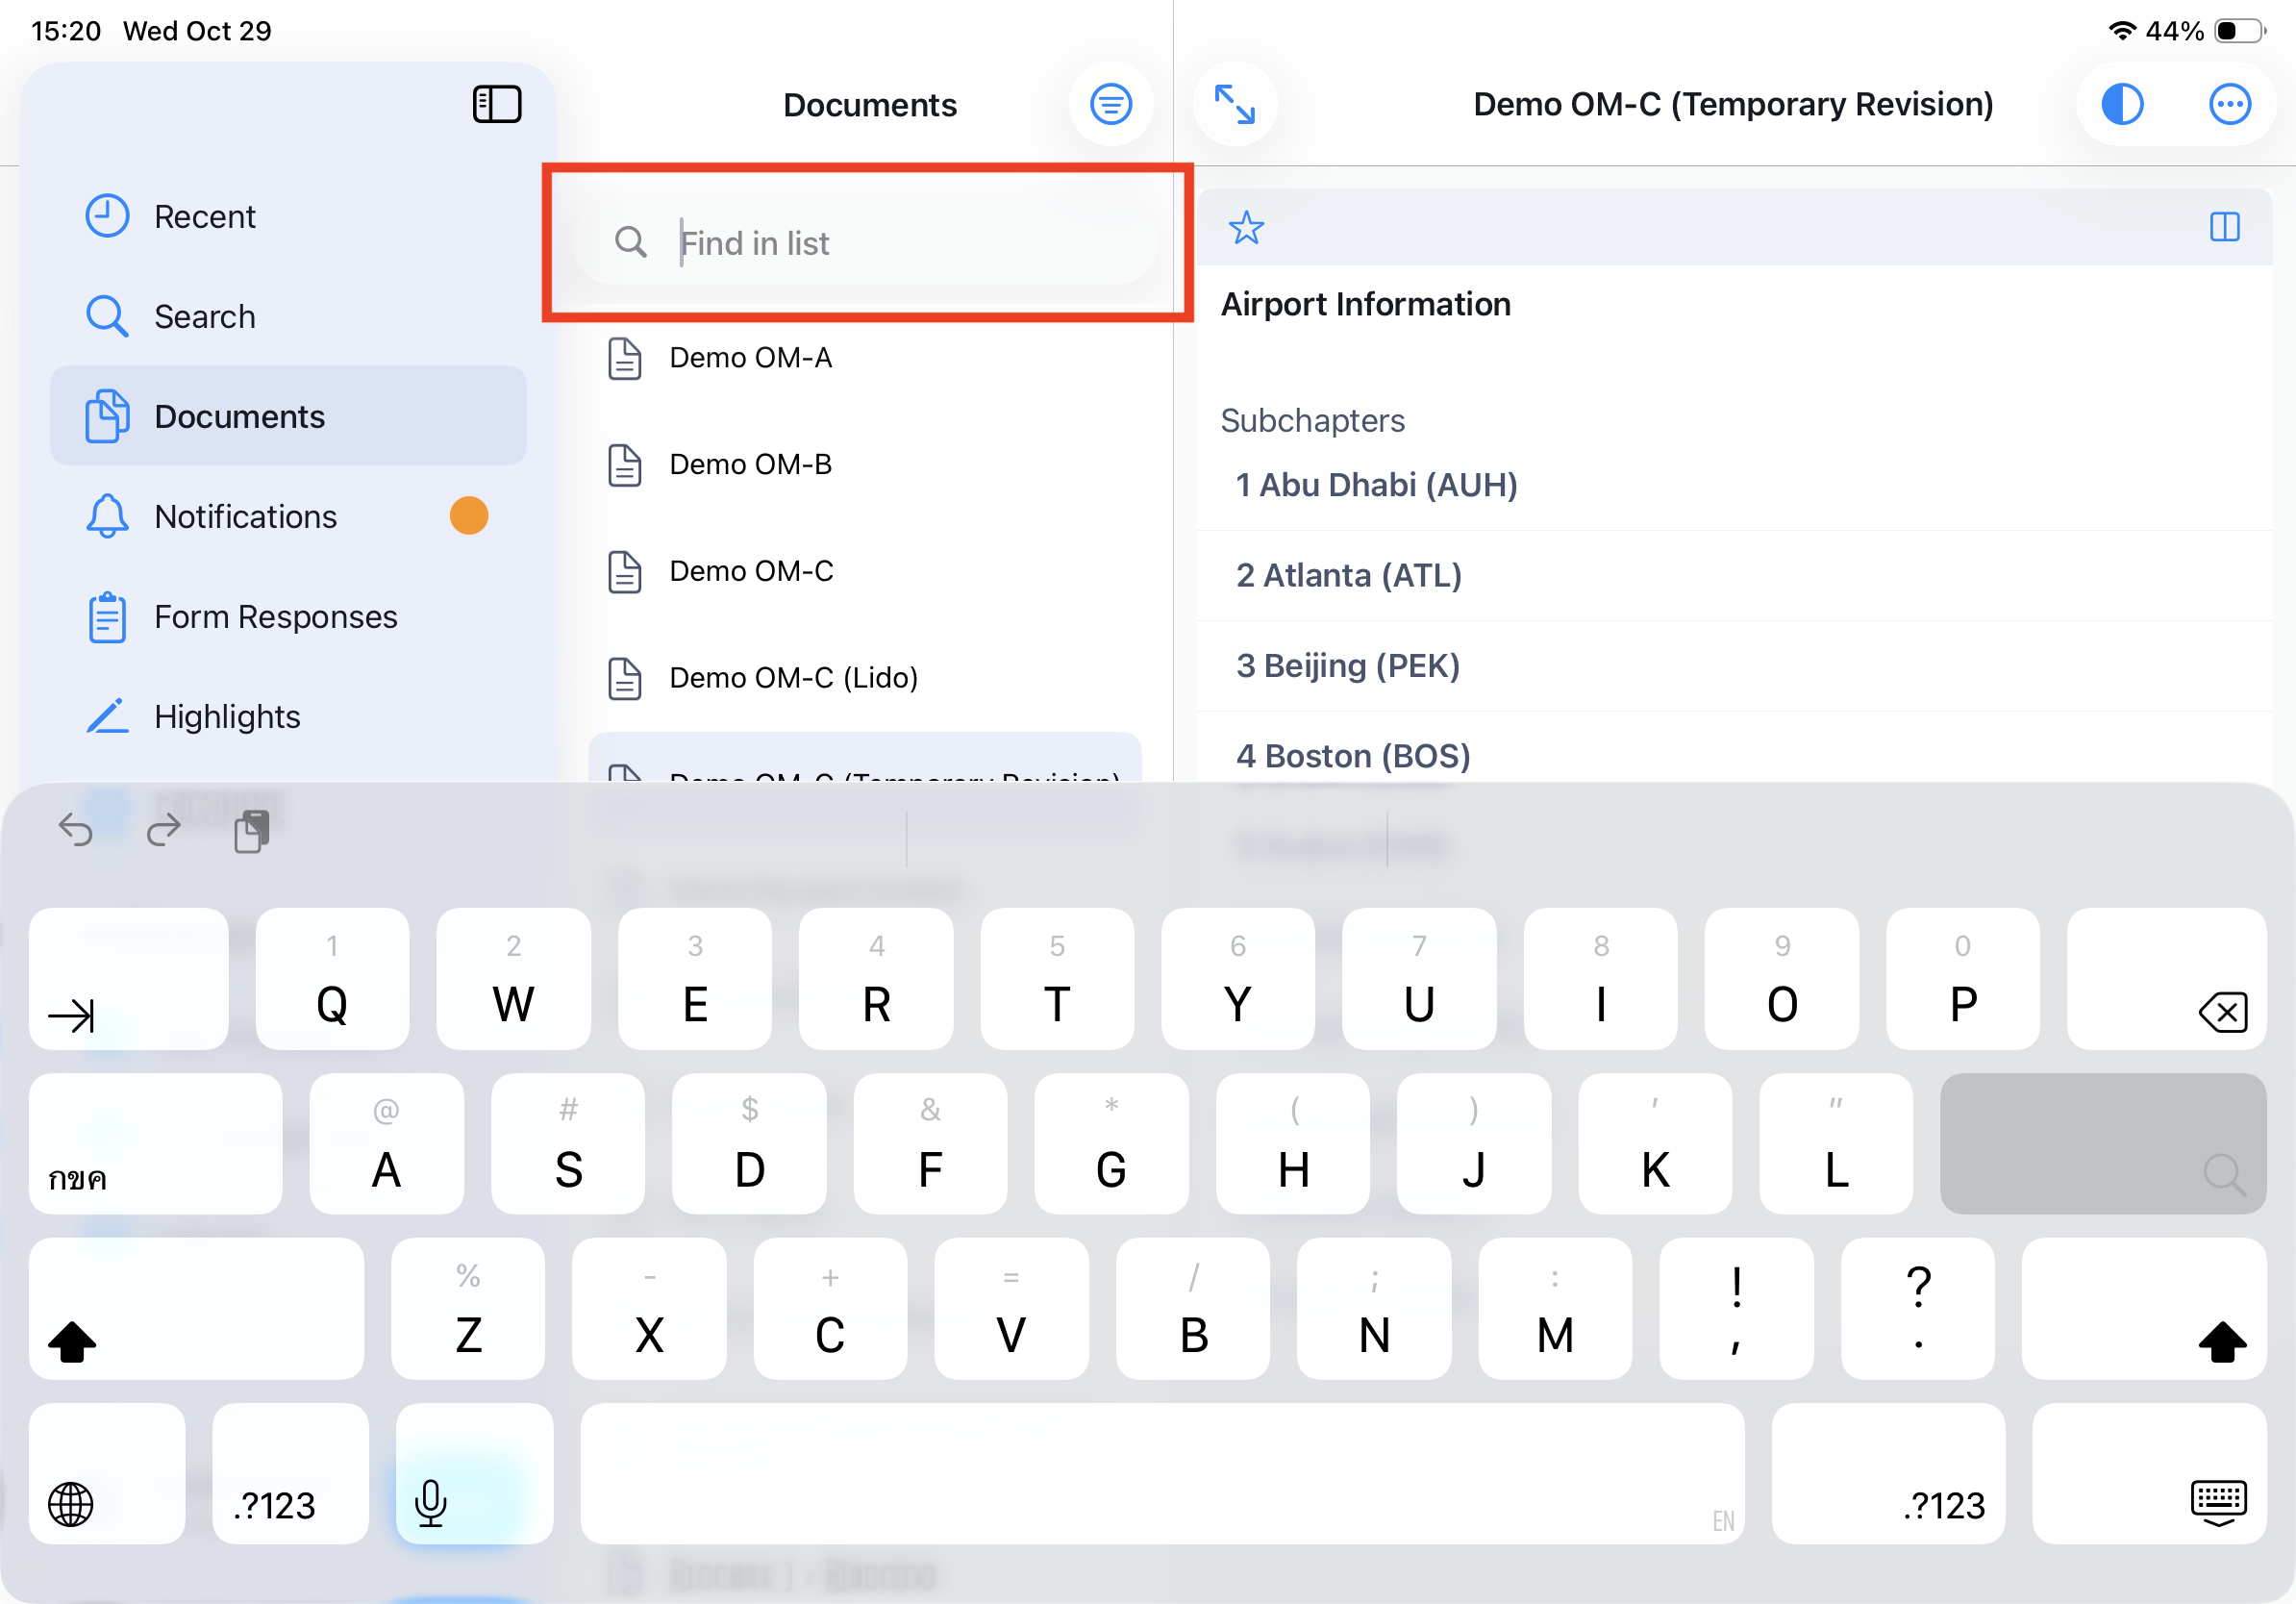
Note: Only exact words are found. If you are not sure about the exact name, please use the general search feature.
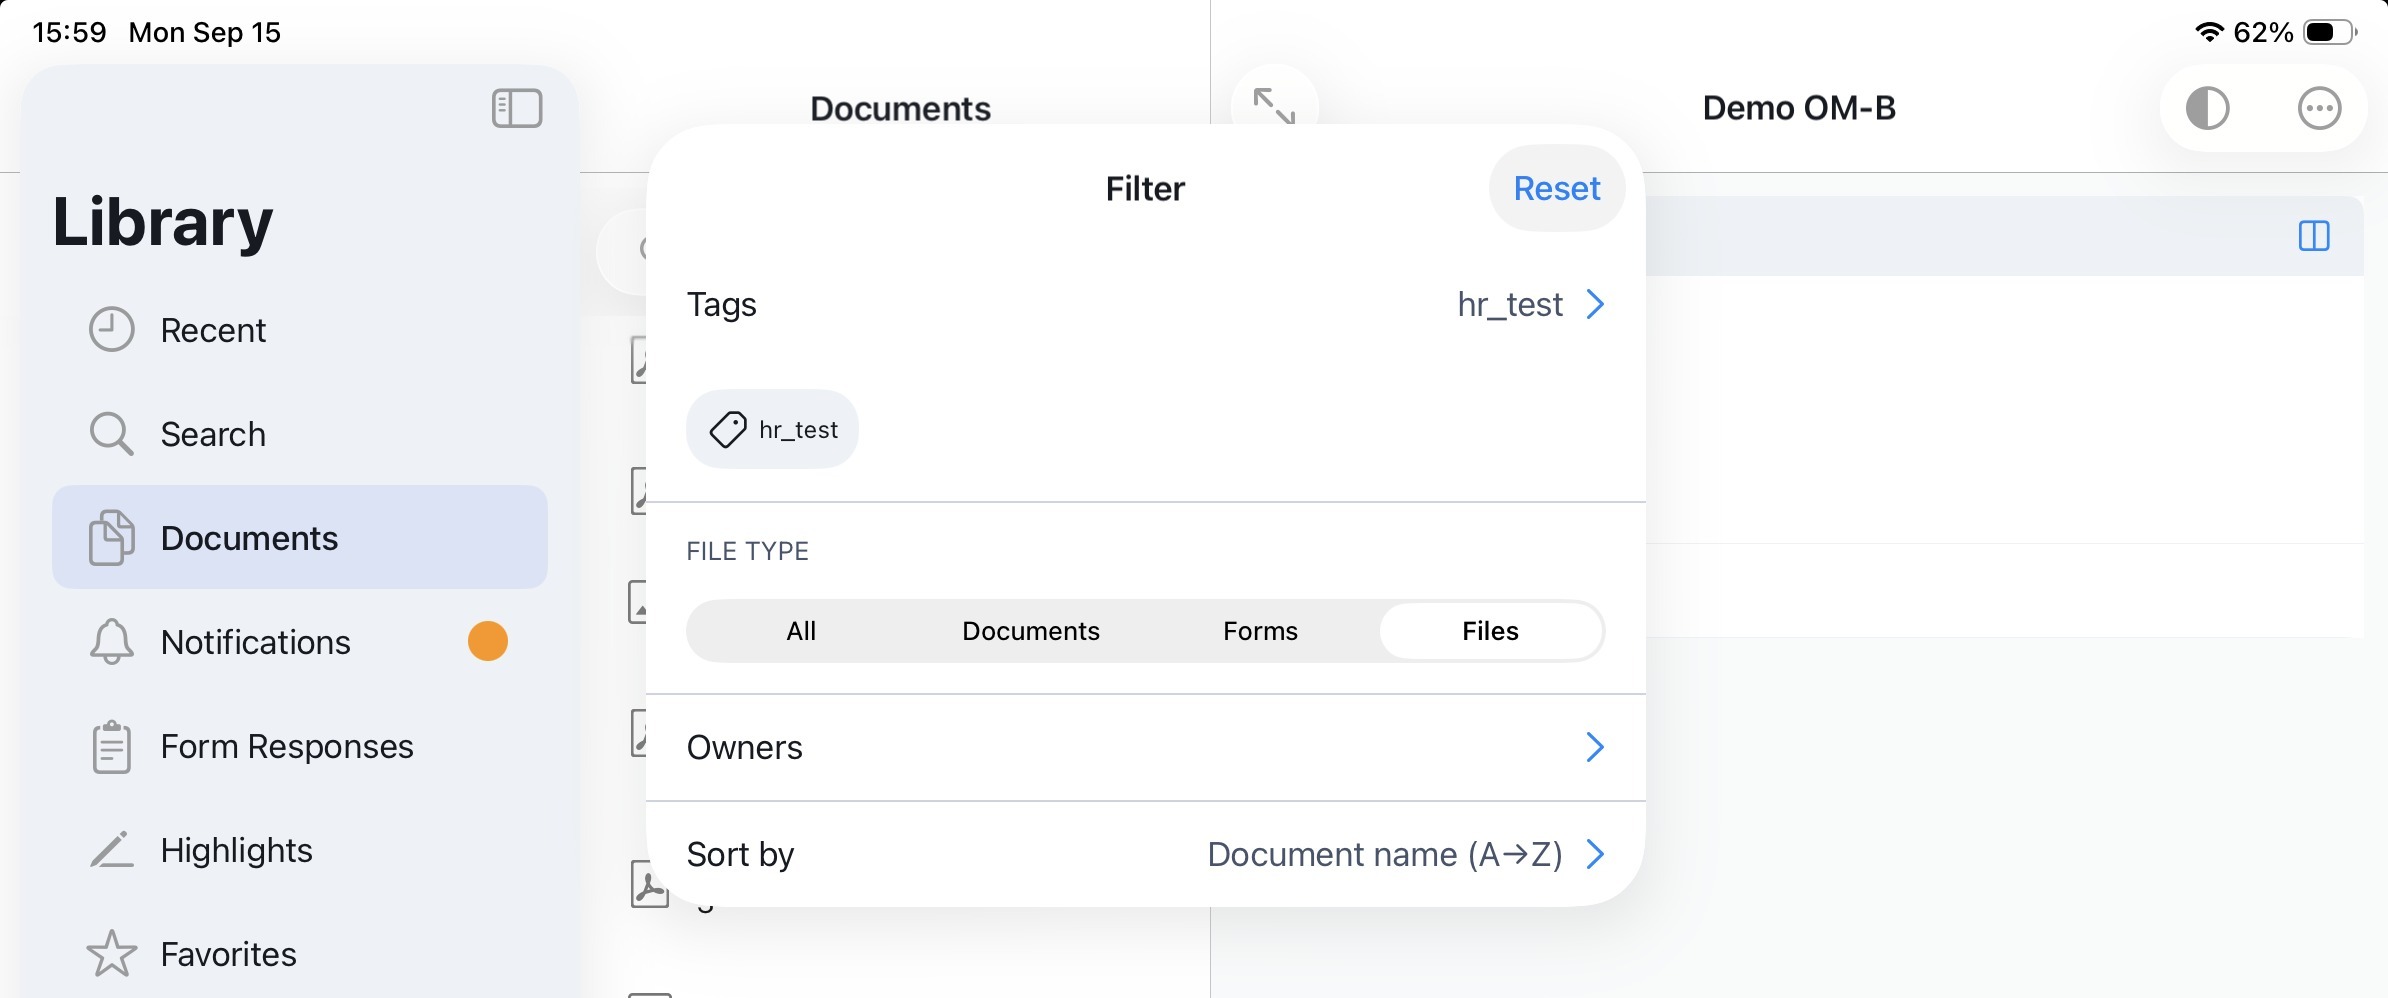
Filter by Tags
Select one or more tags in order to filter the content accordingly. The tags will be displayed as chips.
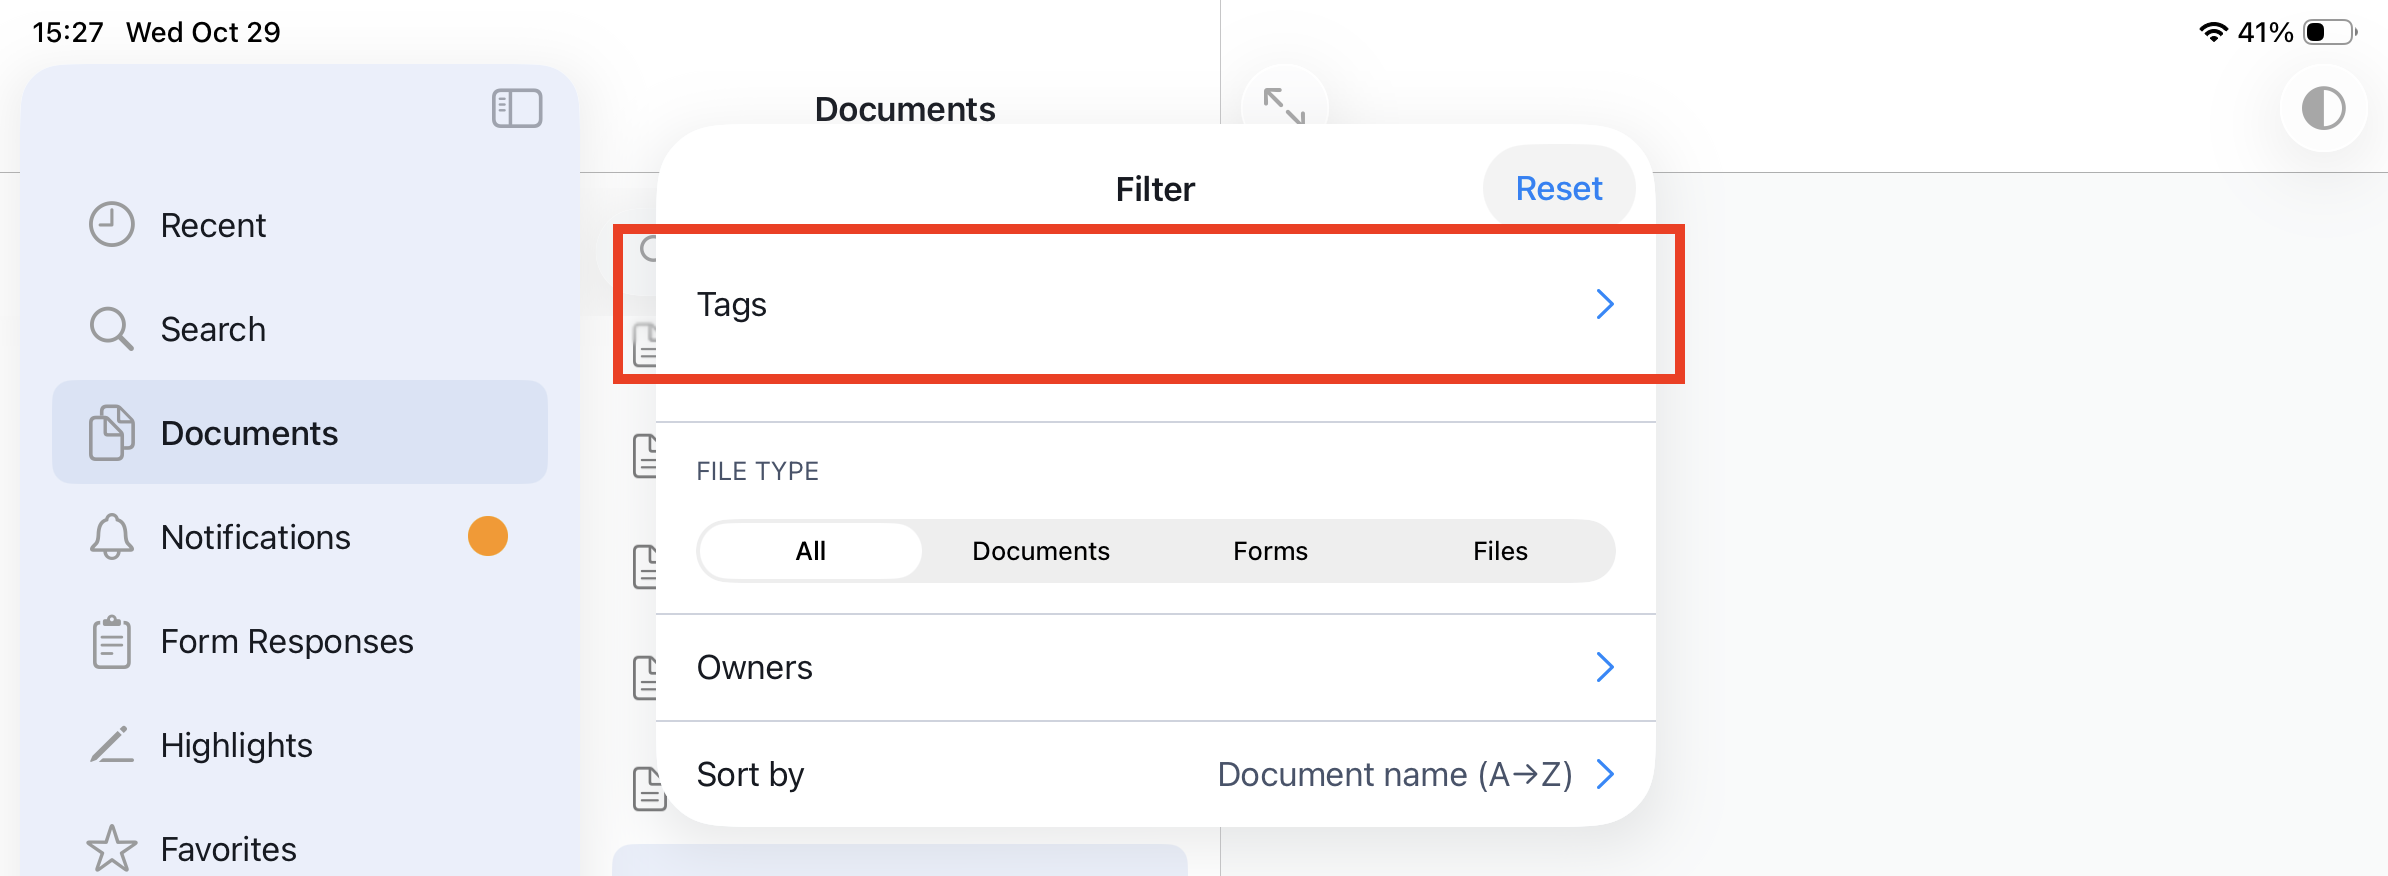
Note: By default, all tags assigned to your role within the company are selected. This ensures that you immediately see content relevant to your responsibilities without needing to manually apply filters.
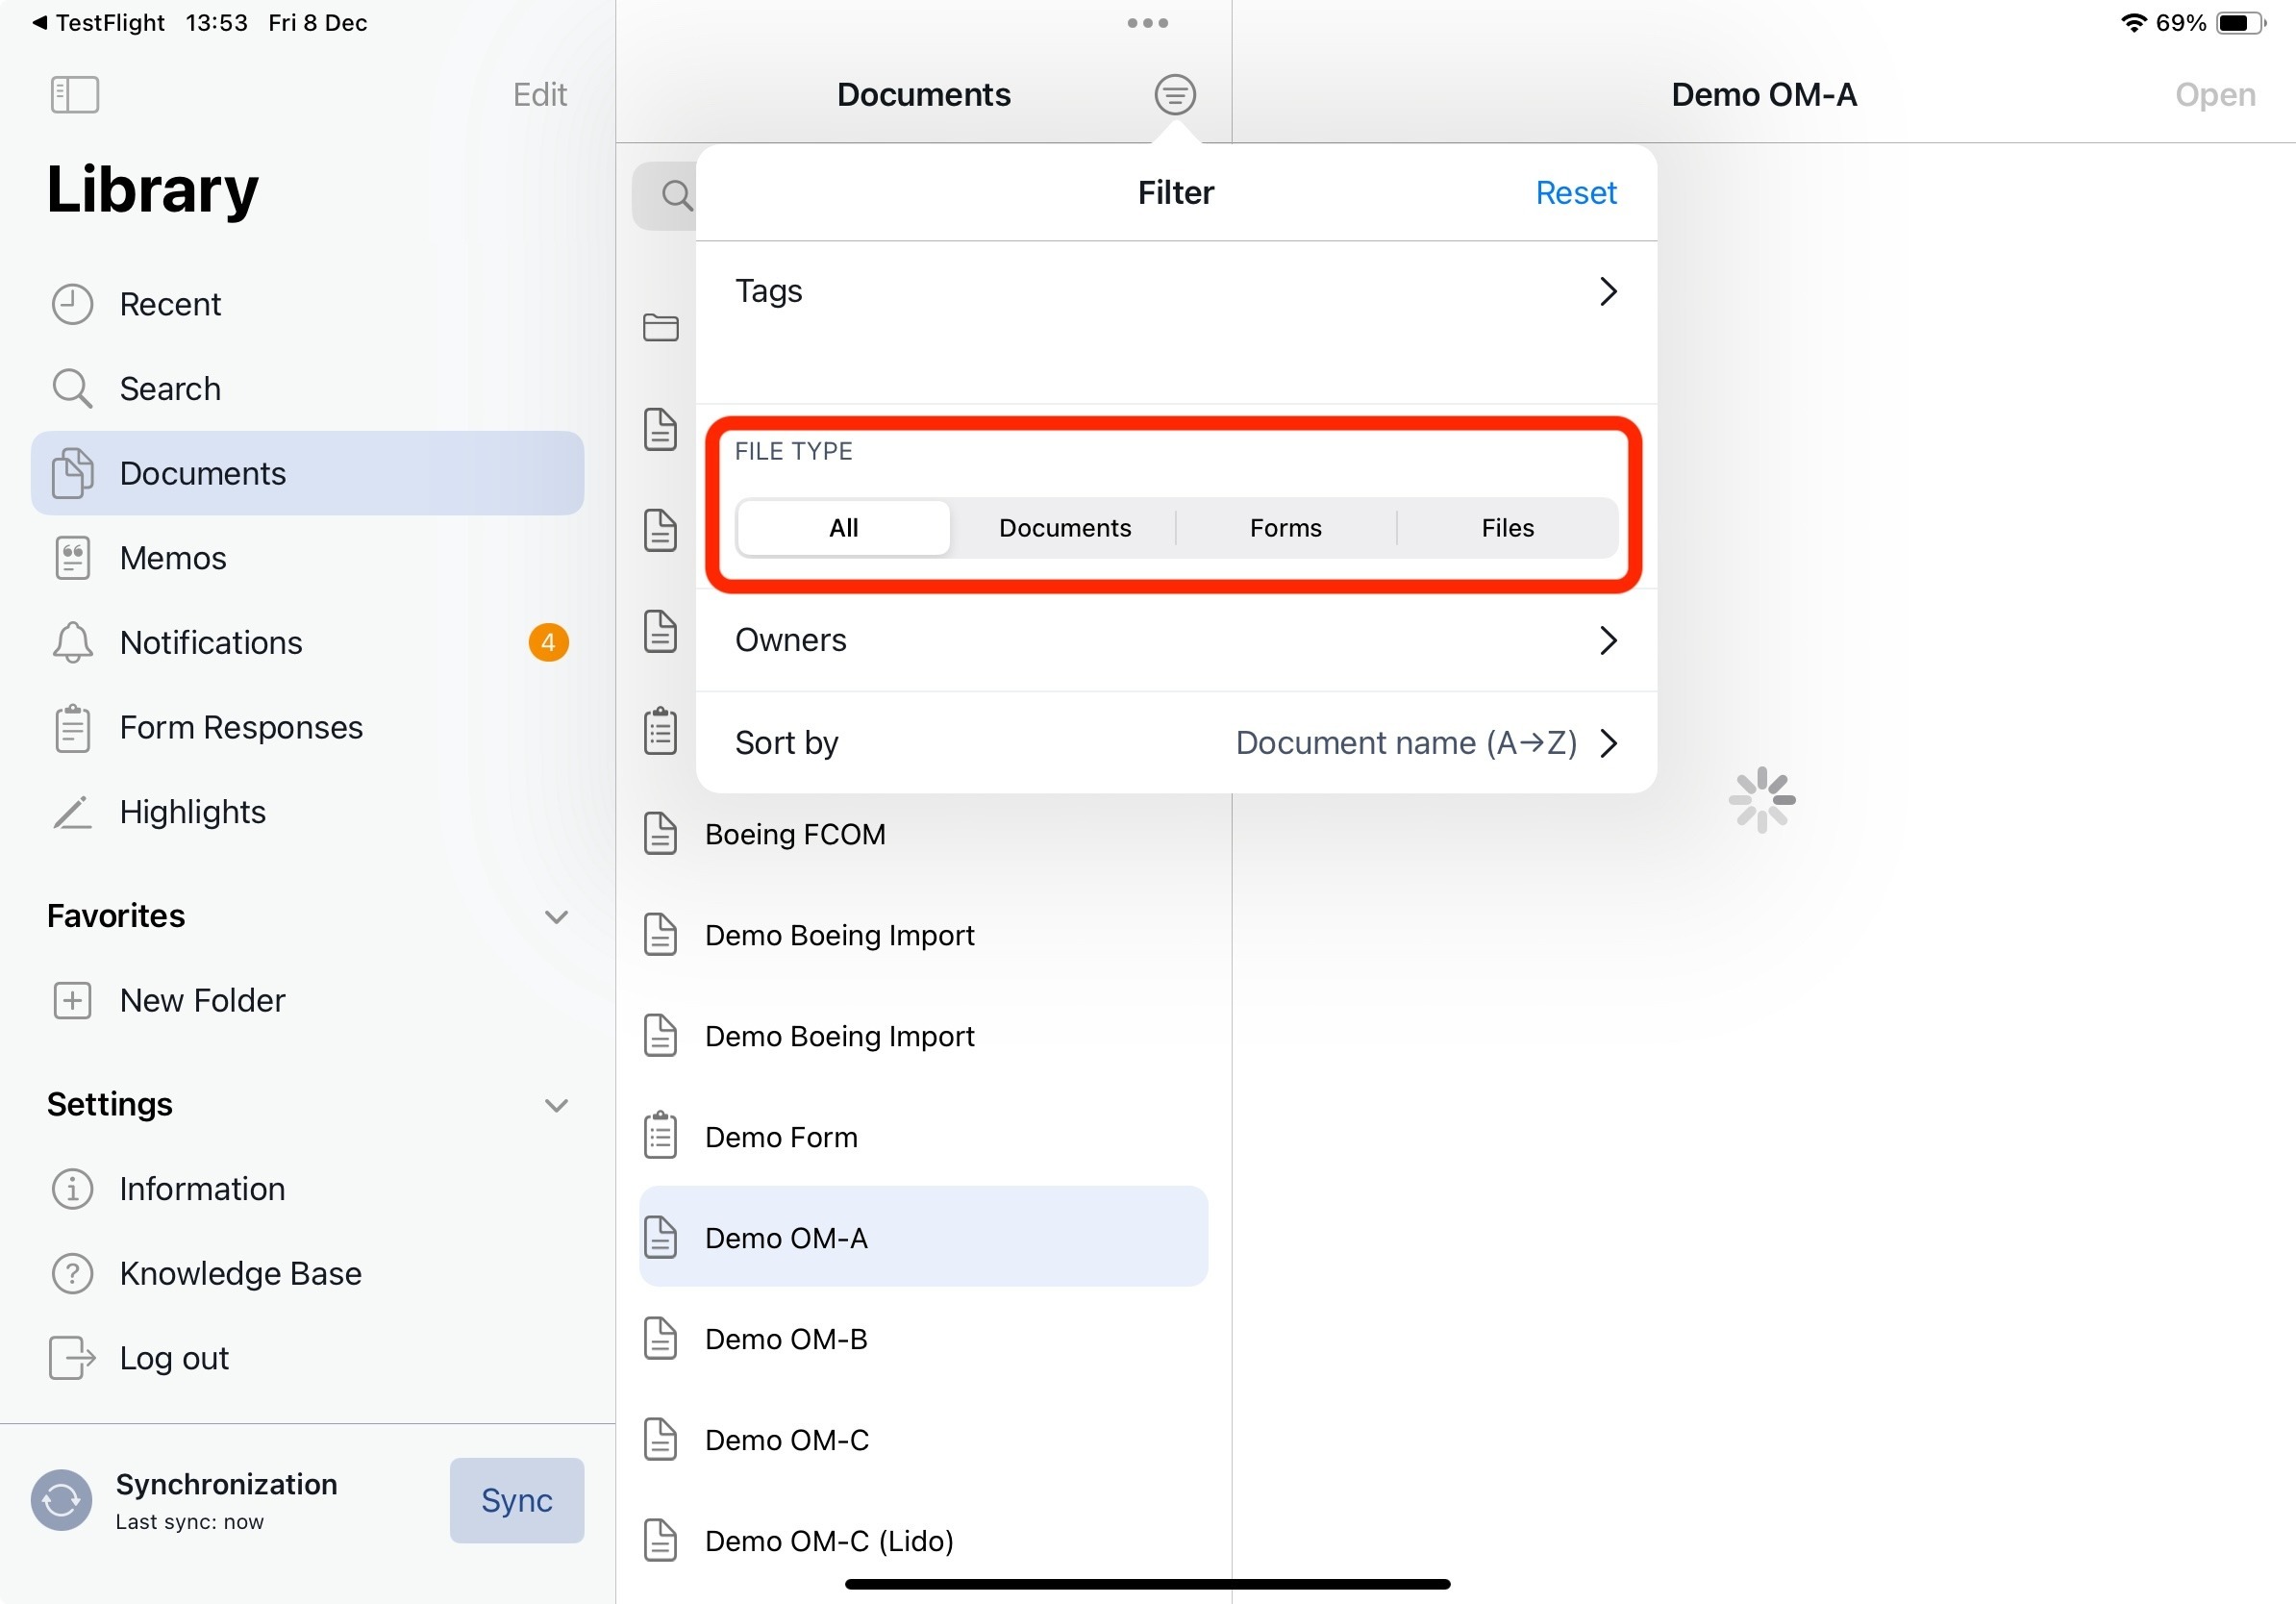
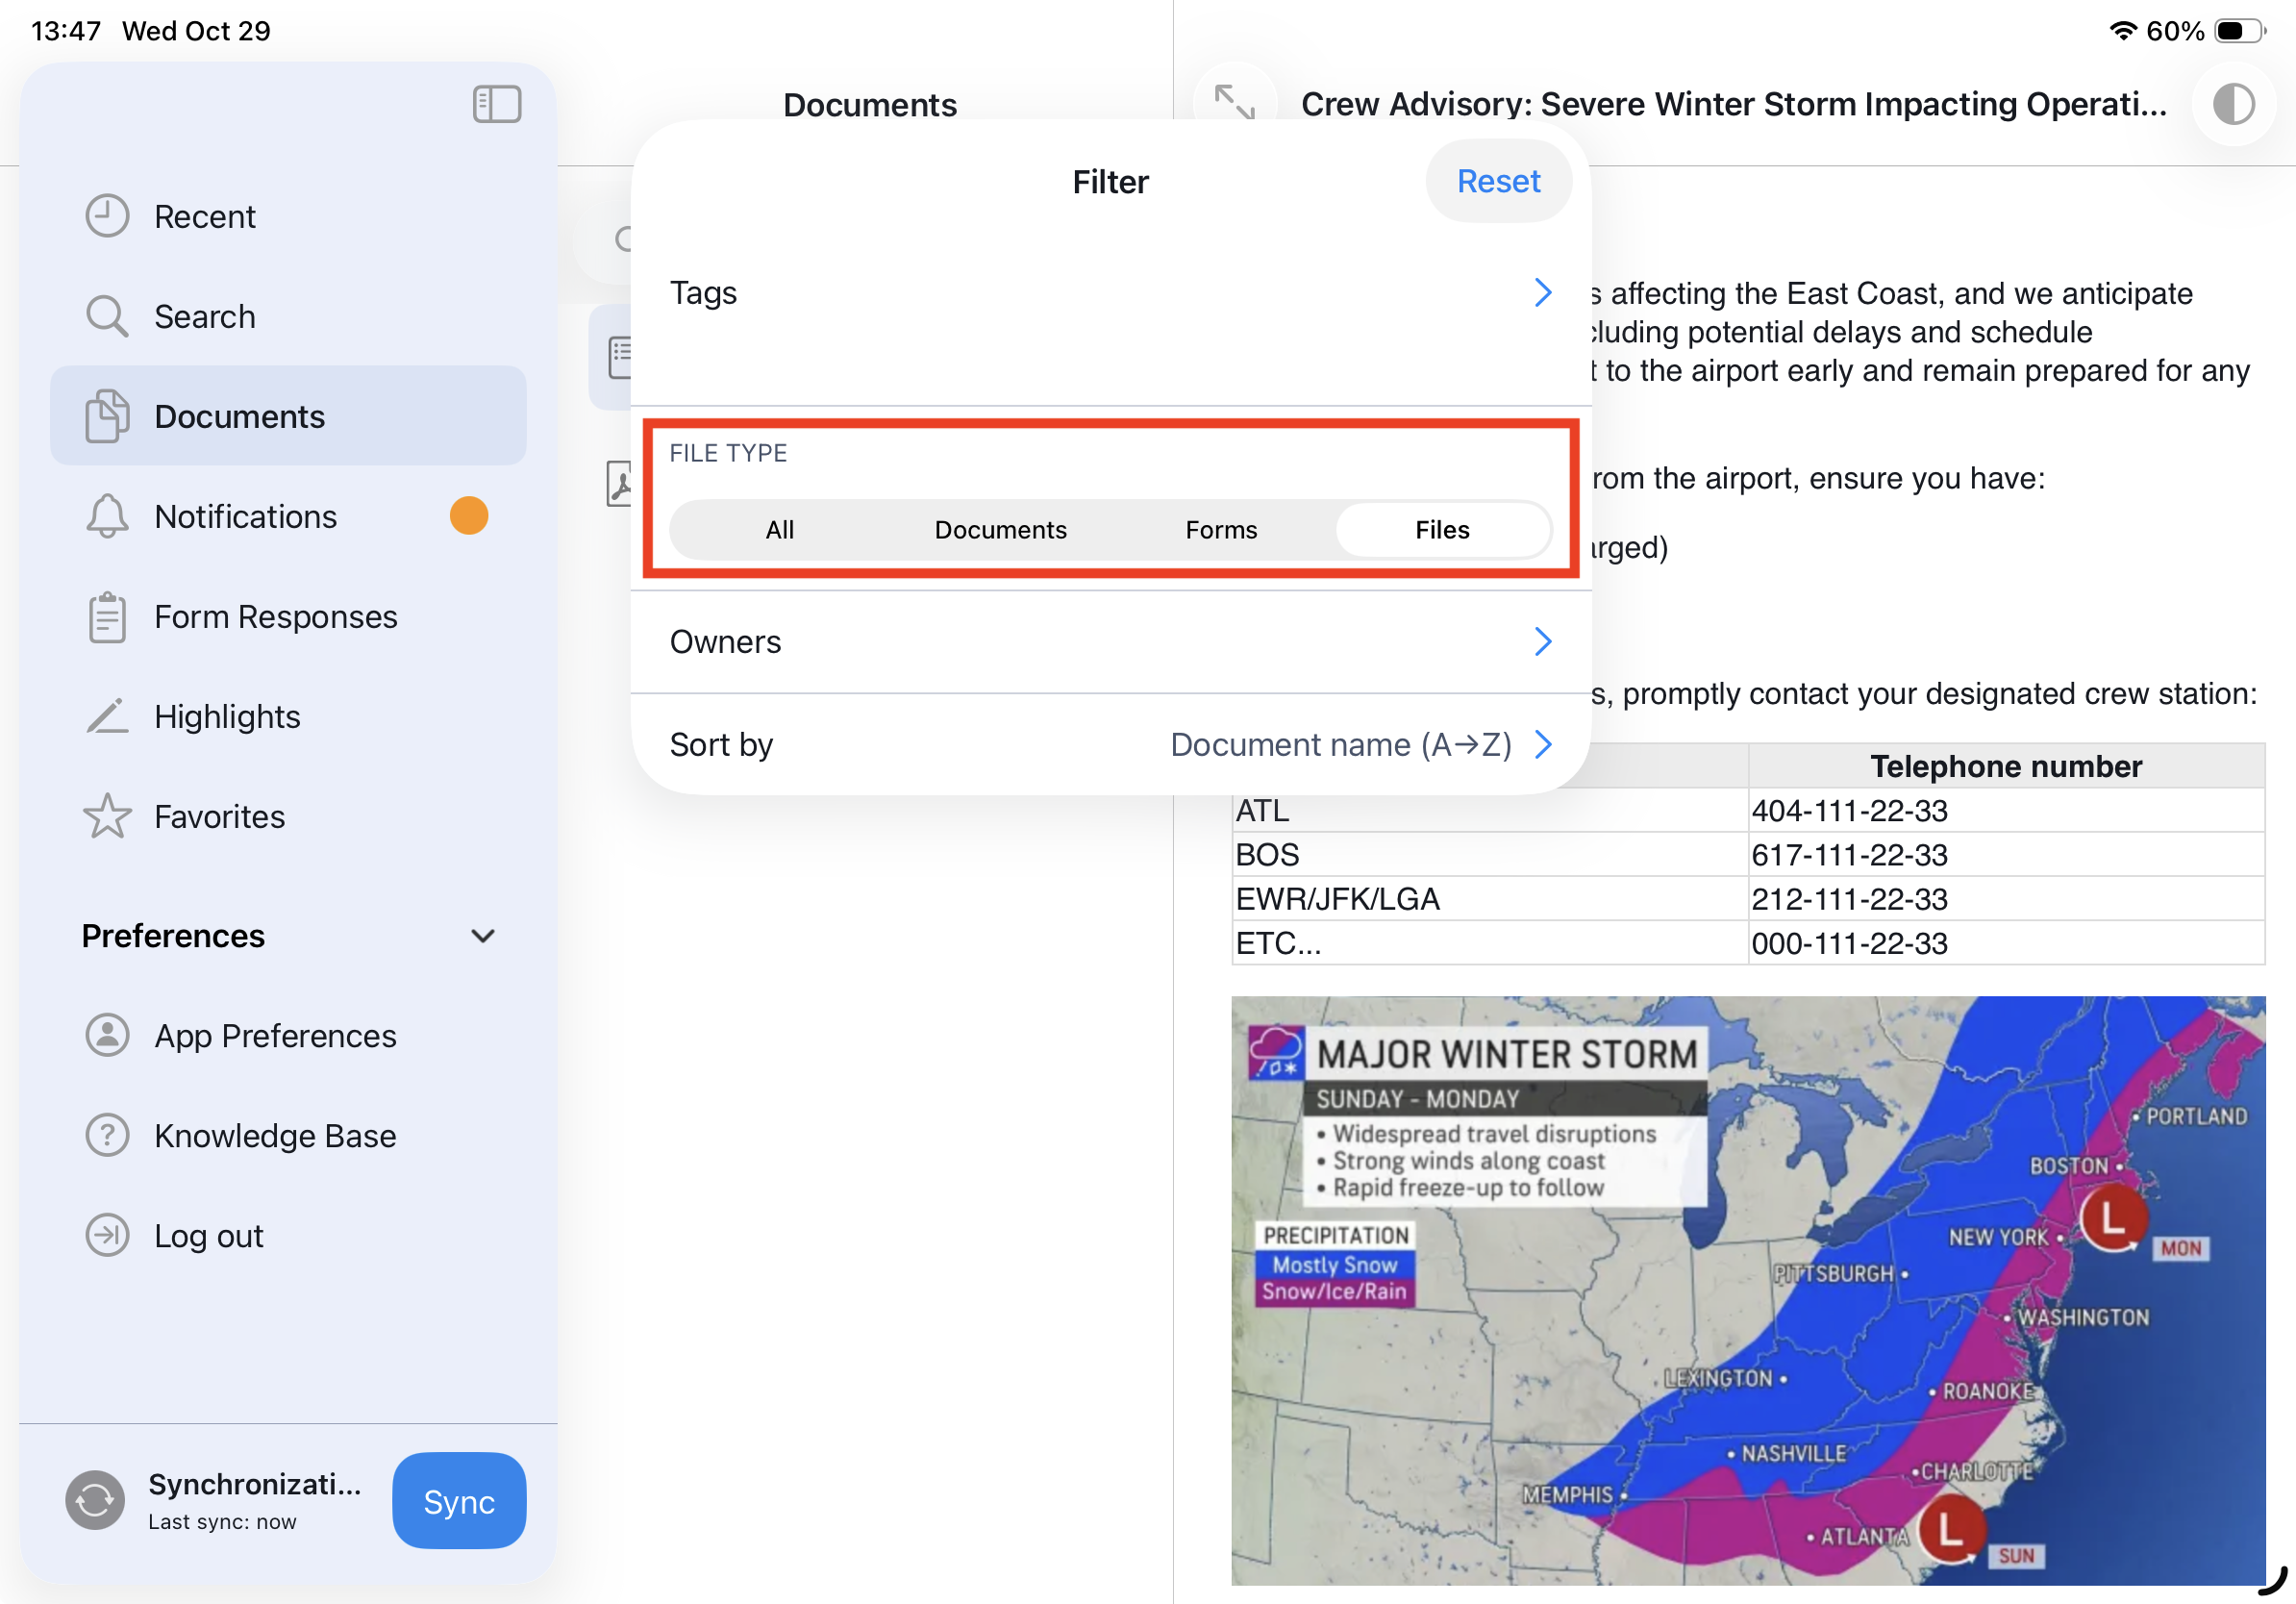
Filter by File Type
Filter the list by document type:
- All (default)
- Documents (Smart Dovuments [XML])
- Forms
- Files & Memos
Filter by Owners
Selecting one or multiple owners filter the document list accordingly.
Sort by alphabetical oder
Sorting arranges the list according to the sort criteria.
- Default sort order for documents is ‘Document Name (A→Z)’
For further details about Tag filtering refer to section: Click here
Applying Filters to the Document List
When you apply filter criteria to the documents list, it only changes what you see in his list. The filters do not affect the actual document itself.
This helps prevent applying filters to the wrong document by mistake. If you want to filter information within a specific document, please use the filters available inside that document instead.
Smart Documents
Smart Documents are created using Yonder’s editorial functionality. They are XML-based and designed to deliver the full capabilities of true digitalization — offering structured, flexible, and interactive content that goes far beyond static document formats.
They support a wide range of advanced features, including:
Version control – manage and track document revisions seamlessly.
Interactivity – embed links, references, and other dynamic elements for enhanced navigation.
Metadata integration – enrich content with contextual data for improved search and categorization.
Conditional content – display information dynamically based on context or user role.
Collaboration – enable multiple editors to contribute within a controlled and traceable environment.
Smart Documents form the foundation of Yonder’s digital document ecosystem, combining structure, control, and usability in a single intelligent format.
Document Sidebar
The document sidebar is context-sensitive and can be adjusted depending on what the user wants to focus on.
By default, the sidebar displays the document outline (table of contents) to support structured navigation. However, users can change the displayed context at any time using the bottom action bar.
This allows the sidebar to switch between different views such as Changes, Compliance Tasks, Personal Highlights, or Search results — always aligned with the document structure.
Bottom Action Bar
The Document Sidebar Bottom Action Bar allows users to quickly switch between different document-related views within the sidebar.
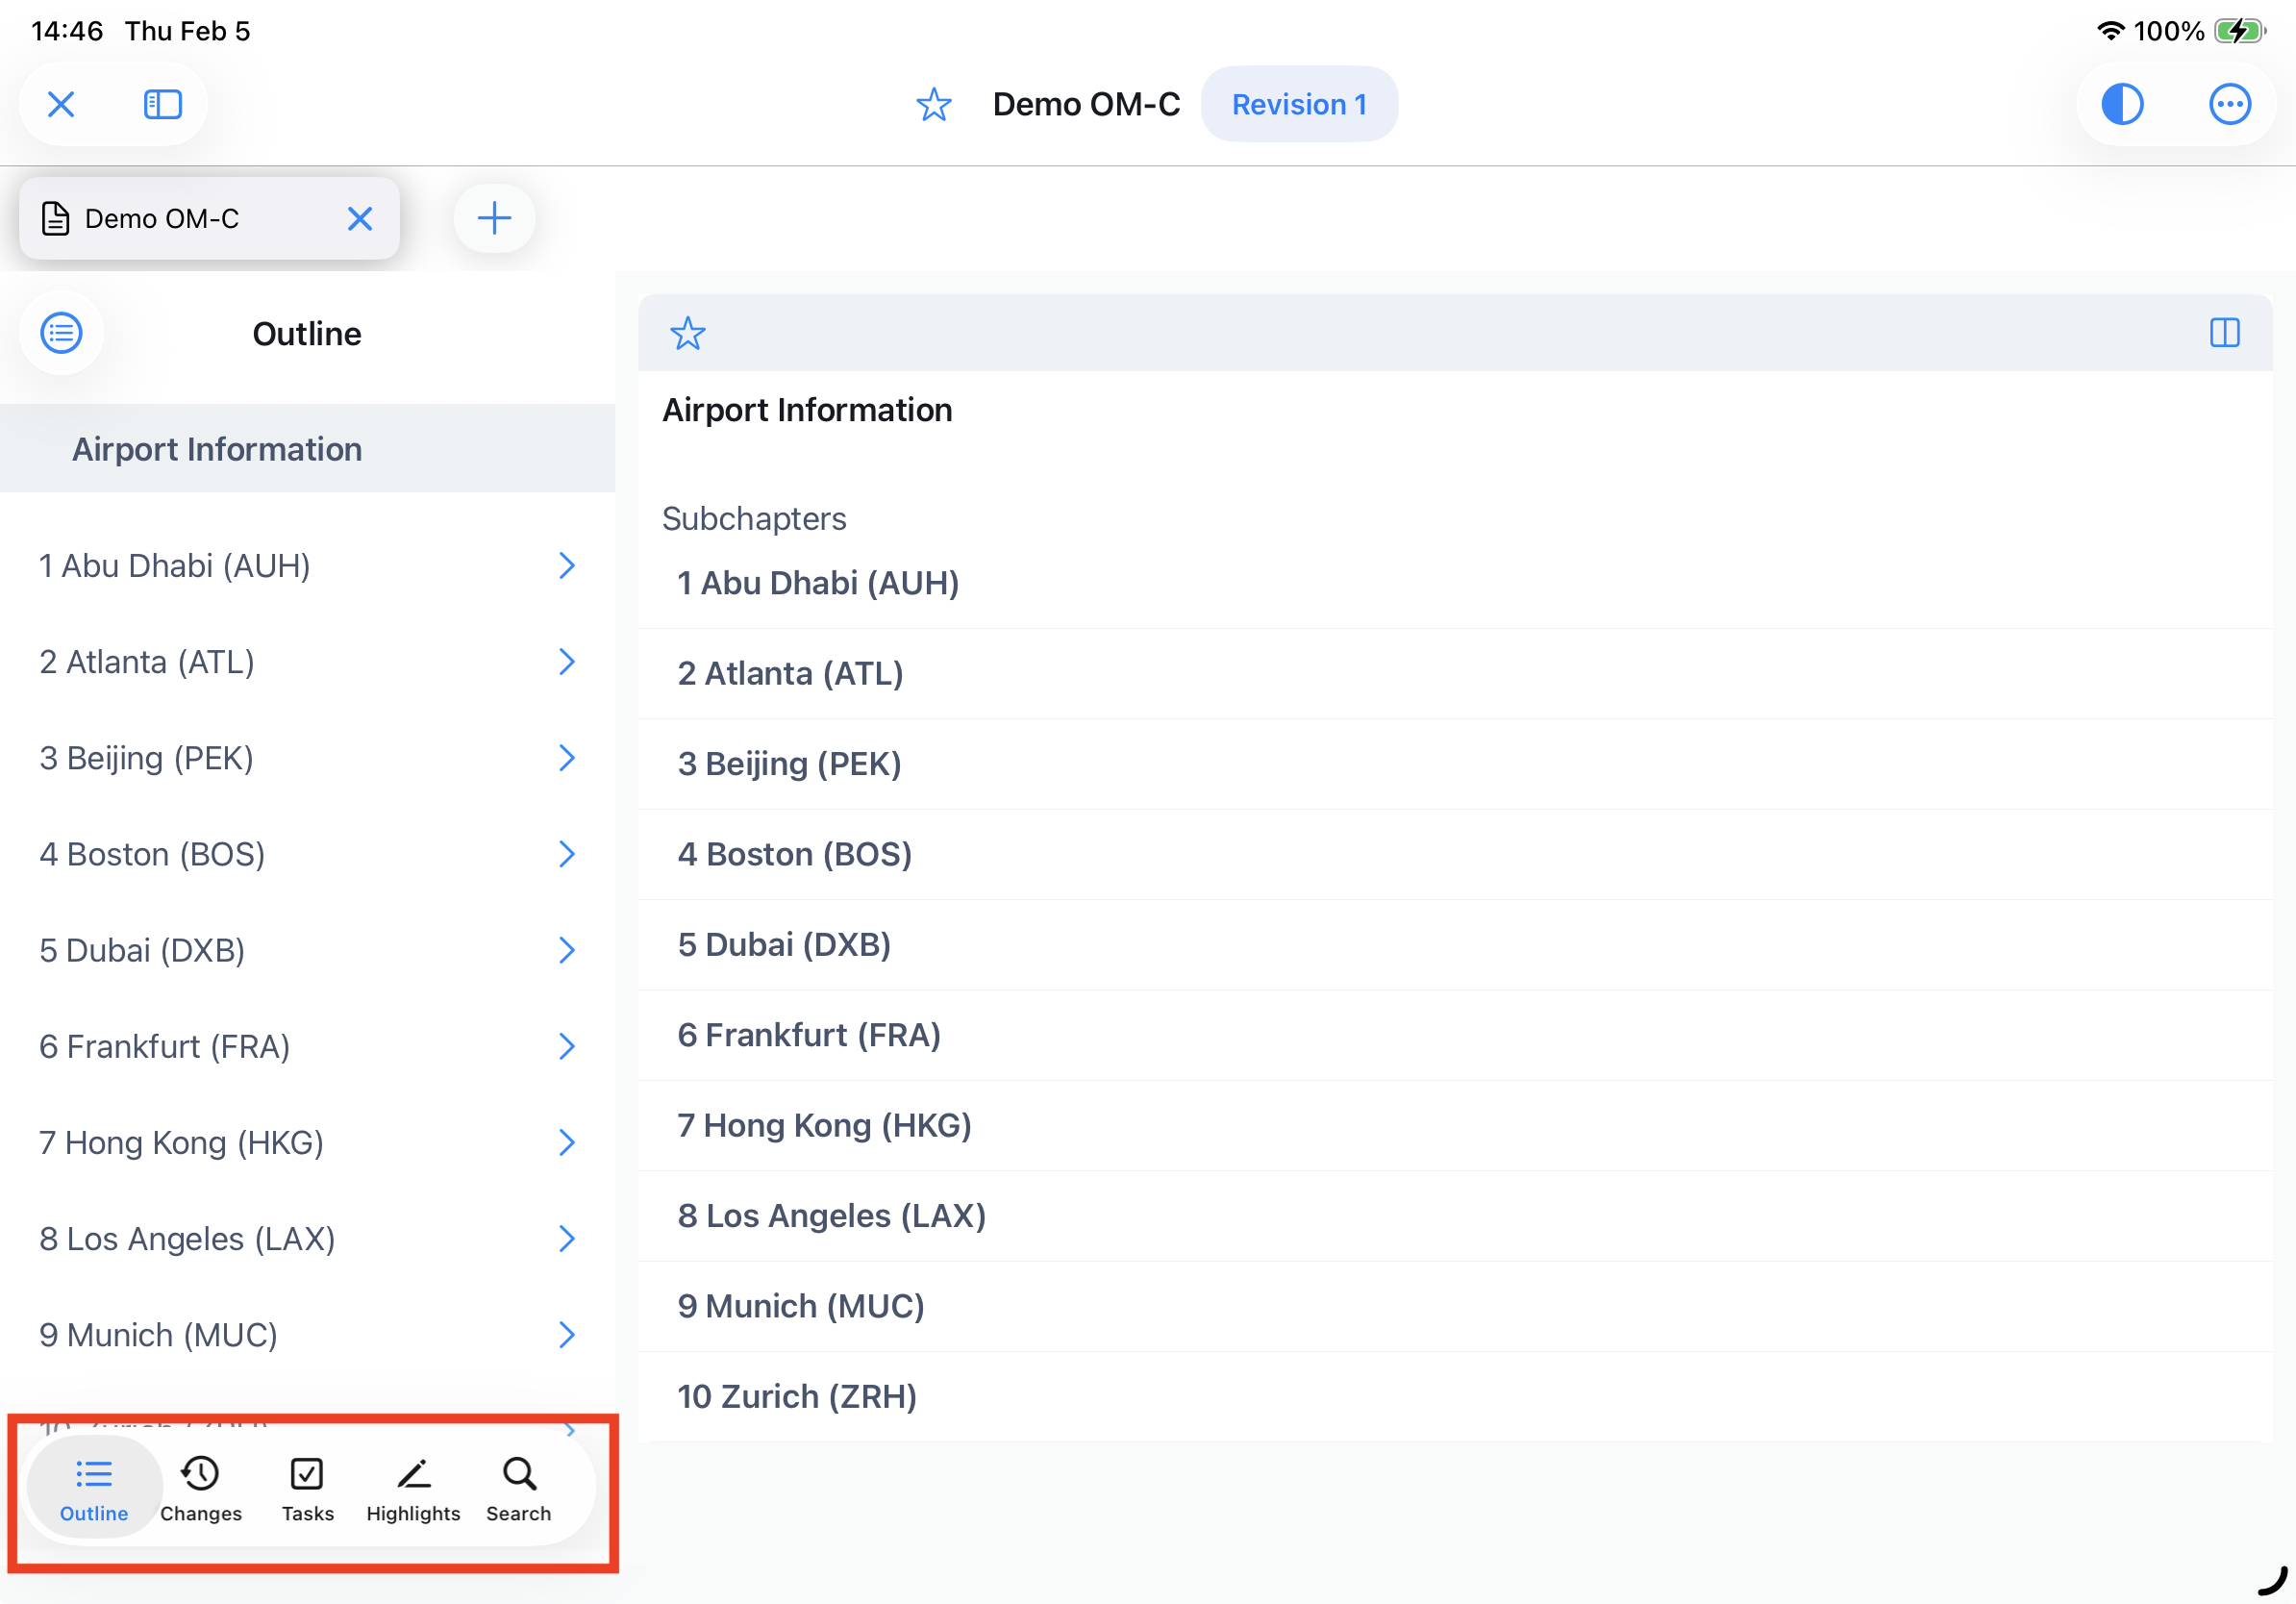
Depending on the selected option, the sidebar displays the corresponding content, structured according to the document outline (table of contents).
The bottom action bar provides:
- Fast switching between different document views
- Context-aware navigation
- Consistent structure-based sorting
- Improved usability and efficiency
Users can easily move between structure, tasks, changes, highlights, and search results without leaving the document view.
Available Views
Users can select between the following options in the bottom action bar:
1. Outline (Table of Contents)
Displays the full document structure based on the table of contents.
All entries are shown in hierarchical order according to the document outline.
2. Changes
Displays all changes related to the document or selected revision.
Entries are sorted and grouped according to their position in the document structure.
3. Tasks
Shows compliance-related tasks assigned to the user.
Tasks are displayed in the context of the document outline, allowing users to directly navigate to the relevant section.
4. Highlights
Displays all highlights created by the user within the document.
Highlights are organized according to their location in the document structure.
5. Search
Shows search results within the document.
Results are listed based on their position in the document outline, enabling quick contextual navigation.
Sorting Logic
All entries displayed in the sidebar (Changes, Tasks, Highlights, and Search Results) follow the document’s structural order.
This ensures that content is always presented in the same logical sequence as the document itself.
Document Navigation
There are multiple ways to navigate through your content such as navigating through the outline or by scrolling and swiping throuh the content of the document.
Swiping Gestures
Yonder includes support for swipe gestures, allowing for a more intuitive and efficient navigation in the content. Users can perform various actions, such as navigating between Content Flows, or within a Contentflow (e.g. virtual page), simply by swiping in different directions on their screen.
Up / down
Swiping up or down you can scroll through the virtual page (also called ‘Content Flow’).
Left / right
By swiping left or right, the content will navigate from virtual page to the next one (from Content Flow to Content Flow).
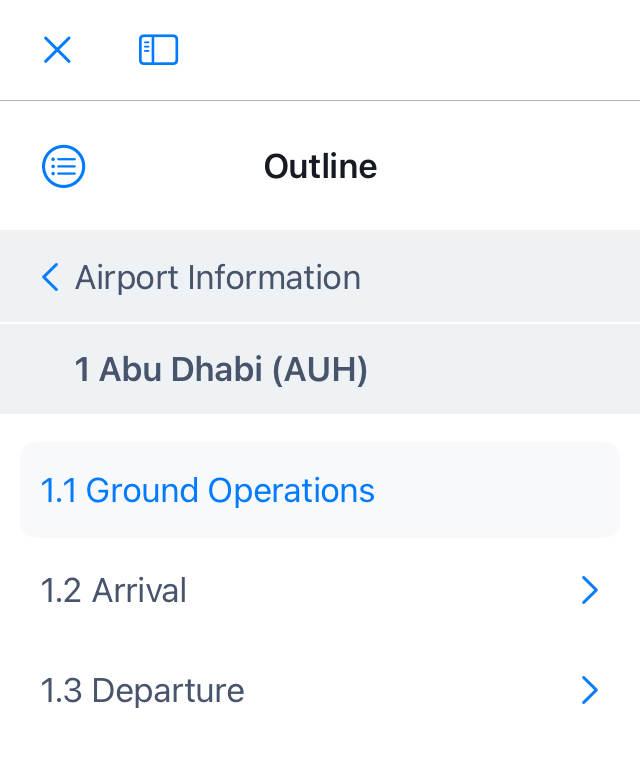
Outline Navigation
The outline contains the hierarchical structure of the document.
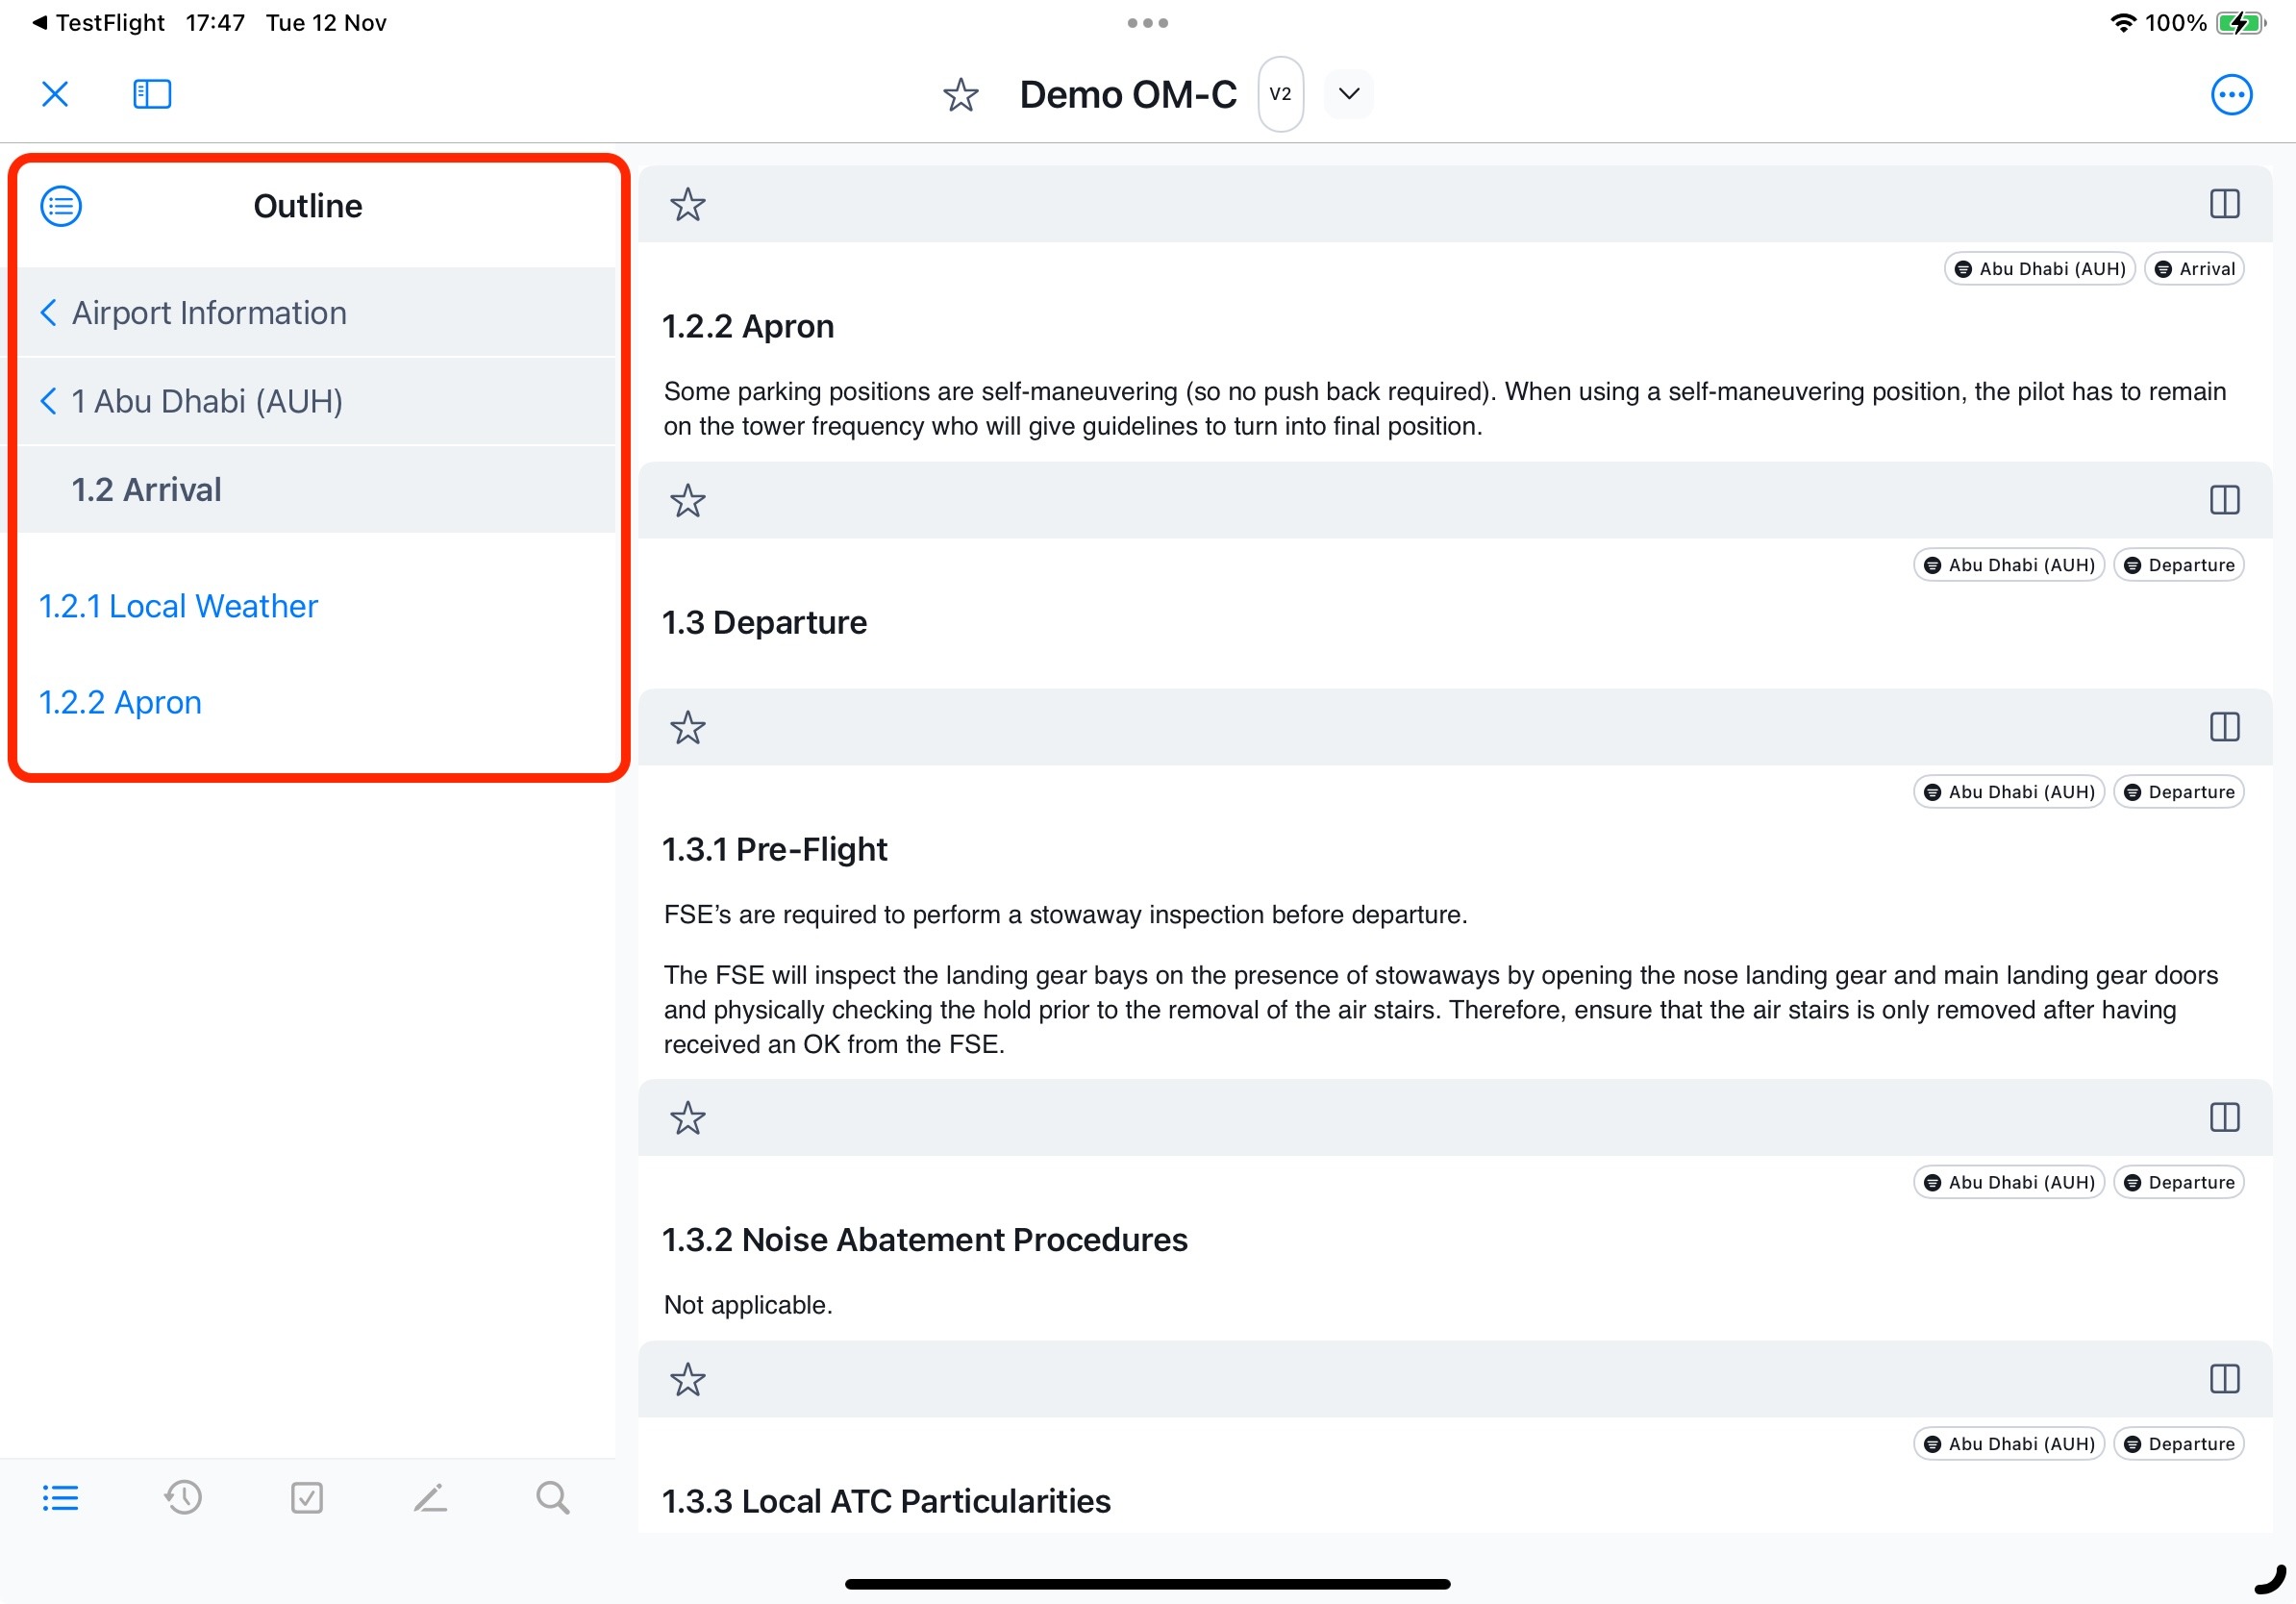
In Yonder, the outline combines a traditional hierarchical structure with clickable breadcrumbs for easy navigation.
As you move down through the hierarchy, parent chapters remain visible, allowing you to navigate back up by clicking any parent entry:
Show / Hide Outline
You can easily hide / reveal the outline by clicking the "Expand Sidebar' icon: ![]()
Back to Document Root (Outline Home)
Clicking the icon on top left of the outline  will reset the outline to the root.
Outline Color-Coding
You can easily navigate from a chapter to any upper level directly by clicking the corresponding entry in the list. All interactive elements appear in standard blue:
- Black Outline Titles: The title serves as a structural element in the document but does not contain any content of its own.
- Blue Outline Titles: A blue title indicates the entry contains content. Clicking the title displays both the title and its content.
- Blue Chevrons (right): A blue arrow pointing to the right next to an outline element indicates it has subchapters. Click the arrow to expand and view the subchapters within the outline.
- Blue Chevrons (left): A blue arrow pointing left next to an outline element indicates you can navigate back up in the hierarchy. Clicking the chevron returns you to that level in the structure.
Warning: Displaying hidden chapters in the Compact Mode
Should an editor hides a chapter from the outline, readers using Compact Mode (the minimized single-column view on iPad or iPhone) will be unable to see the hidden chapter in the outline.
To access the content, users must tap the "Expand Sidebar" icon:![]() It will hide the outline and display the hidden chapter.
It will hide the outline and display the hidden chapter.
To return to the outline, simply click the “Expand Sidebar" icon again.
Version Selection
Per default, the currently valid resp. effective document version (aka revision) is shown.
To select a different version, please click on the ‘version label’ arrow beside the document title:
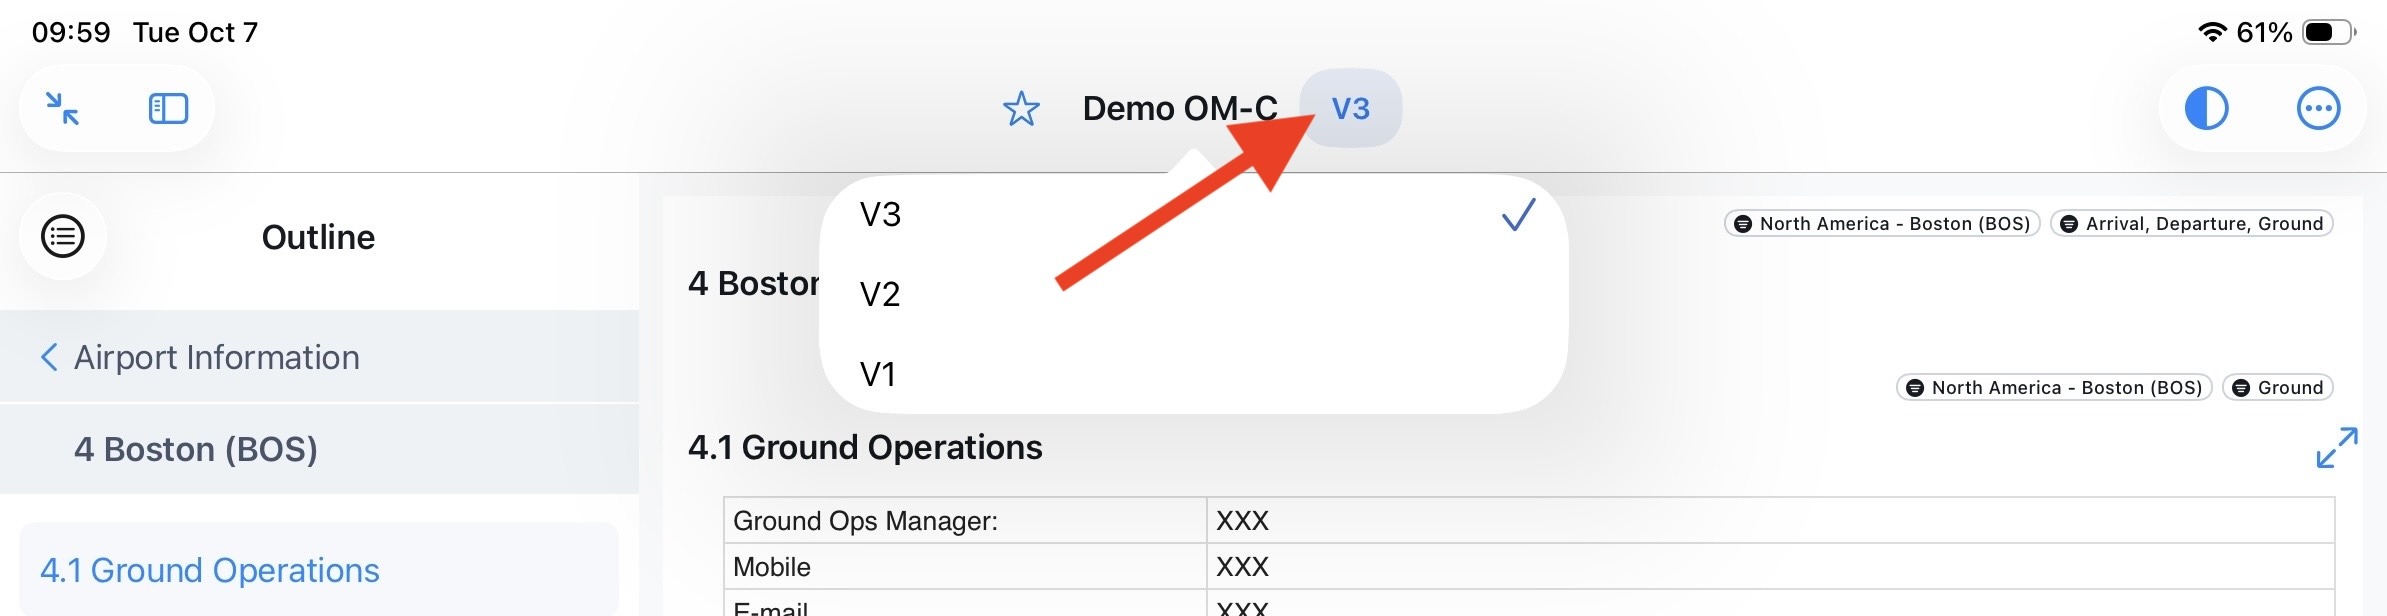
A warning message will be shown, that a currently not valid version is opened.
- Expired (invalid since <date>) for versions in the past
- Not effective yet (Revision will be effective on <date> for released but upcoming versions
- Draft for upcoming but not yet released versions
NOTE: This function can be disabled for specific users and the chevron for the revision selection is not available.
Version Banner Color
Document banner colors reflect their status:
- valid standard and not banner
- outdated orange
- future effective mauve

This helps users immediately identify the status of a document without needing to open additional details.
Changes in Content
Changes are indicated by a black sidebar on the corresponding content module.

Display Module Changes
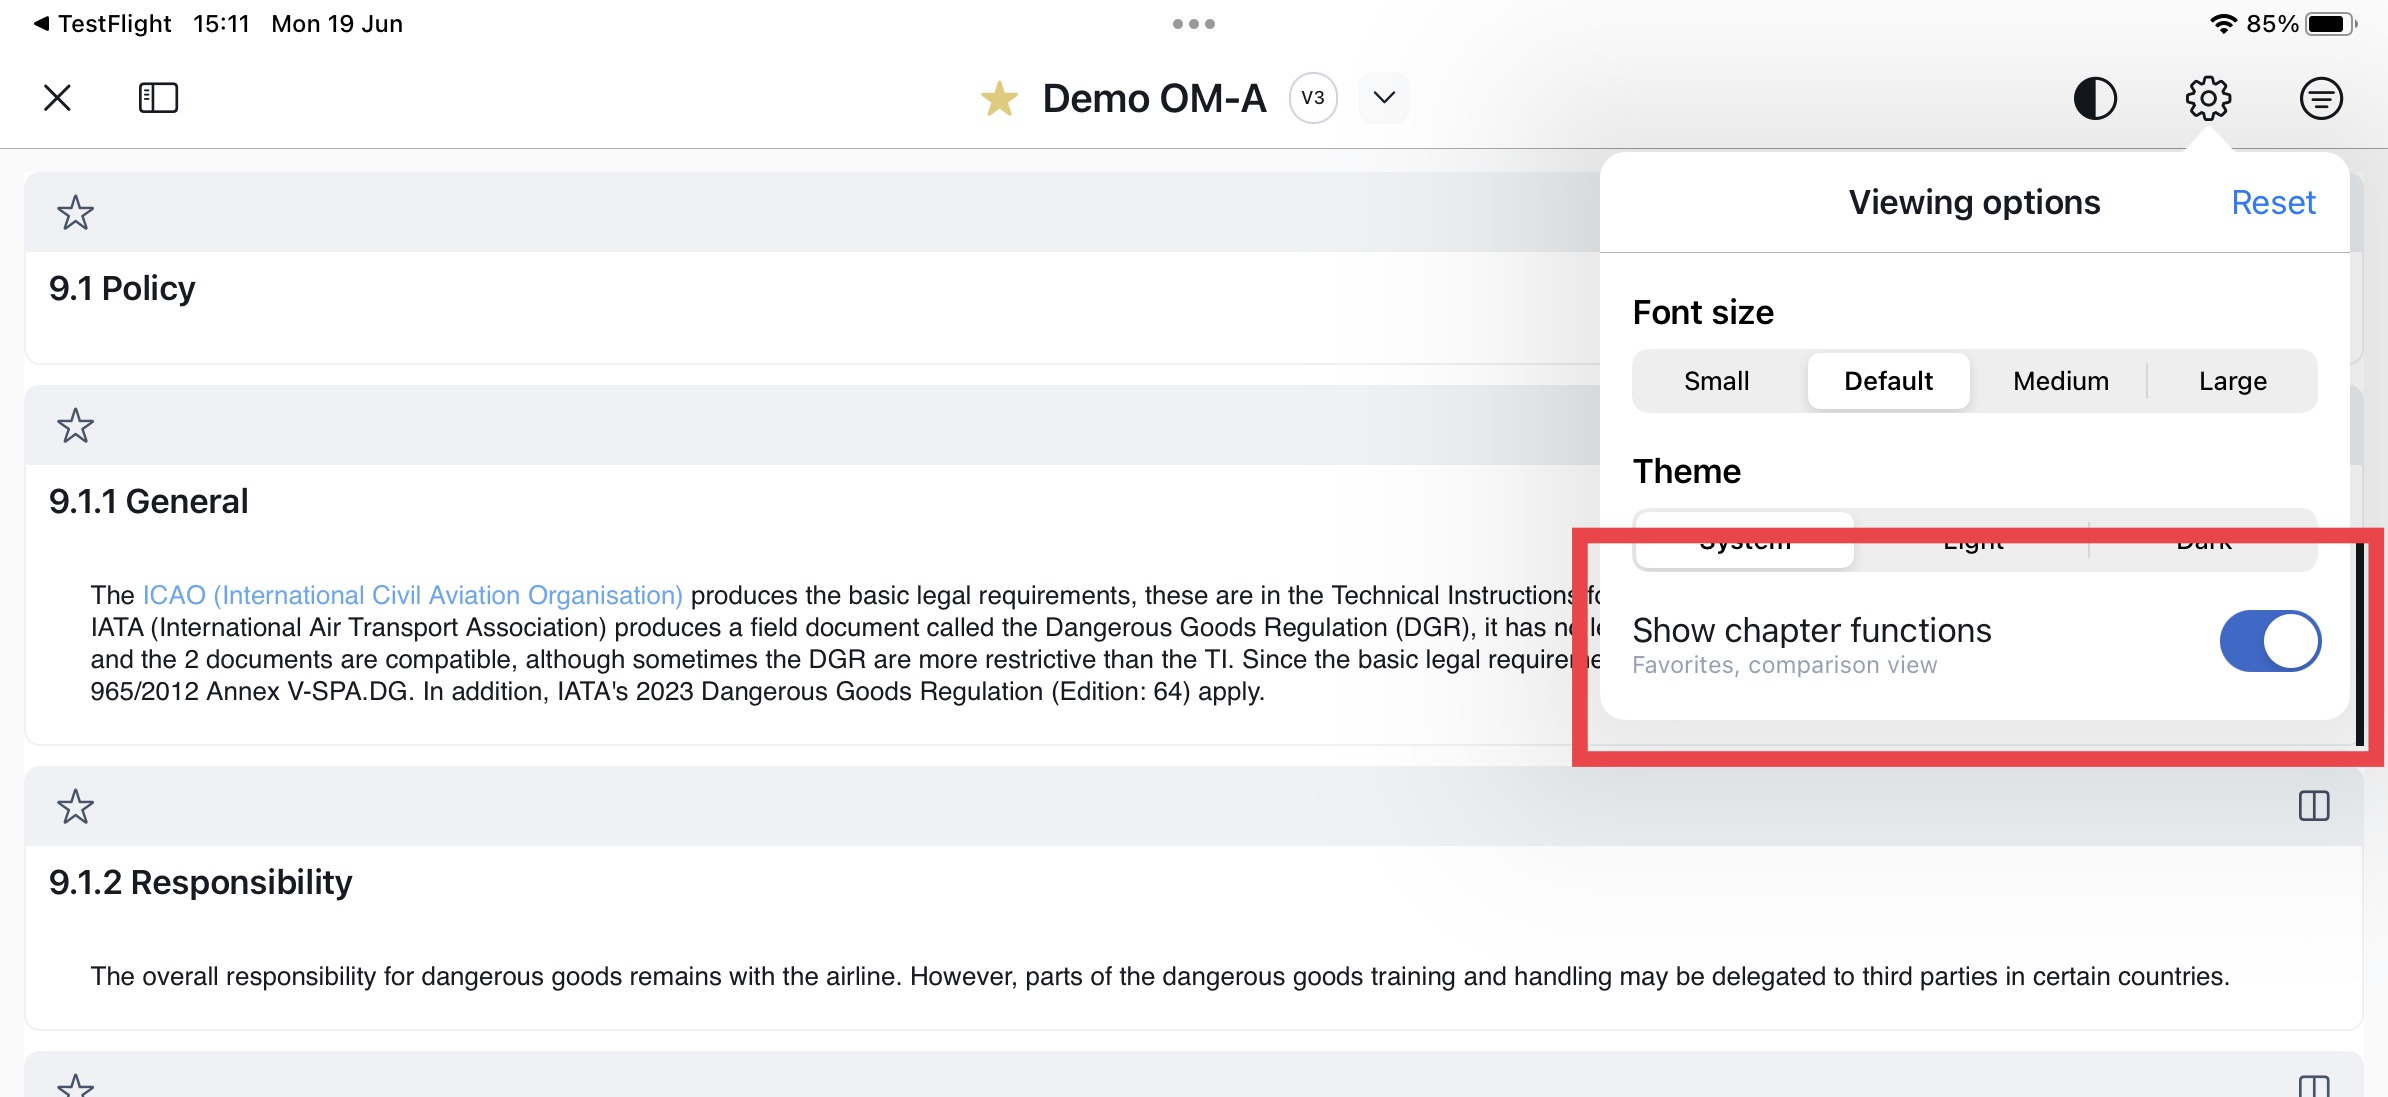
To enable the display of content differences, ensure that the ‘Show chaper functions’ toggle is on and click on the ‘diffing’ icon.
Show chapter functions
Make sure the toggle the ‘Show chapter functions’ is on to enable the ‘comparison view’ per chapter: (Click here)
Show module changes inline
In the header section the change reason will be displayed and via the ‘Show changes’ toggle you can display or hide the changes:
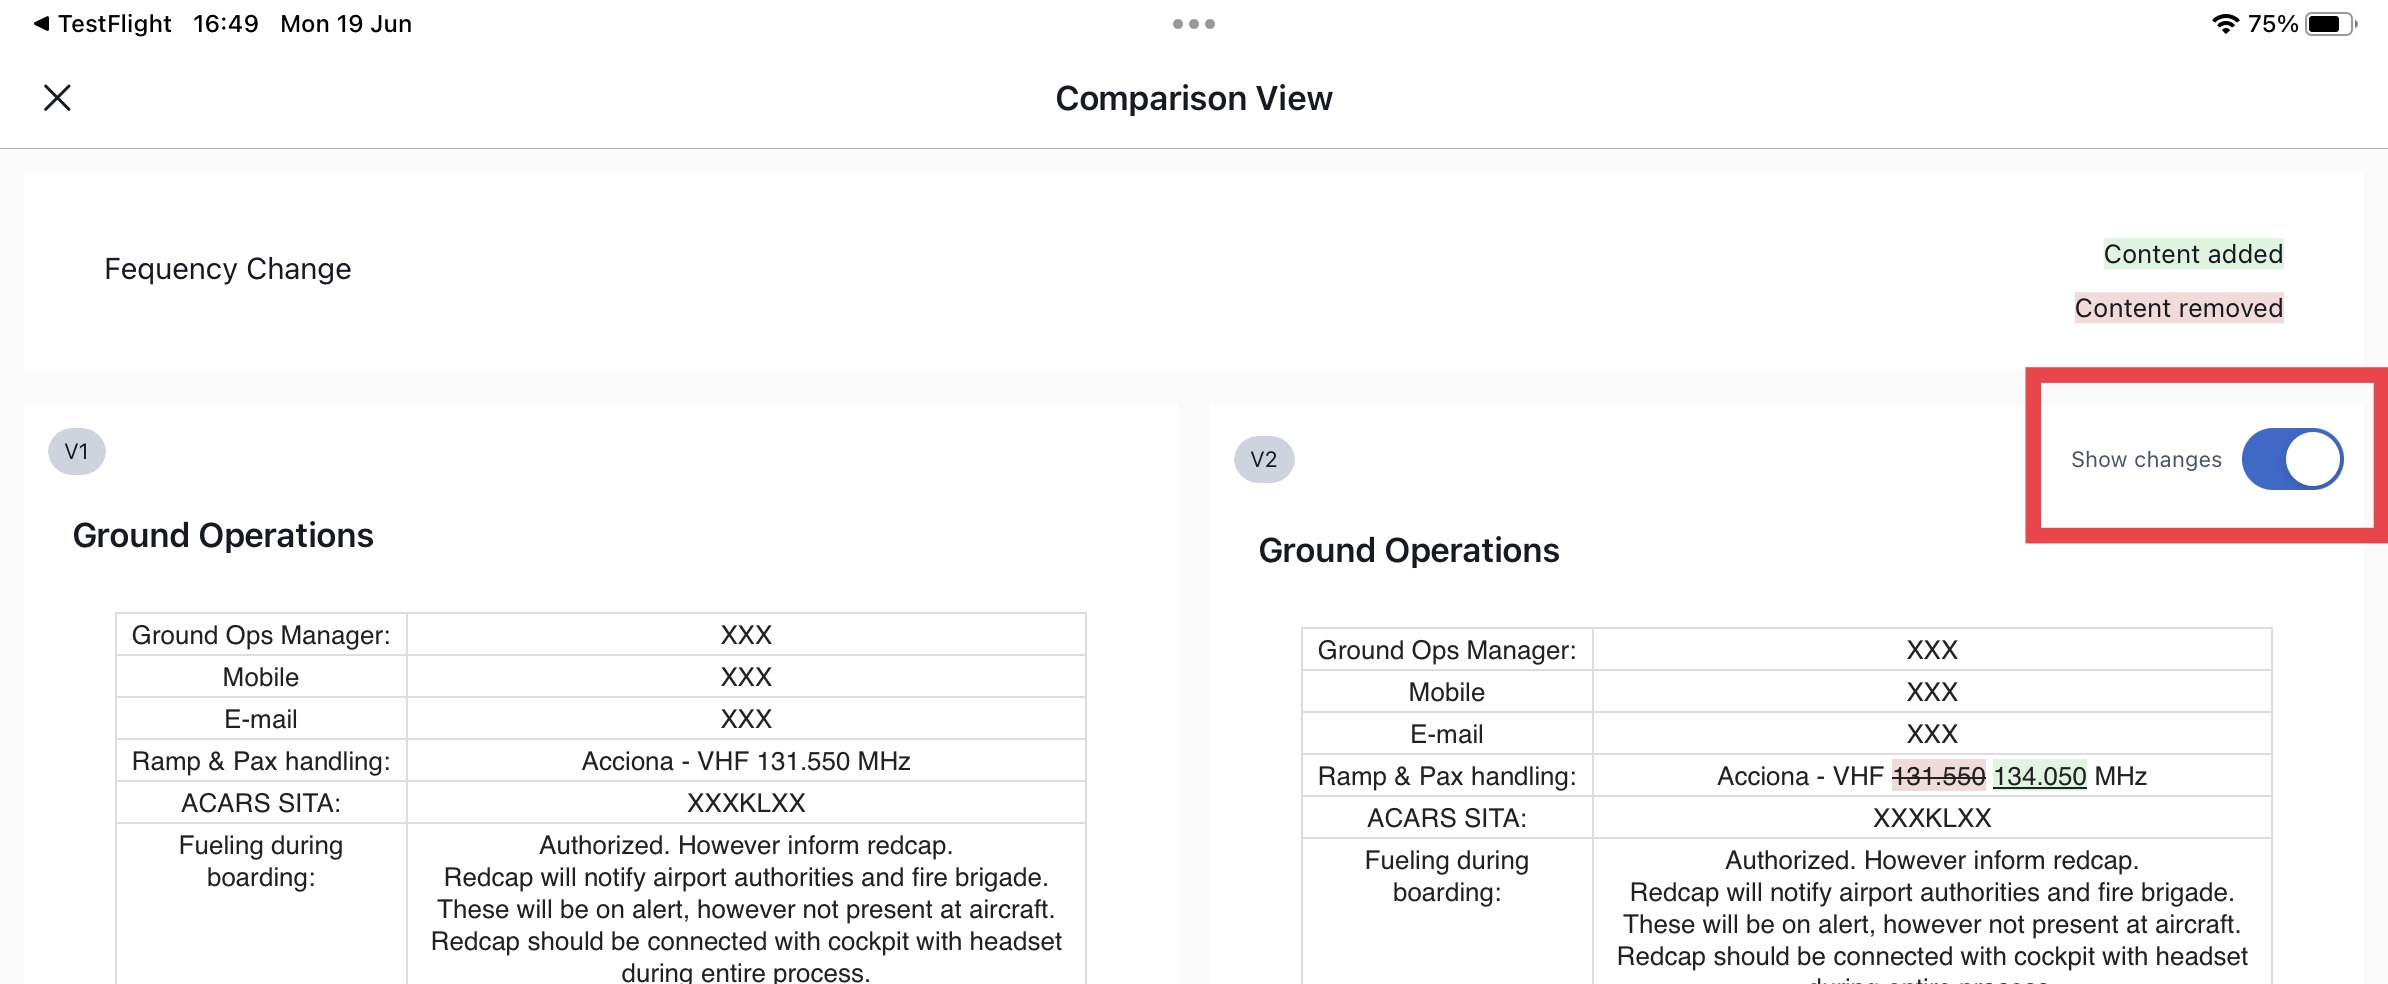
- Marking in green: in this version added content
- Marking in red: content removed in this version
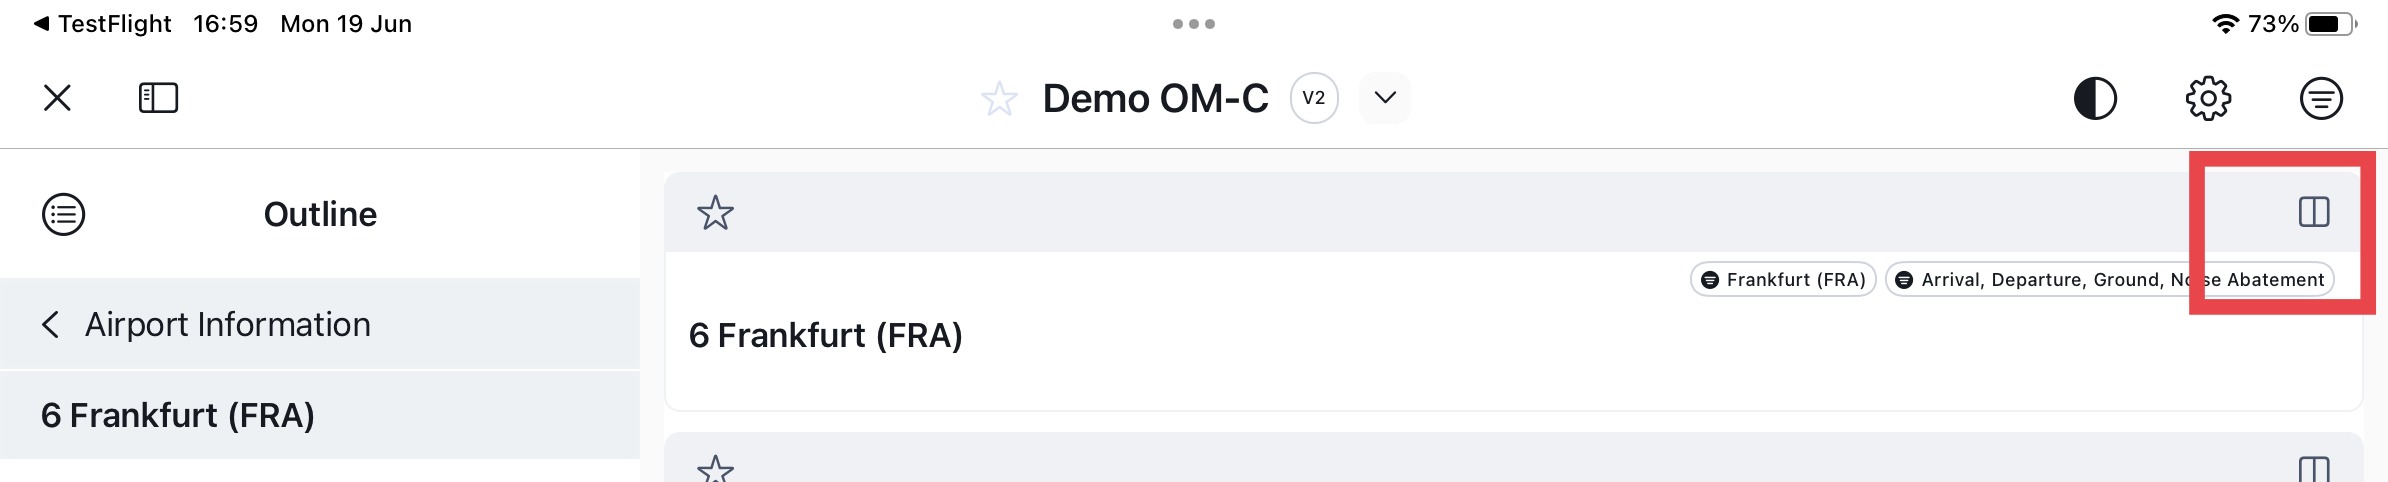
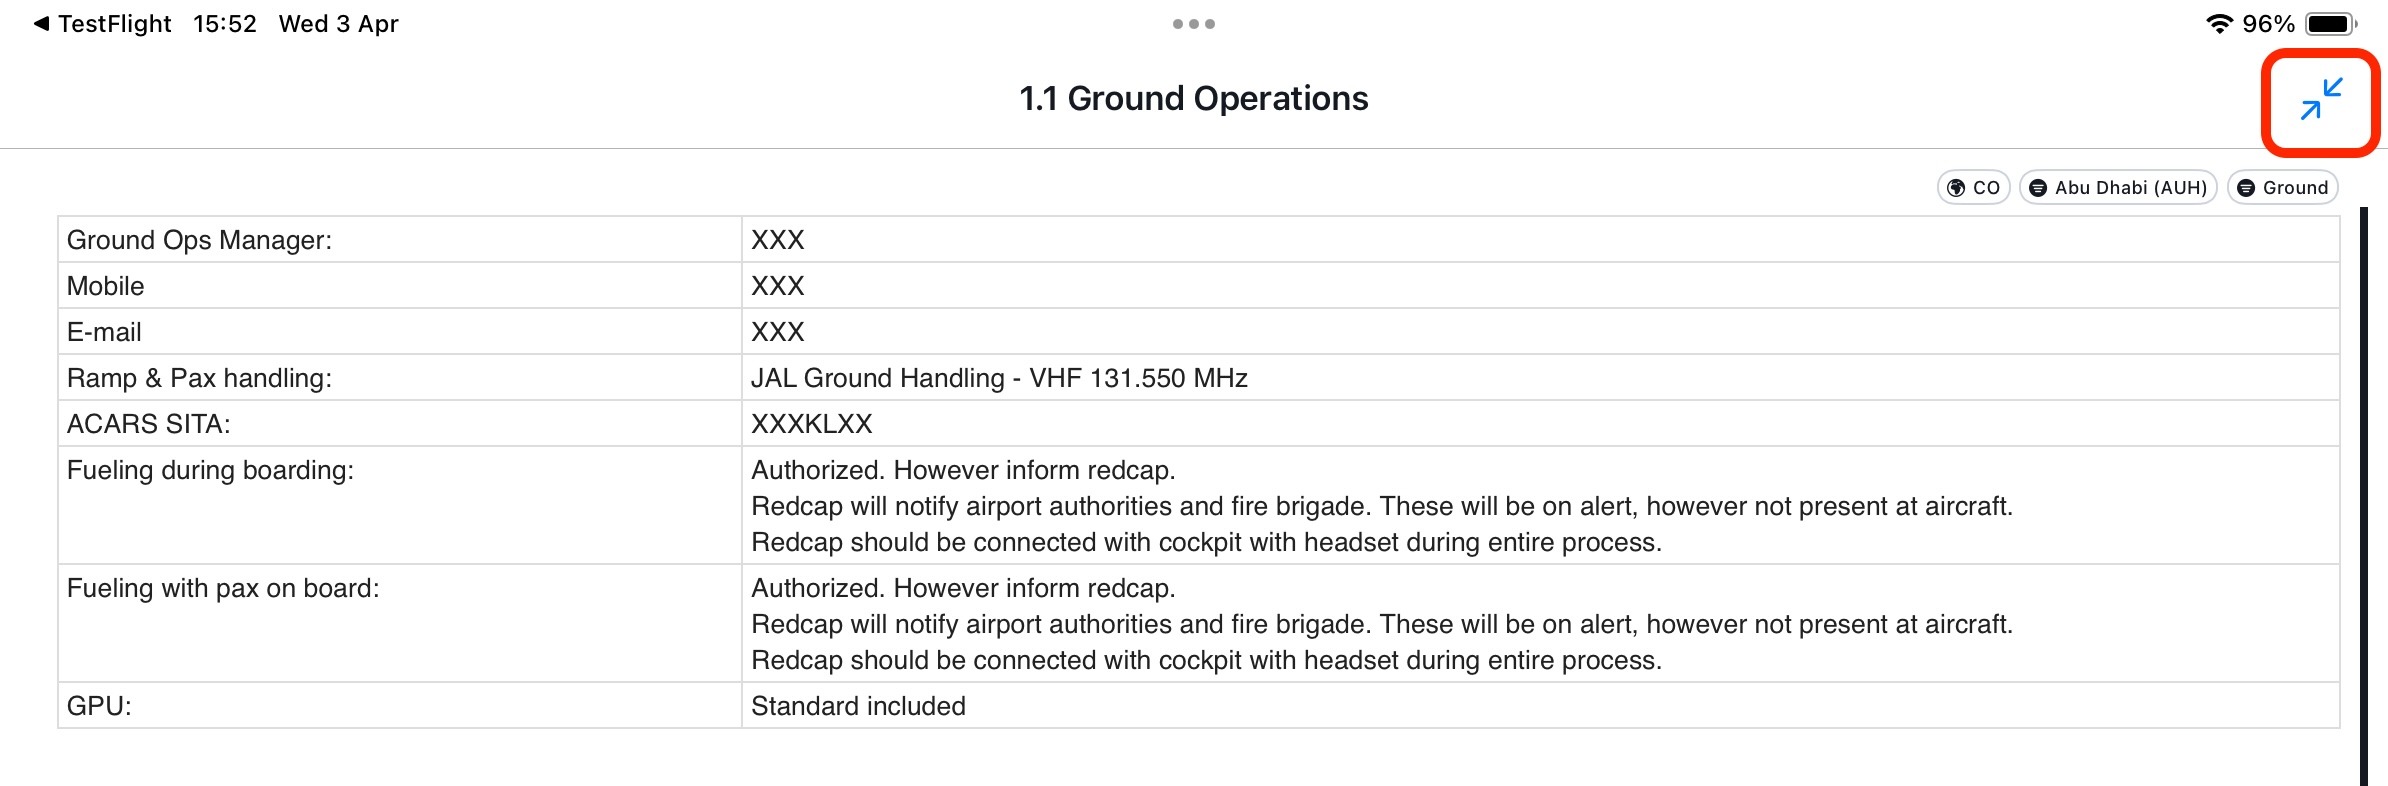
Pinch & Zoom
You can improve your viewing experience of tables and images by enlarging content using the Pinch & Zoom feature.
Upon clicking the designated ‘maximize’ icon, the image or table will open in a dedicated view, allowing you to pinch and zoom to magnify the content.
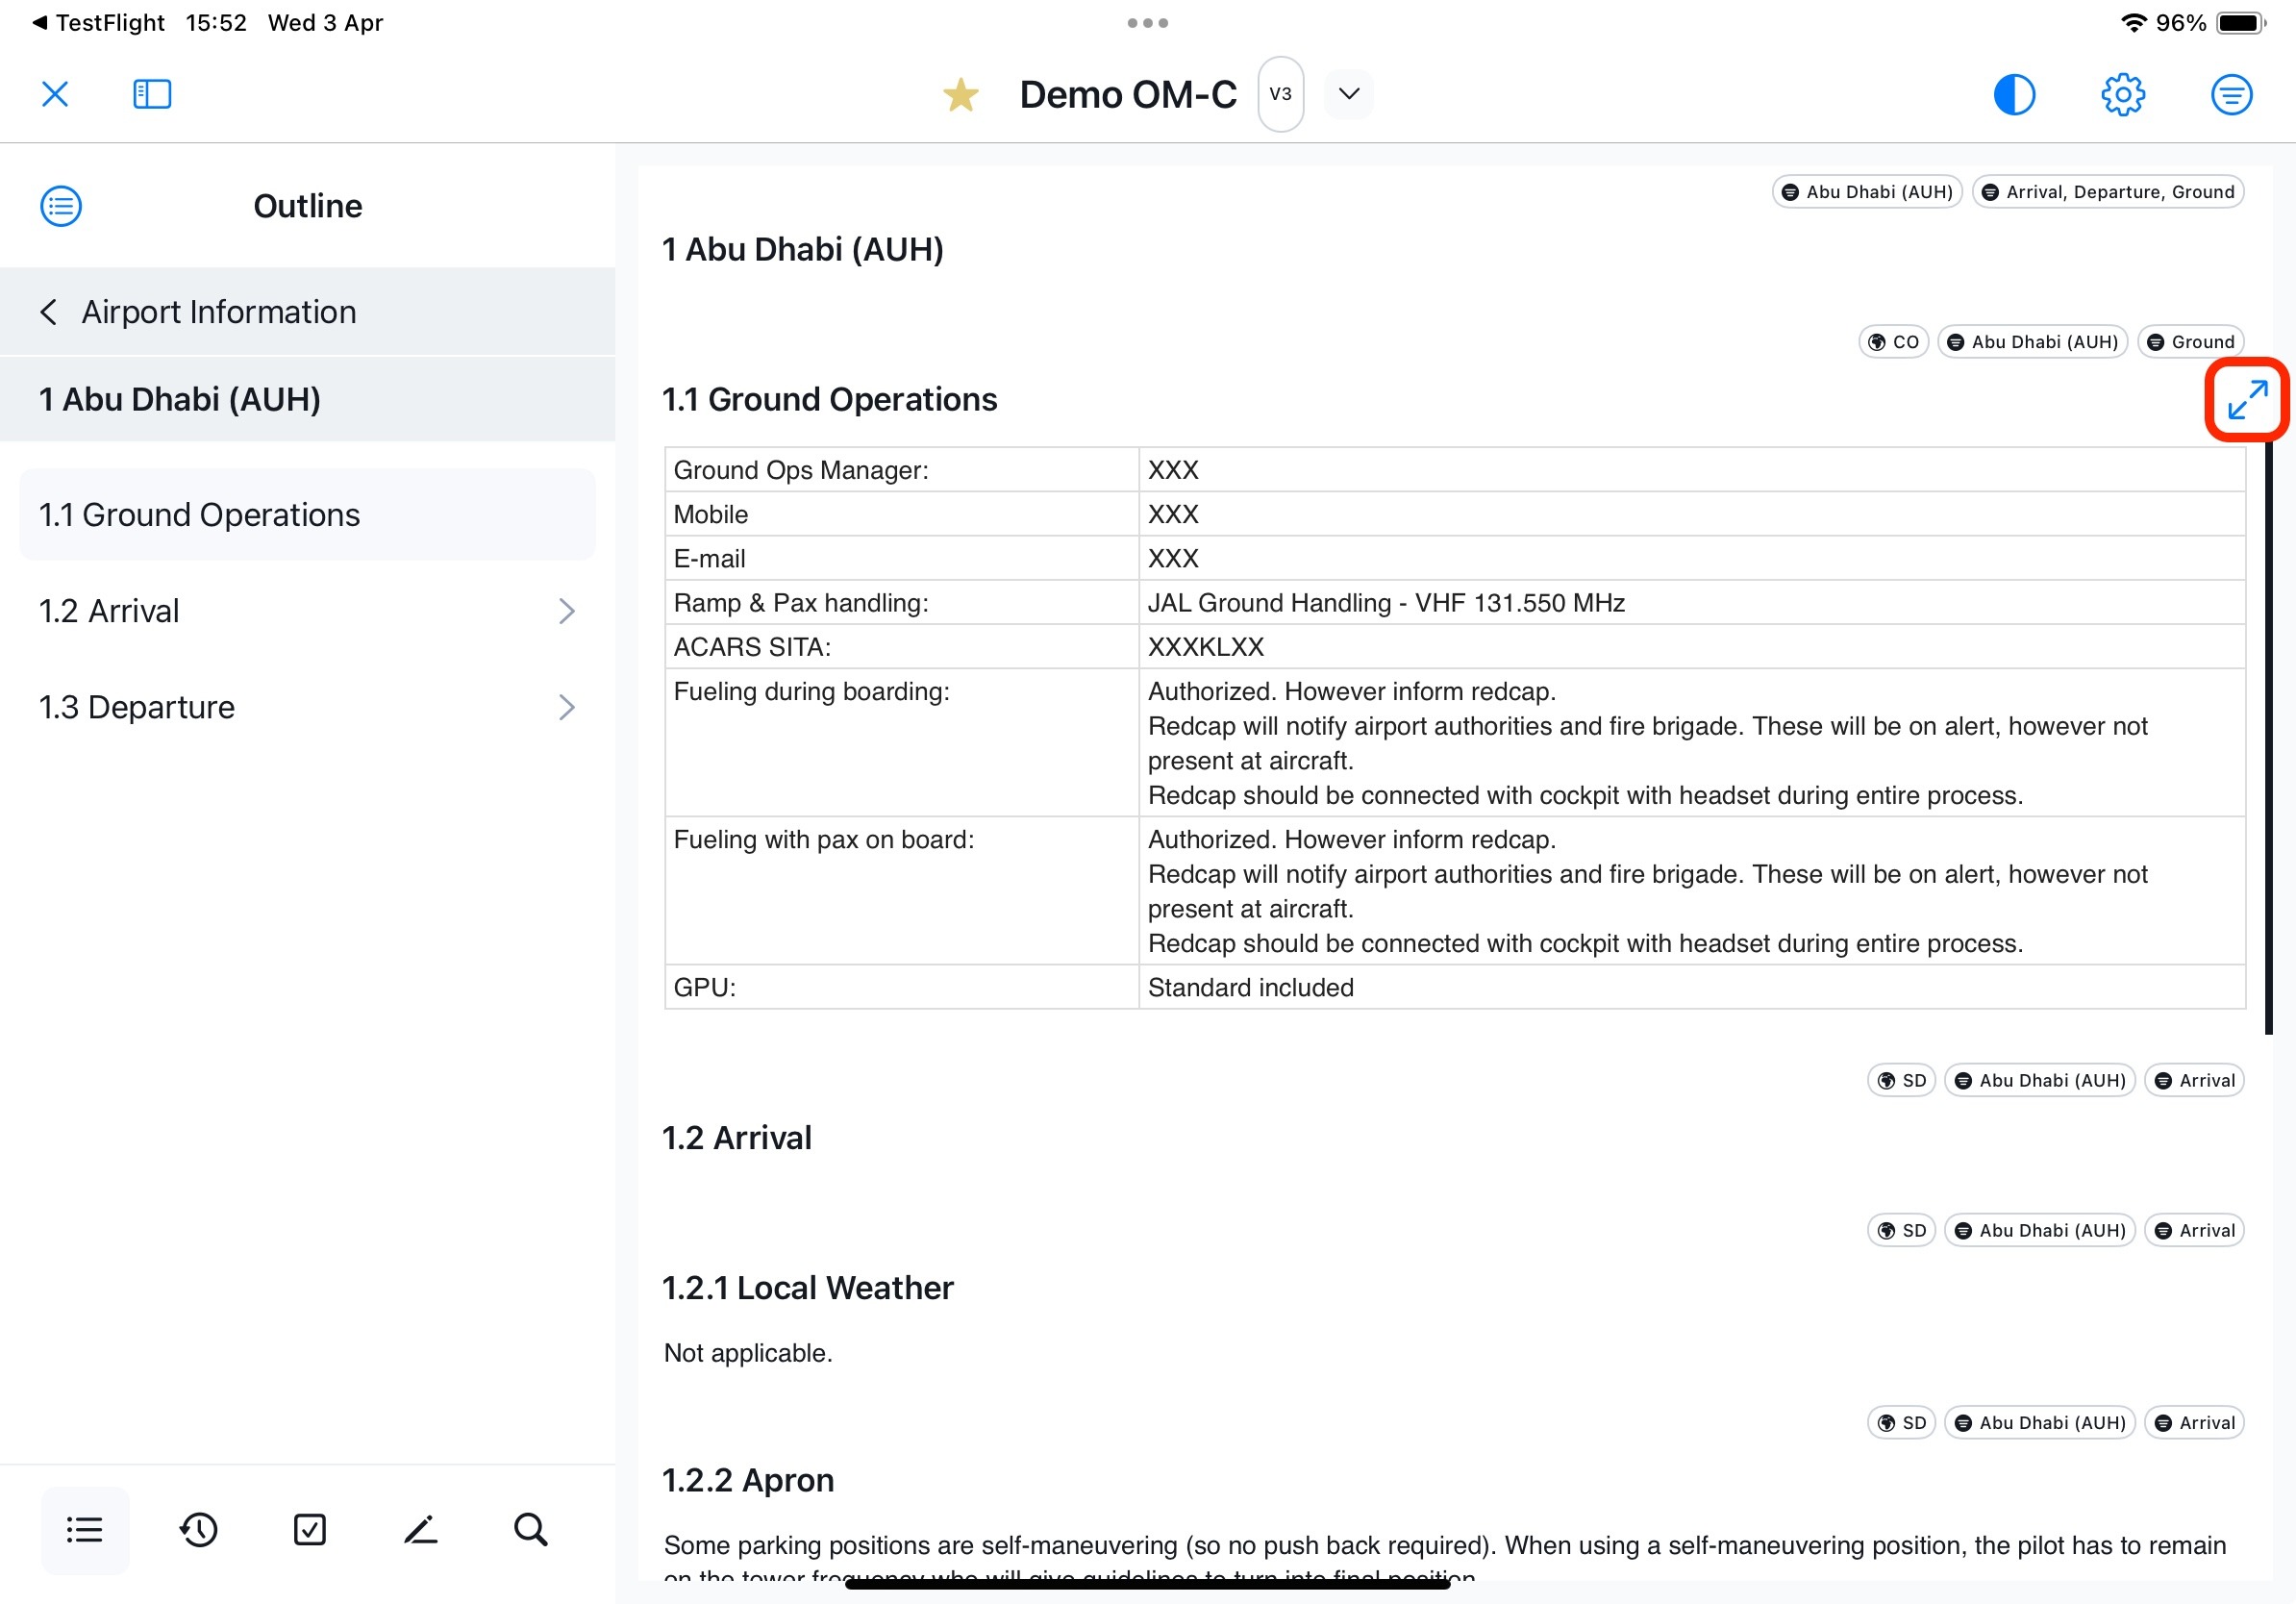
To revert to the previous view, simply click the corresponding 'minimize' icon:
Note:
- Pinch & Zoom is exclusively available for sections containing images or tables.
- If you wish to enlarge the general text, please choose a different font size.
- Enlarging low-resolution pictures may result in pixelation. The image quality is determined by its native resolution and image file type.
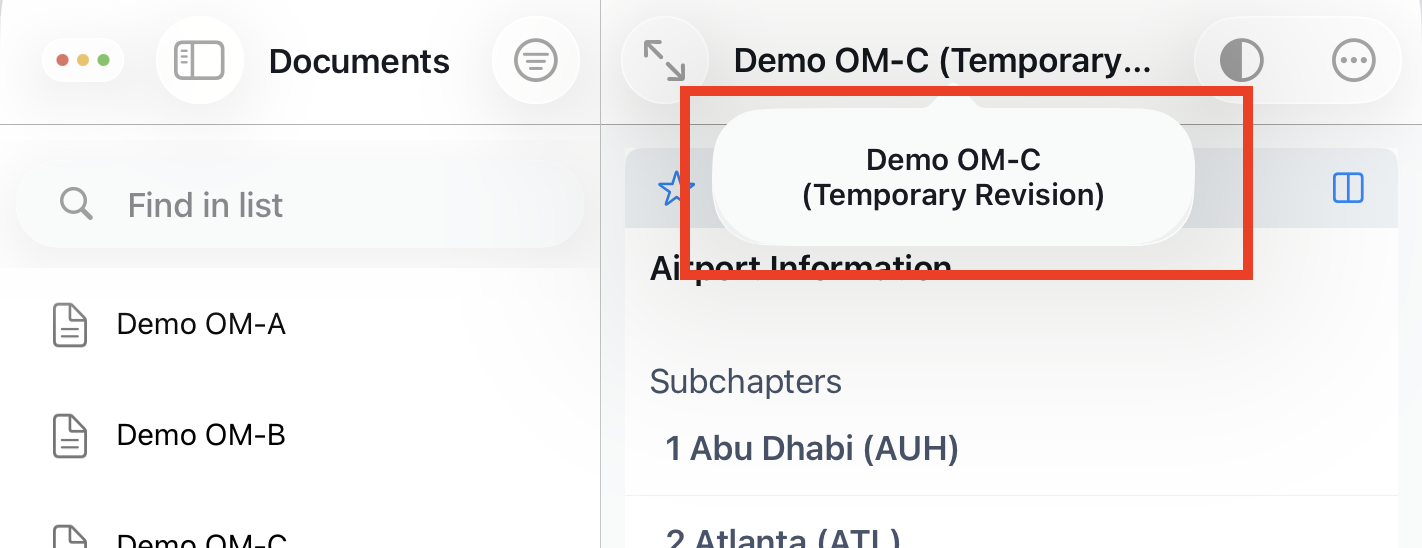
Display long document names
When a document name is truncated ‘…’ due to limited space in the viewport, users can long-press on the name to view the full text.
The full document name is displayed in a temporary popover, ensuring readability.
Files
In Files you see multiple types of content:
- Memos
- Office files (Word, Excel, PowerPoint)
- Media Objects (images)
Important: For Files, the system ensures:
- Only the currently effective version is stored locally.
- No outdated or superseded versions are retained offline.
- When a File is revised, the previous version is replaced locally after synchronization.
This guarantees that no obsolete content remains accessible on the device and storage usage is minimized.
Search
Search is selecting search hits for the title of the file. Only exact words are found.
Filter & Sort Options
It supports following filter and sort options:
Tags
- Defined Tags
File Type
- All (default)
- Documents
- Forms
- Files
Owner
- Document Owner
Sort By
- Document name (Default: A→Z / Z→A)
Memos
You can access your Memos by filtering the Documents for 'Files' and selecting the corresponding file type:
Forms
Forms are 'interactive documents' that allow users to provide information directly within Yonder.
Users can fill out a form, save it under a user-defined title, and submit it to the back-office for further processing.
For detailed instructions and guidance, please refer to the dedicated article on Forms.
Was this article helpful?
That’s Great!
Thank you for your feedback
Sorry! We couldn't be helpful
Thank you for your feedback
Feedback sent
We appreciate your effort and will try to fix the article