TABLE OF CONTENTS
General
The Change Request workflow allows authorized users to propose, review, and approve changes to documents.
Depending on a user's role and permissions, they may:
Issue Change Requests – Propose edits or additions to documents.
Participate in Workflows – Review or approve proposed changes.
Edit or Implement Draft Versions – Apply approved changes before release.
Workflows and approval steps may differ depending on your organization’s configuration.
Permissions
Only users with the appropriate permissions can create or participate in change requests. These permissions are managed by your organization and determine whether a user can:
Raise a Change Request,
Incorporate proposed changes, or
Approve applied changes.
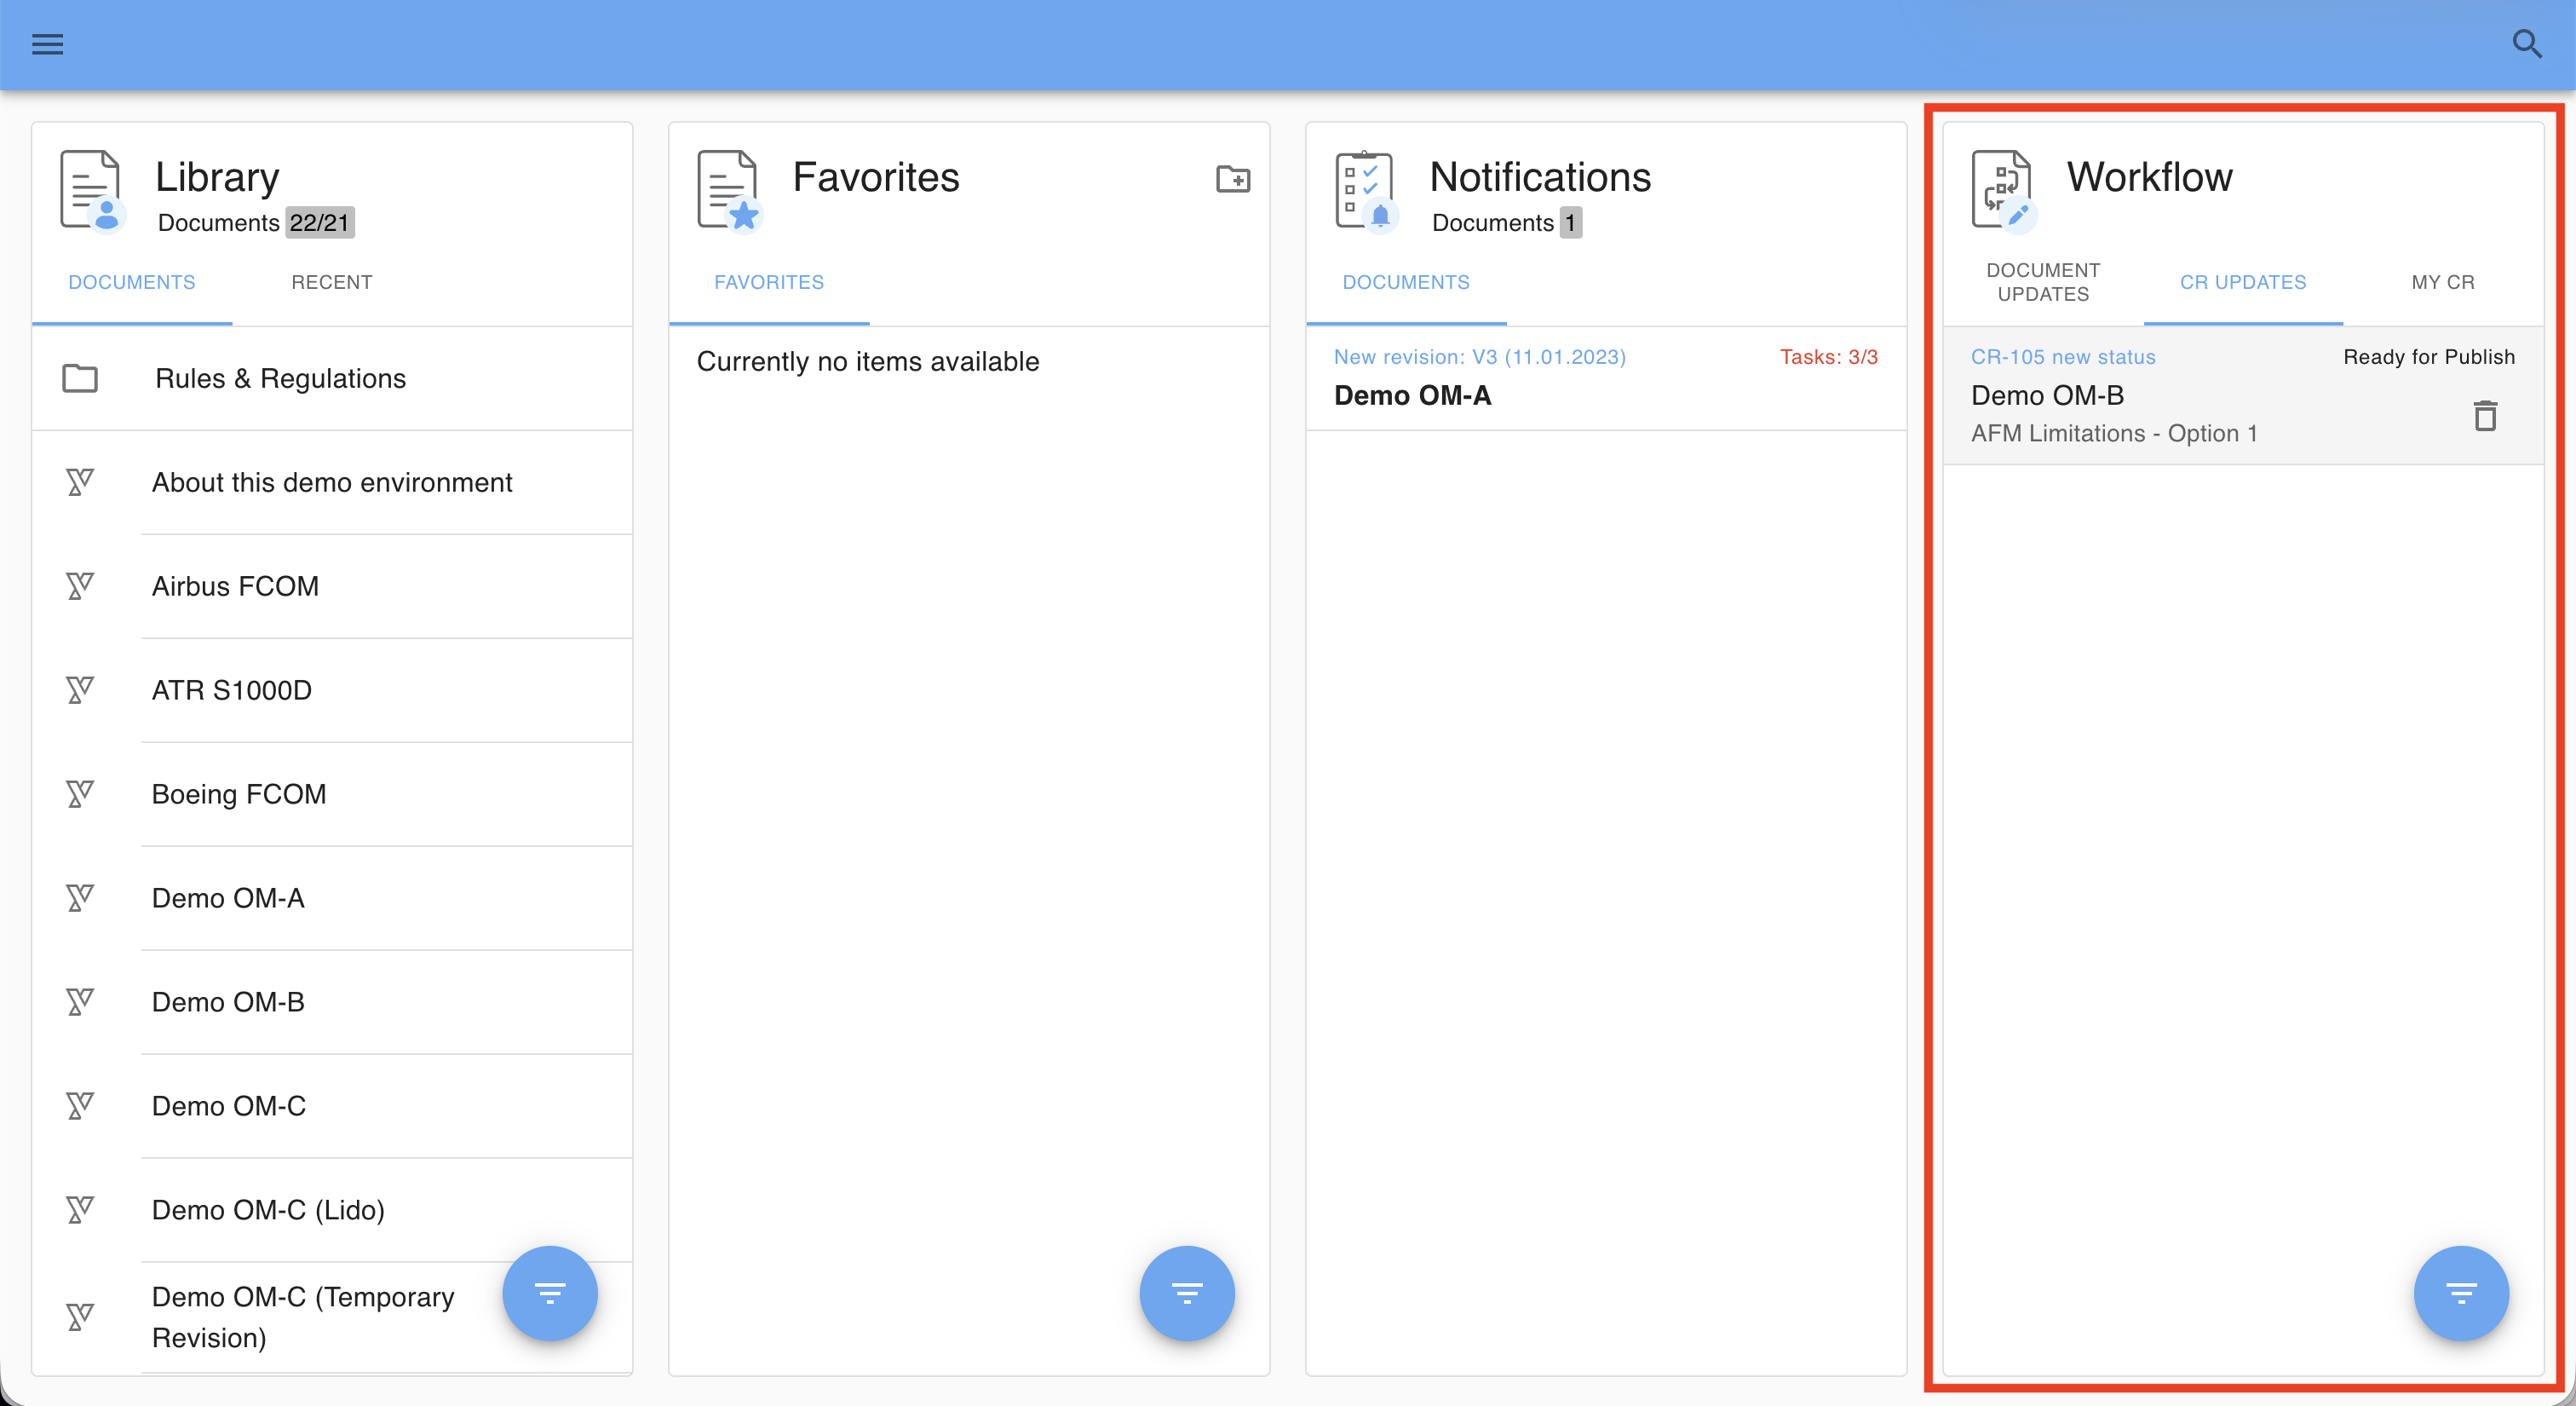
You can verify your Workflow access directly in the Yonder Online Reader Dashboard:
If the Workflow card is not visible, you currently do not have permission to participate in change request workflows.

Issue a Change Request
Users can create a Change Request directly in the browser from the relevant module. To do so, follow these steps:
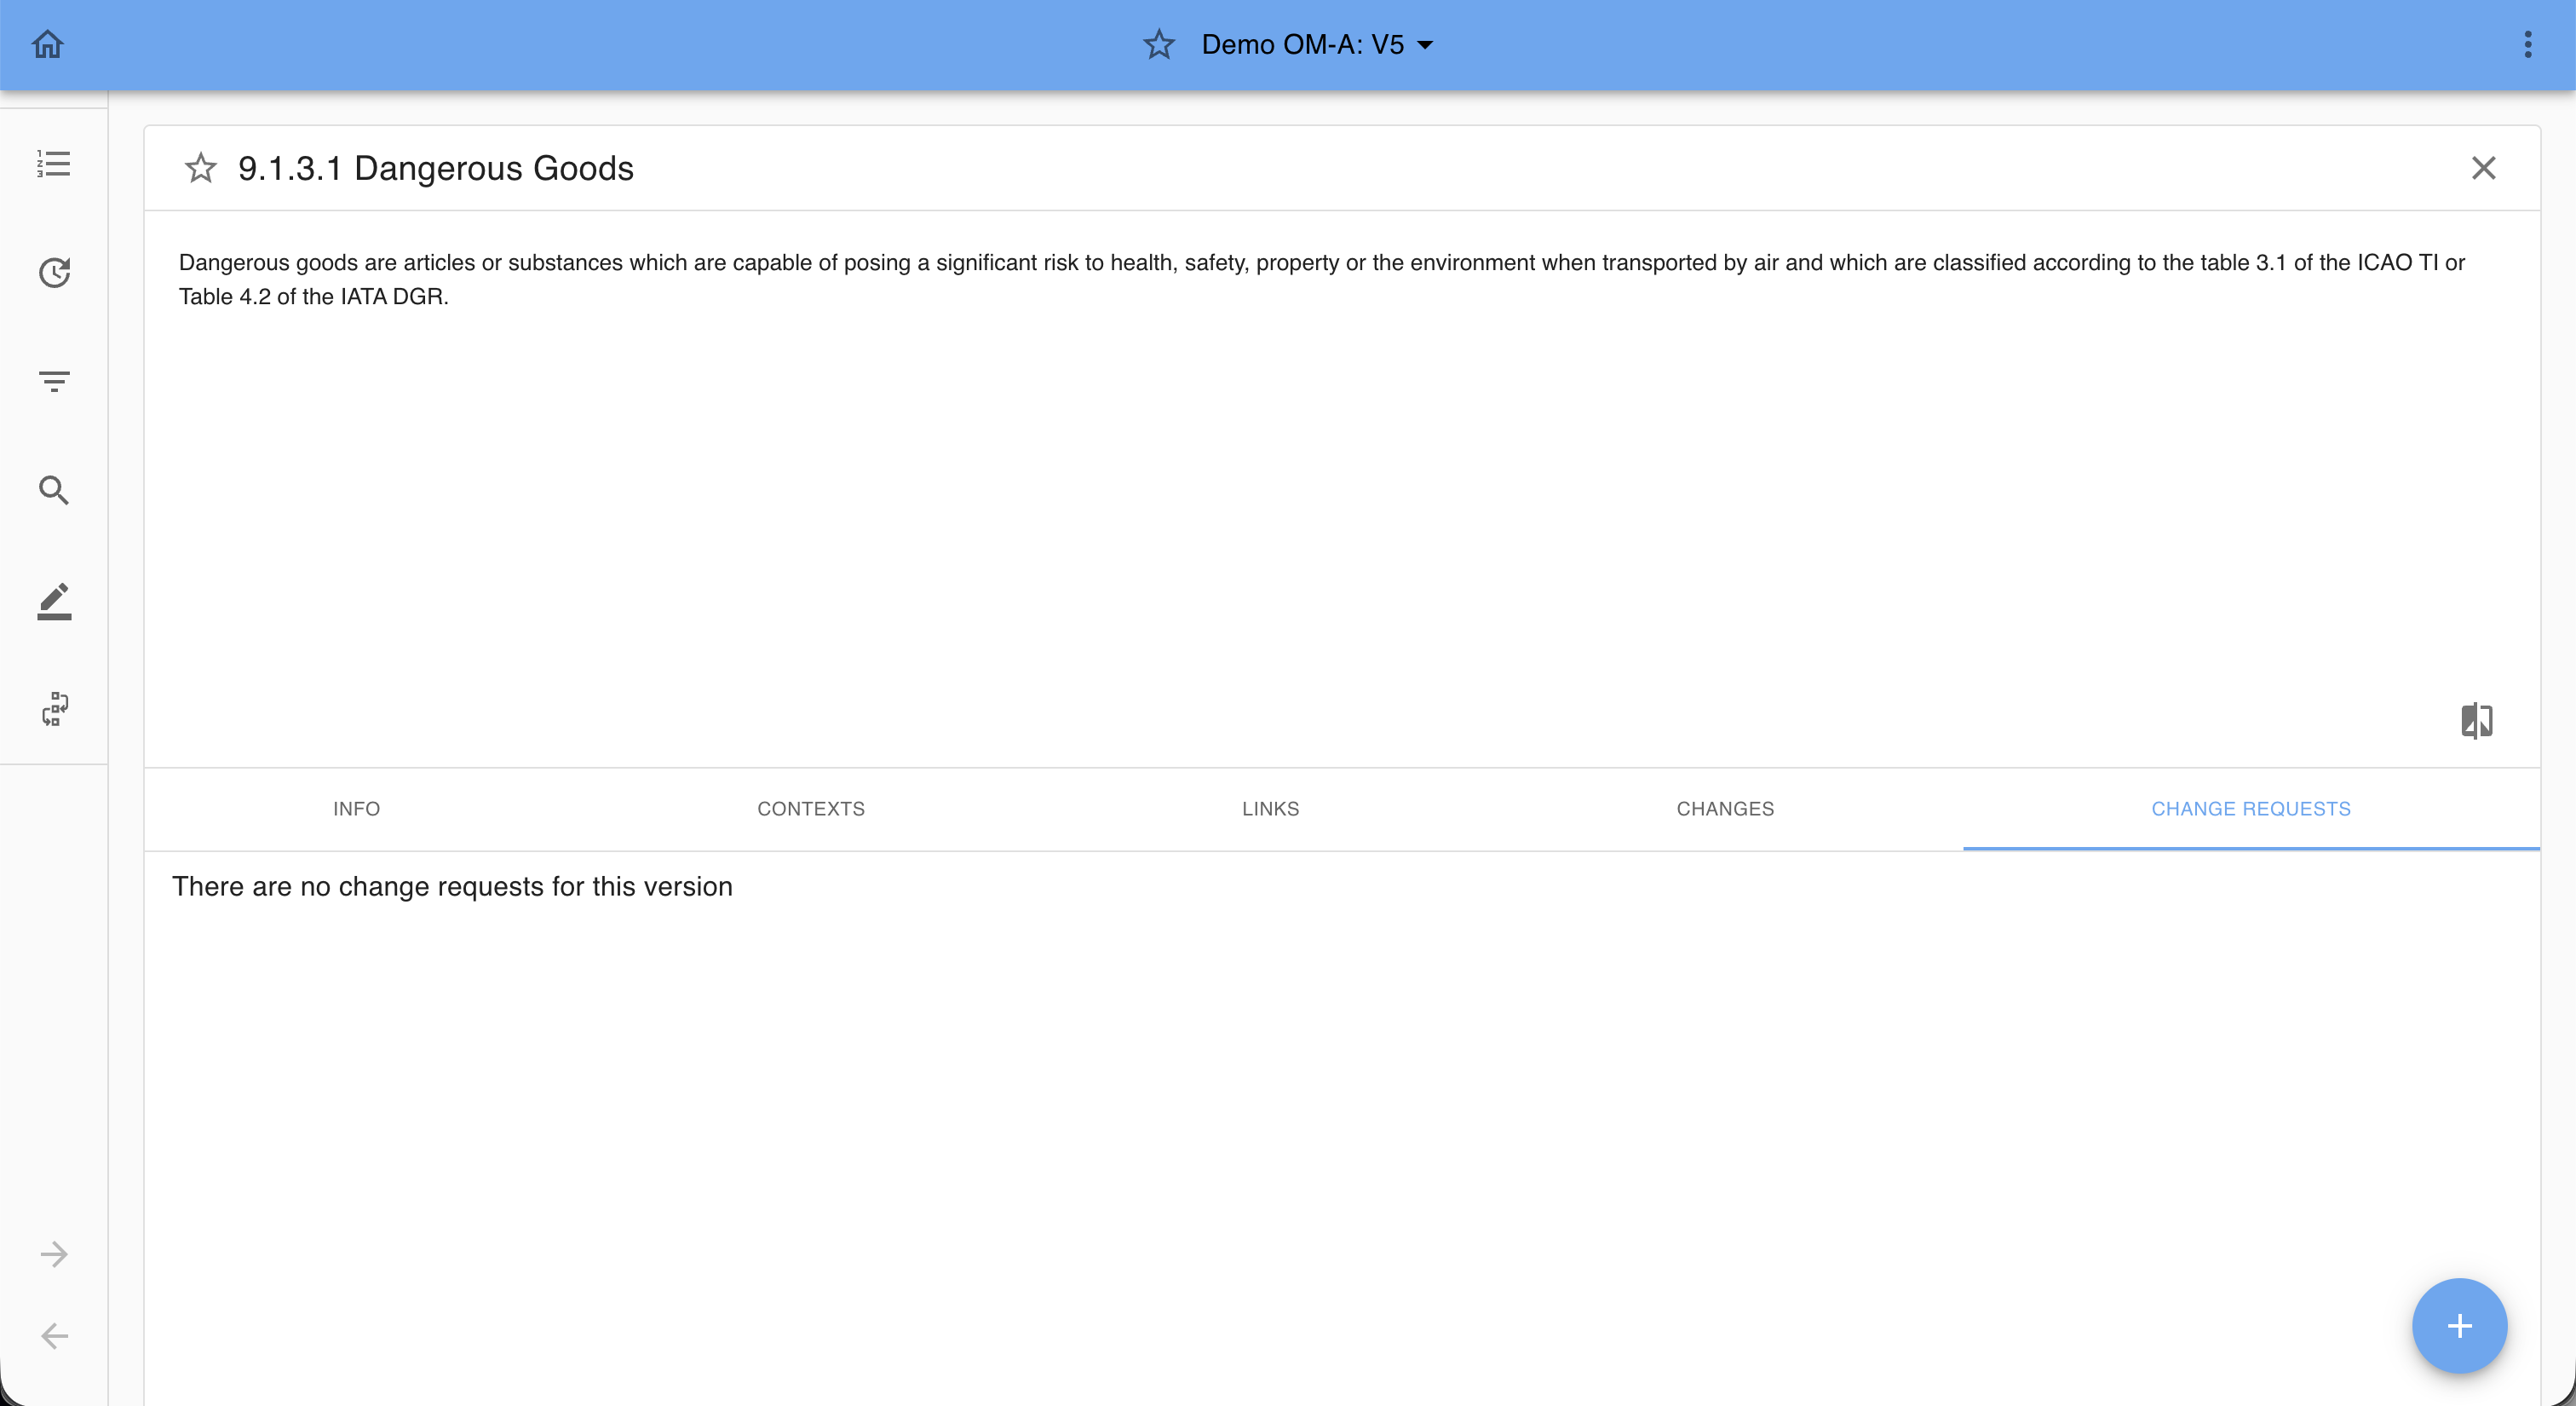
Open the document version that contains the target content.
Expand the information module by clicking the chevron-down icon on the right.
In the module’s detail view, open the CHANGE REQUESTS tab.
Click the ➕ (plus) icon at the bottom right.
-> If the plus icon is not visible, you do not have permission to create change requests for this document.
After clicking on the plus sign, the user is presented with several options on the change request scope:
- Edit Content: Propose changes for the existing content.
- Edit Title: Propose changes for the title of the information module.
- Add Module: Propose adding a new information module altogether.
- Delete Module: Propose deleting the information module altogether.
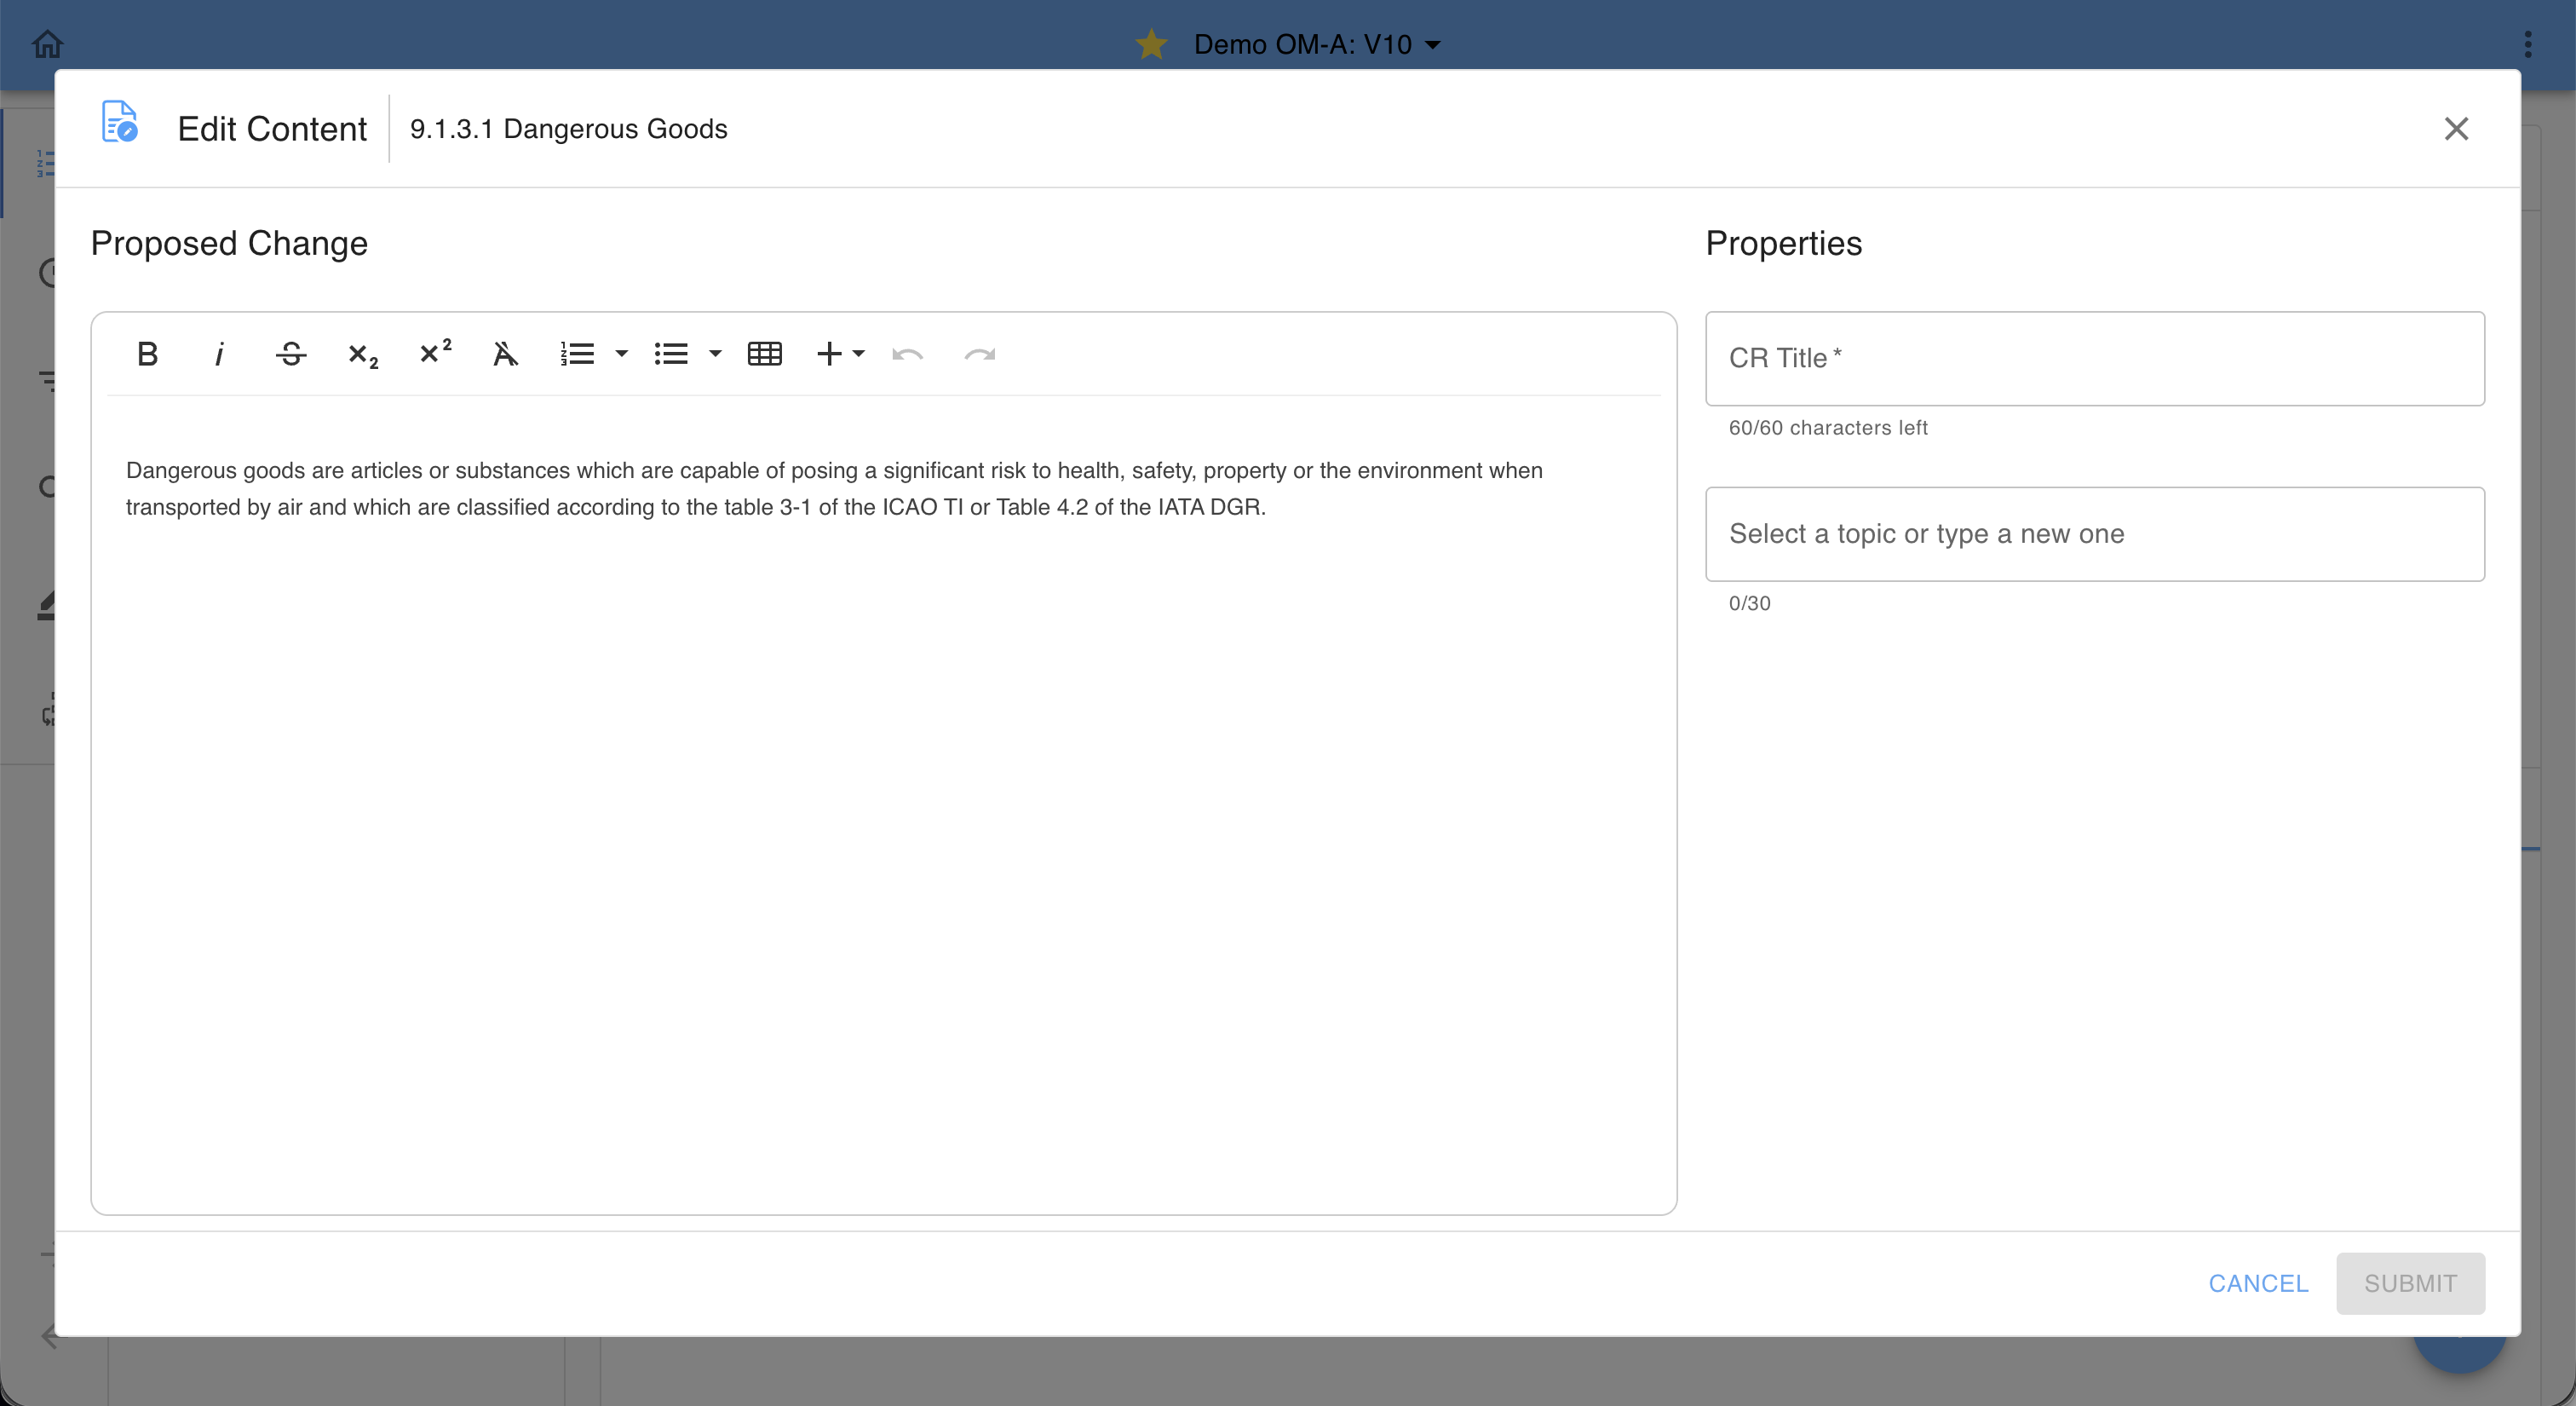
Propose a Change
After selecting an option (e.g., Edit Content), an editor window appears where you can propose content changes using the toolbox.
Provide a CR title for your proposed change, optionally create or select an existing topic (see dedicated article) and then click SUBMIT (or click CANCEL to start over).
This automatically starts the document’s approval workflow.
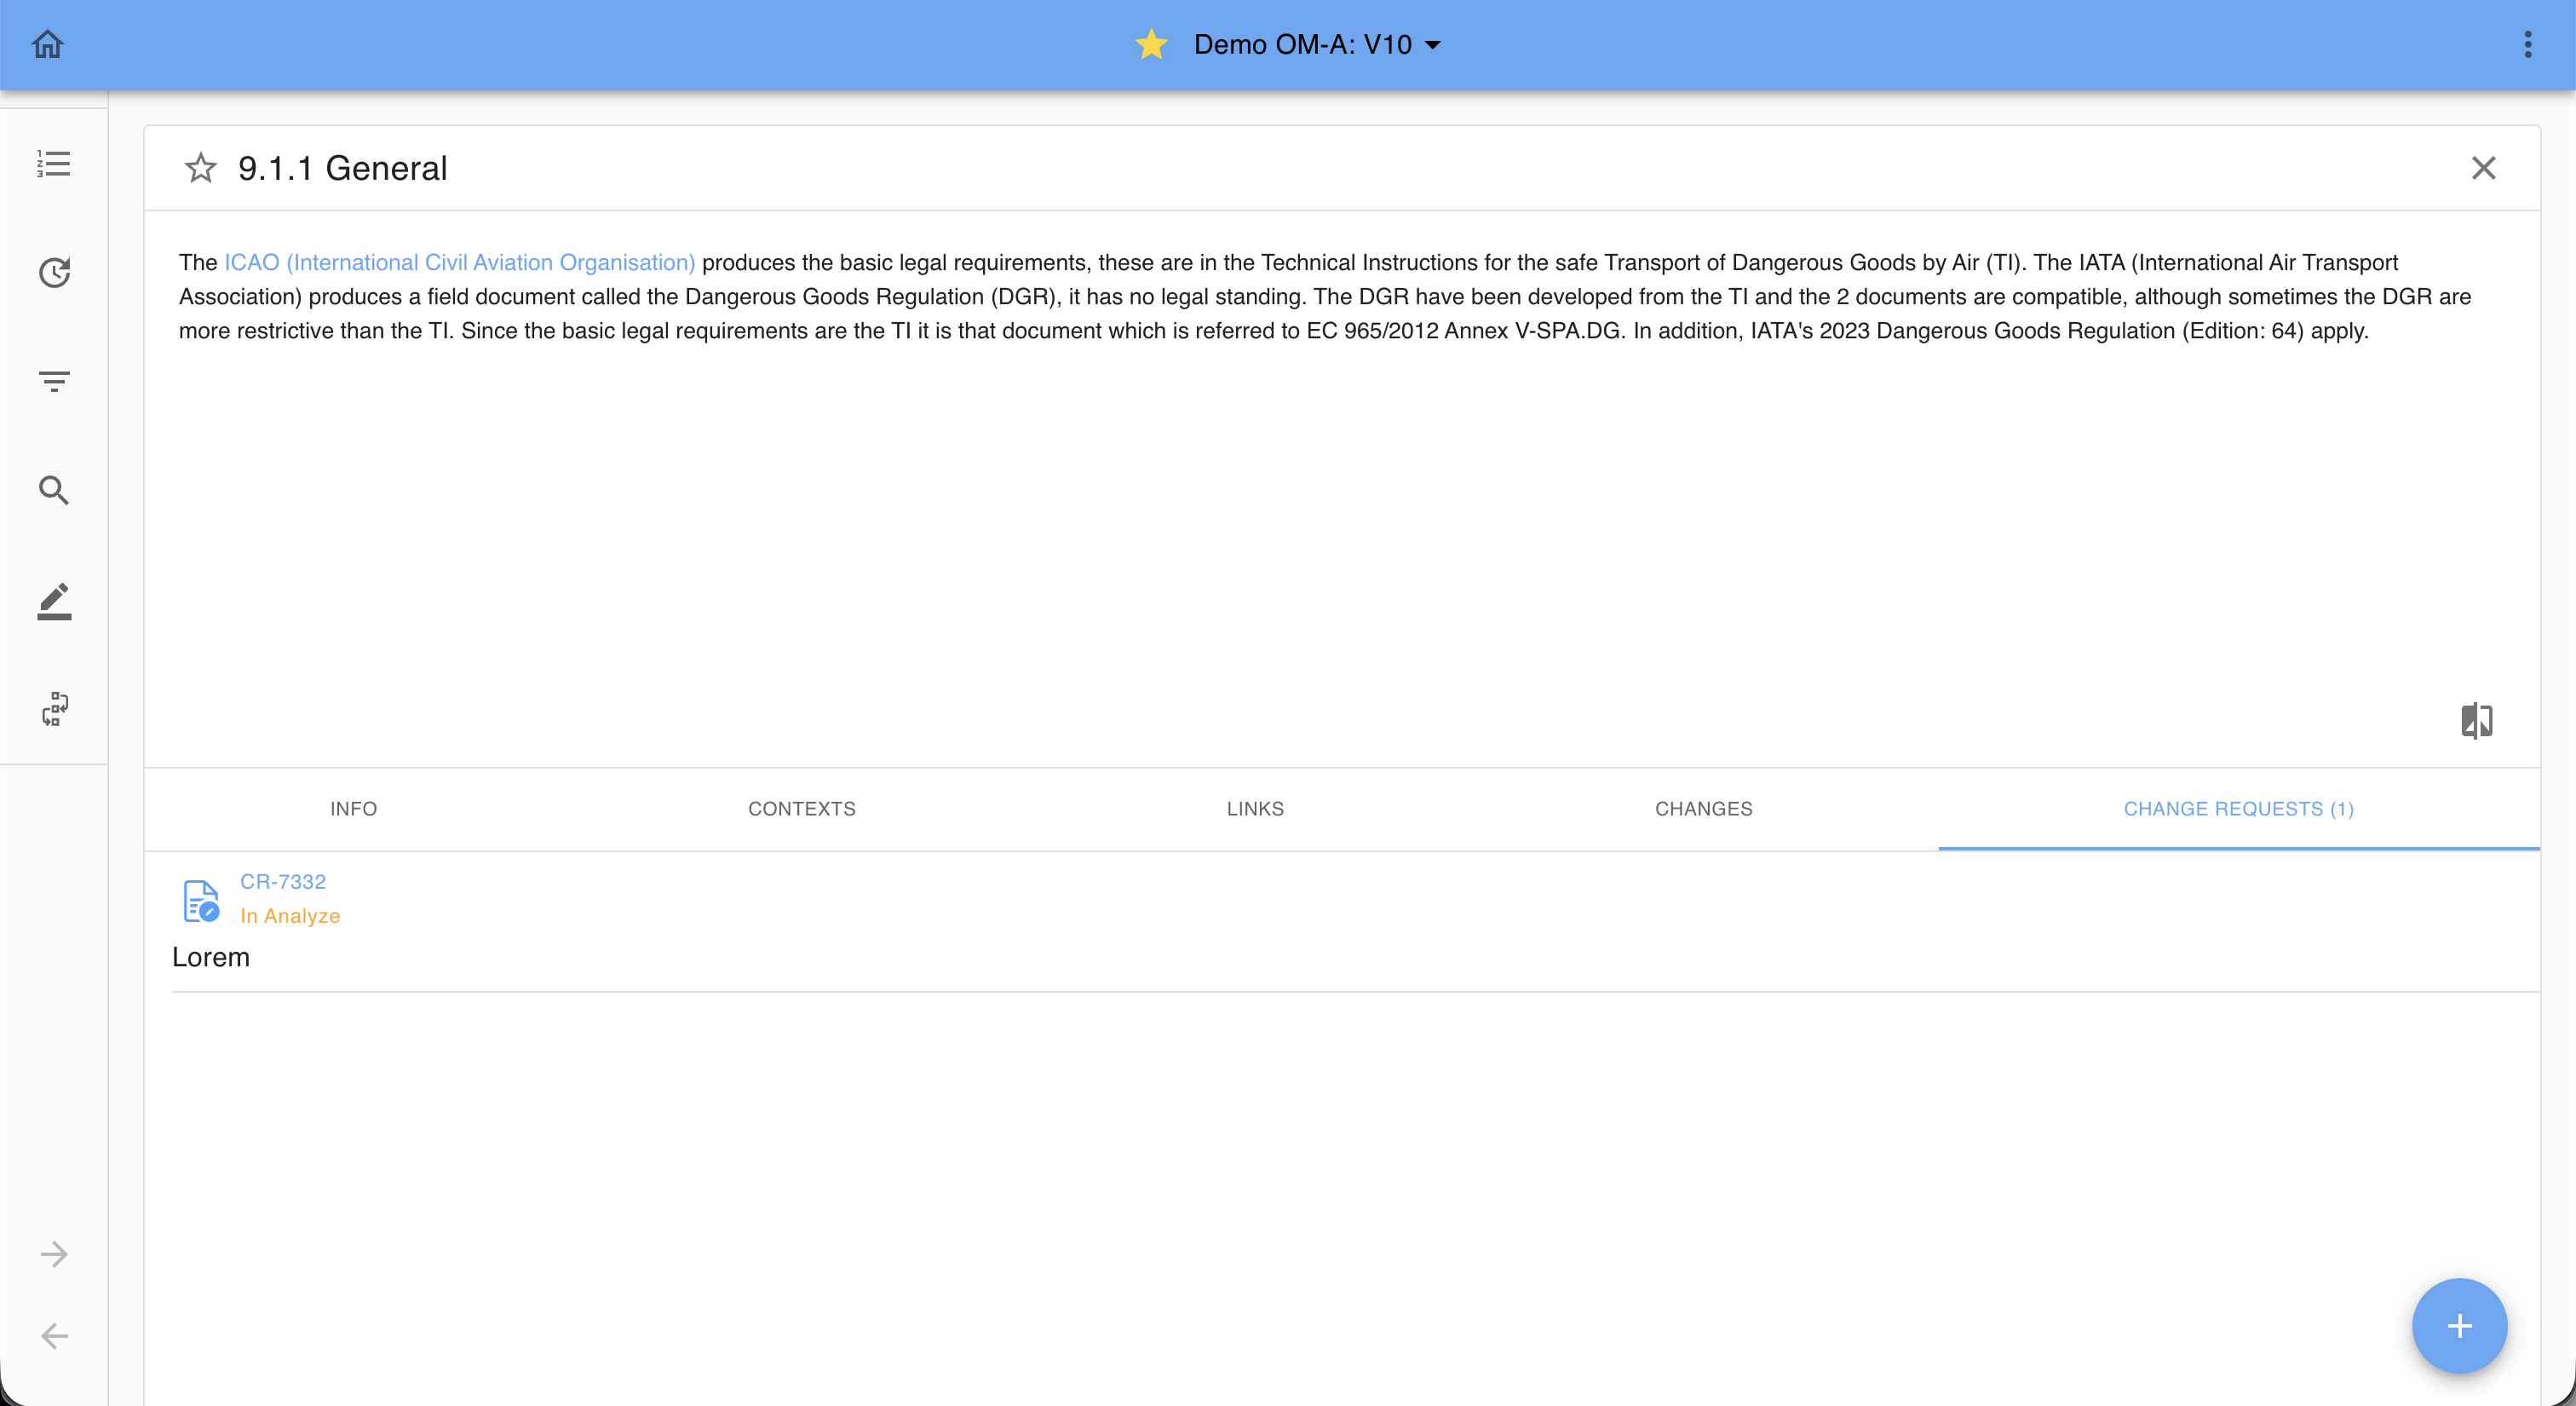
Submitted change requests appear under the module’s CHANGE REQUESTS tab, showing:
The request title and status.
The current workflow stage.
The user that raised the Change Request can also track all your requests via Dashboard → MY CR.
Status updates appear under NOTIFICATIONS → CR UPDATES.

Editorial Workflow
Change requests progress through workflow steps that involve review and approval by selected users.
Stakeholders are automatically notified of pending actions through:
The NOTIFICATIONS tab on the dashboard.
Optional email notifications.
Clicking a notification opens the Change Requests screen with detailed information about the current step.
Workflow Statuses
Workflows and their statuses are highly customizable and depend on each customer’s specific implementation.
In general, the following standard steps are defined:
In Analyse – The submitted Change Request is under initial review. The content and scope are analyzed to decide whether the request is valid and should proceed.
In Edit – The Change Request has been accepted for editing. Authorized users can now implement or adjust the proposed changes.
Request Approval – The edited content is ready for review. The Change Request is submitted to designated approvers for validation and sign-off.
Internal Approval – The Change Request undergoes an internal approval round within the organization before final release.
In Waitlist – The Change Request is on hold and not yet assigned to a revision. It remains pending until included in a future update.
Rejecting a Change Request
Change requests raised by mistake or duplicated can be rejected during certain workflow stages.
Typically, requests can be rejected at the In Analyse stage.
Click REJECT to remove the request from the revision process.
Depending on your tenant’s setup, rejection may also be possible at other stages.
However, once a request reaches the In Edit stage, rejection or deletion is no longer possible.
Incorporate Change Requests
Only users with the corresponding permissions can incorporate proposed change requests. Change Requests can be accessed via notifications or directly form a document by clicking on the workflow icon: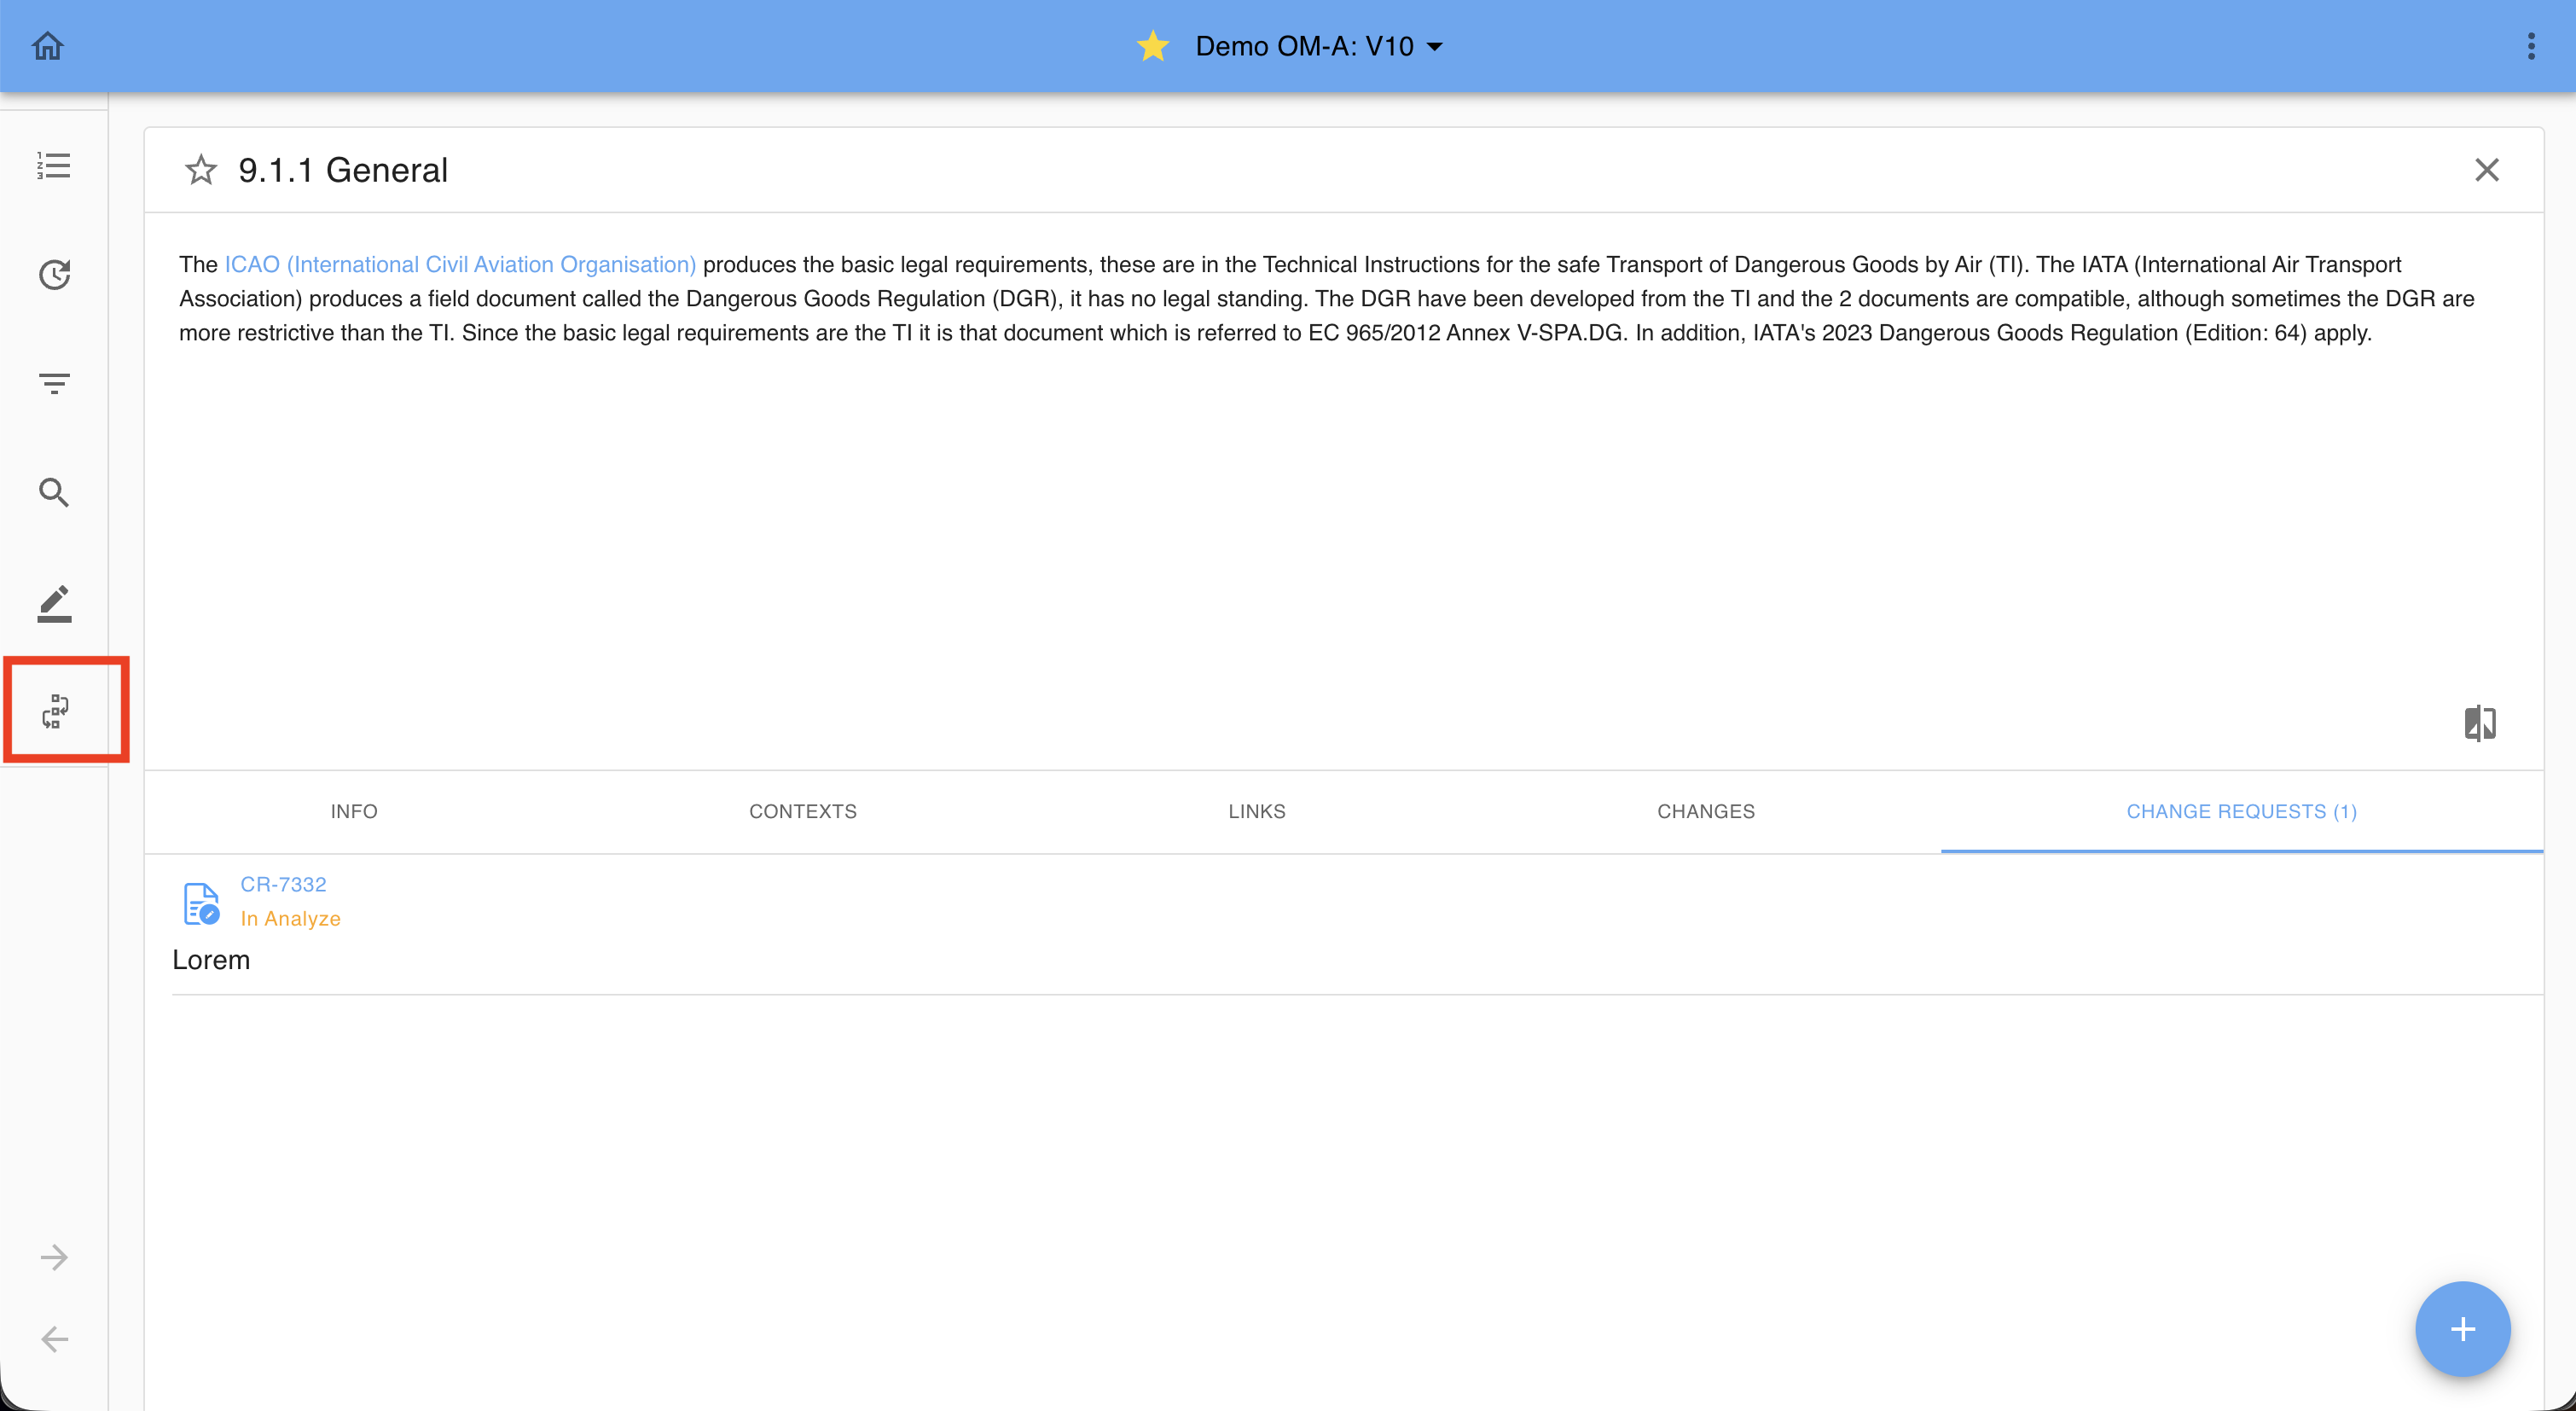
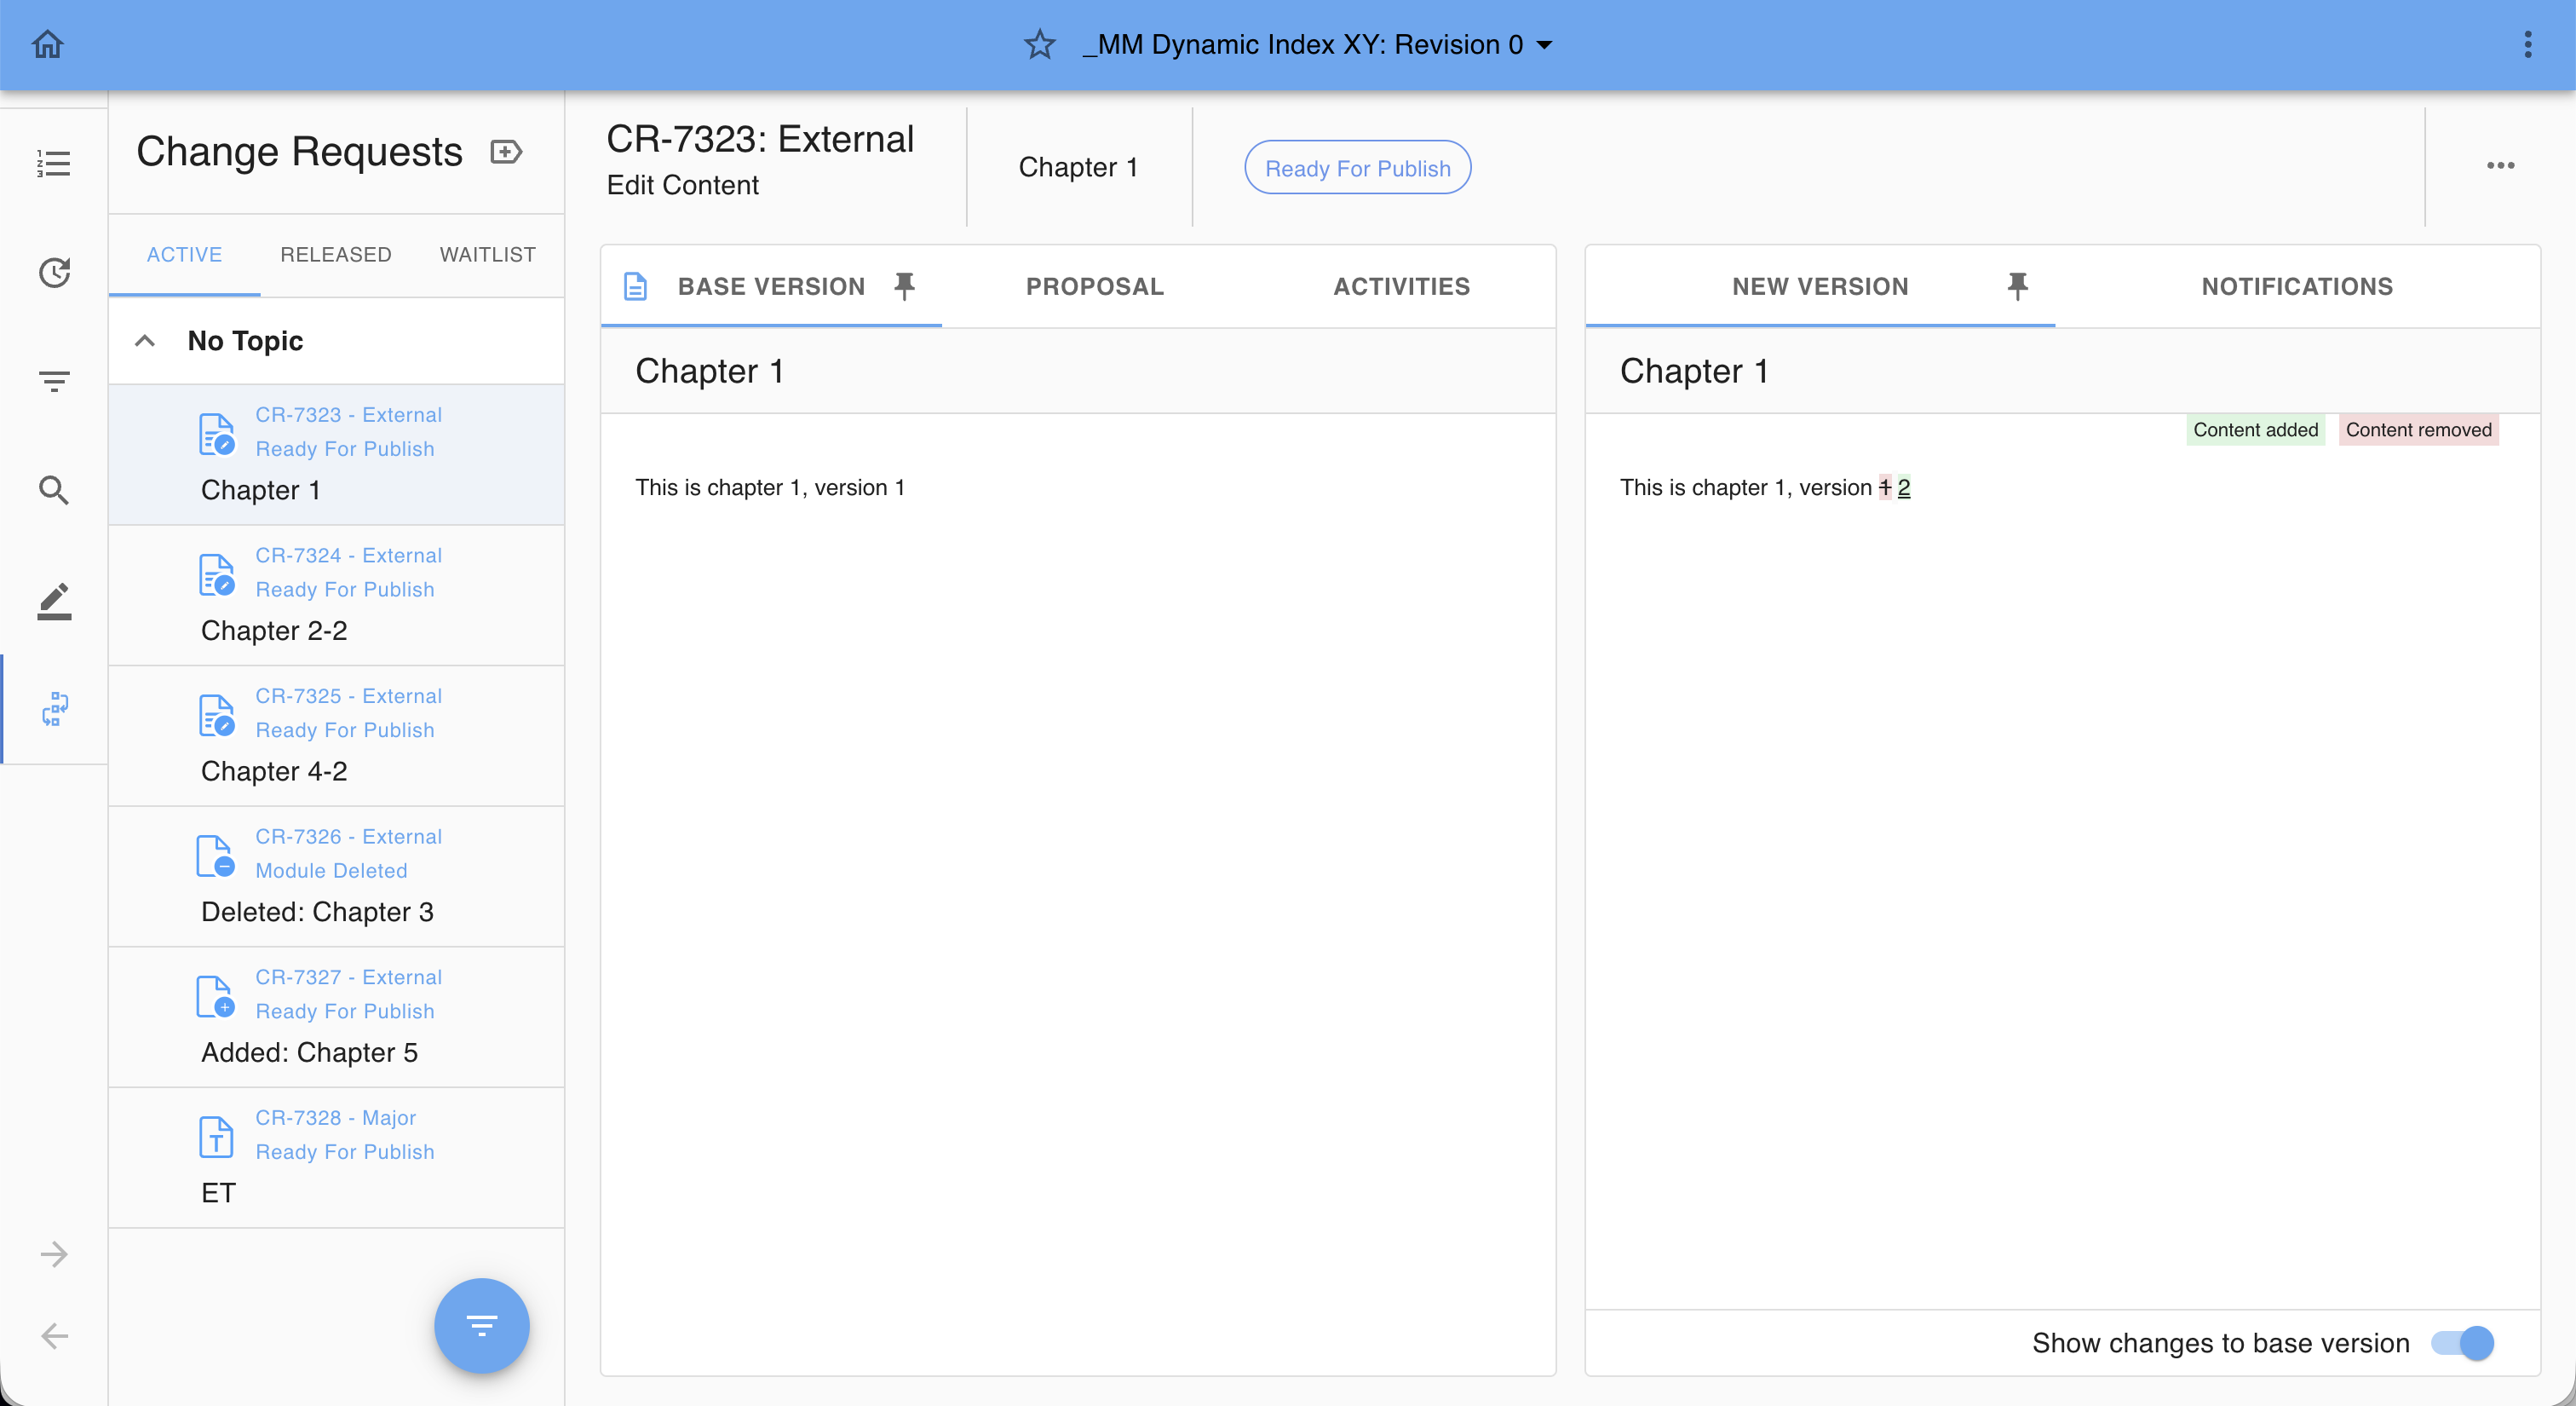
Change Request Base Screen
Editors can start implementing a proposed change in the Change Request main screen by selecting a Change Request:
Change Requests Sidebar
The Change Requests Sidebar provides quick access to change requests grouped by their status.
Tabs
Active – Lists change requests that are currently being worked on.
Released – Lists change requests that were included in the current document revision.
Waitlist – Lists change requests that are not yet assigned to a revision.
Sorting and Filtering
Use the sort and filter options to narrow down results and quickly locate specific change requests in longer lists.
Content Preview
The Content Preview area is divided into two panels allowing userst to see the base version of the content while working on the upcoming change.
Left Panel
Contains the following tabs:
Base Version (default pinned) – Shows the version for which the change request was created.
Proposal – Displays the changes proposed by the request initiator.
Activities – Provides additional information related to the change request:
Status Notes – Displays supplementary details such as change instructions or preliminary classifications.
Comments – Lists user comments for the change request.
Attachments – Allows uploading or viewing attached files linked to a workflow step.
History Log – Shows the chronological record of status changes with timestamps.
Right Panel
Contains the following tabs:
New Version (default pinned) – Displays the modified version with highlighted additions, deletions, or edits.
Includes a toggle to show or hide the changes.
Notification – Allows creating notifications that can include optional compliance tasks.
See the dedicated Notifications article for more details.
Edit the Content
Certain users may have permission to edit a Change Request during specific workflow stages.
To edit, click the Edit icon in the NEW VERSION panel.
Note: If the Edit icon is not visible, you either do not have permission to edit the Change Request, or editing is not allowed at the current workflow stage.
After applying the changes, click SAVE to confirm and finish editing, or CANCEL to discard the modifications and revert to the previous state.
Copy Paste the Proposal
A Copy proposal button is available in supported modules. This allows you to copy the proposal text and paste it into the current document.

Supported Change Request Types
The Copy proposal function is available only for:
- Editorial
- Add modules CR
The button is not shown in other modules.
Using the Copy Paste Functionality
- Select the Copy proposal button.
- A confirmation message will appear.

- Confirm the action by clicking COPY.
- The proposal text will be inserted automatically.
Limitation
The Copy Proposal feature is not available for OEM documents as these formats are not compatible.
Was this article helpful?
That’s Great!
Thank you for your feedback
Sorry! We couldn't be helpful
Thank you for your feedback
Feedback sent
We appreciate your effort and will try to fix the article