TABLE OF CONTENTS
Introduction
The Highlights & Notes feature allows you to mark a selected text excerpt and optionally add a note for additional context.
Within a document, you can access all highlights and notes via a dedicated sidebar, where they are listed and can be used for quick navigation.
Highlights and notes are also available in the Yonder Online Reader once they have been synchronized, ensuring access across platforms.
Terms and Definitions
| highlight | marked content |
| note | personal remark added to a highlighted section |
Managing Highlights
Selecting a text section allows you to choose one of the following actions: create a highlight, add a note, or copy the selected text.
Create a Highlight
On touch devices, the system must distinguish between a normal swipe gesture and the creation of a highlight.
To create a highlight:
- Long press on the desired text position.
- Swipe to select the text you want to highlight.
- Select the desired color from the color picker.
Create a Note
To create a note in a document is similar to creating a highlicht
- Select the desired text in the document (long press and swipe to select).
- Click the note icon (instead of selecting a highlight color).
- A pop-over will open.
- Enter your note text.
- Format the text if needed.
- Select the desired color for the note.
- Save the note.
The note will be added to the selected text.

Note: The last selected color will be used as the default color for the next highlight or note.
Copy a text selection
To copy a text section in a document:
- Long press on the desired position in the text.
- Swipe to select the text you want to copy.
- Select the copy icon from the action menu.
The selected text will be copied to your clipboard for further use.
Navigate Highlights
Select a Highlight within a document
In the document view, there is a dedicated Highlights tab (1.) where you can see all highlights created for the current document.
Notes:
- Highlights are listed in the order in which they appear in the document.
- Highlights that contain notes are marked with a note symbol in the highlight bubble (2).
Delete a Highlight or Note
To delete a Highlight or Note, click directly on the highlighted text to select it.Then choose the trash bin icon from the toolbar:
Confirm the action.The Highlight and Note will be removed from the document.

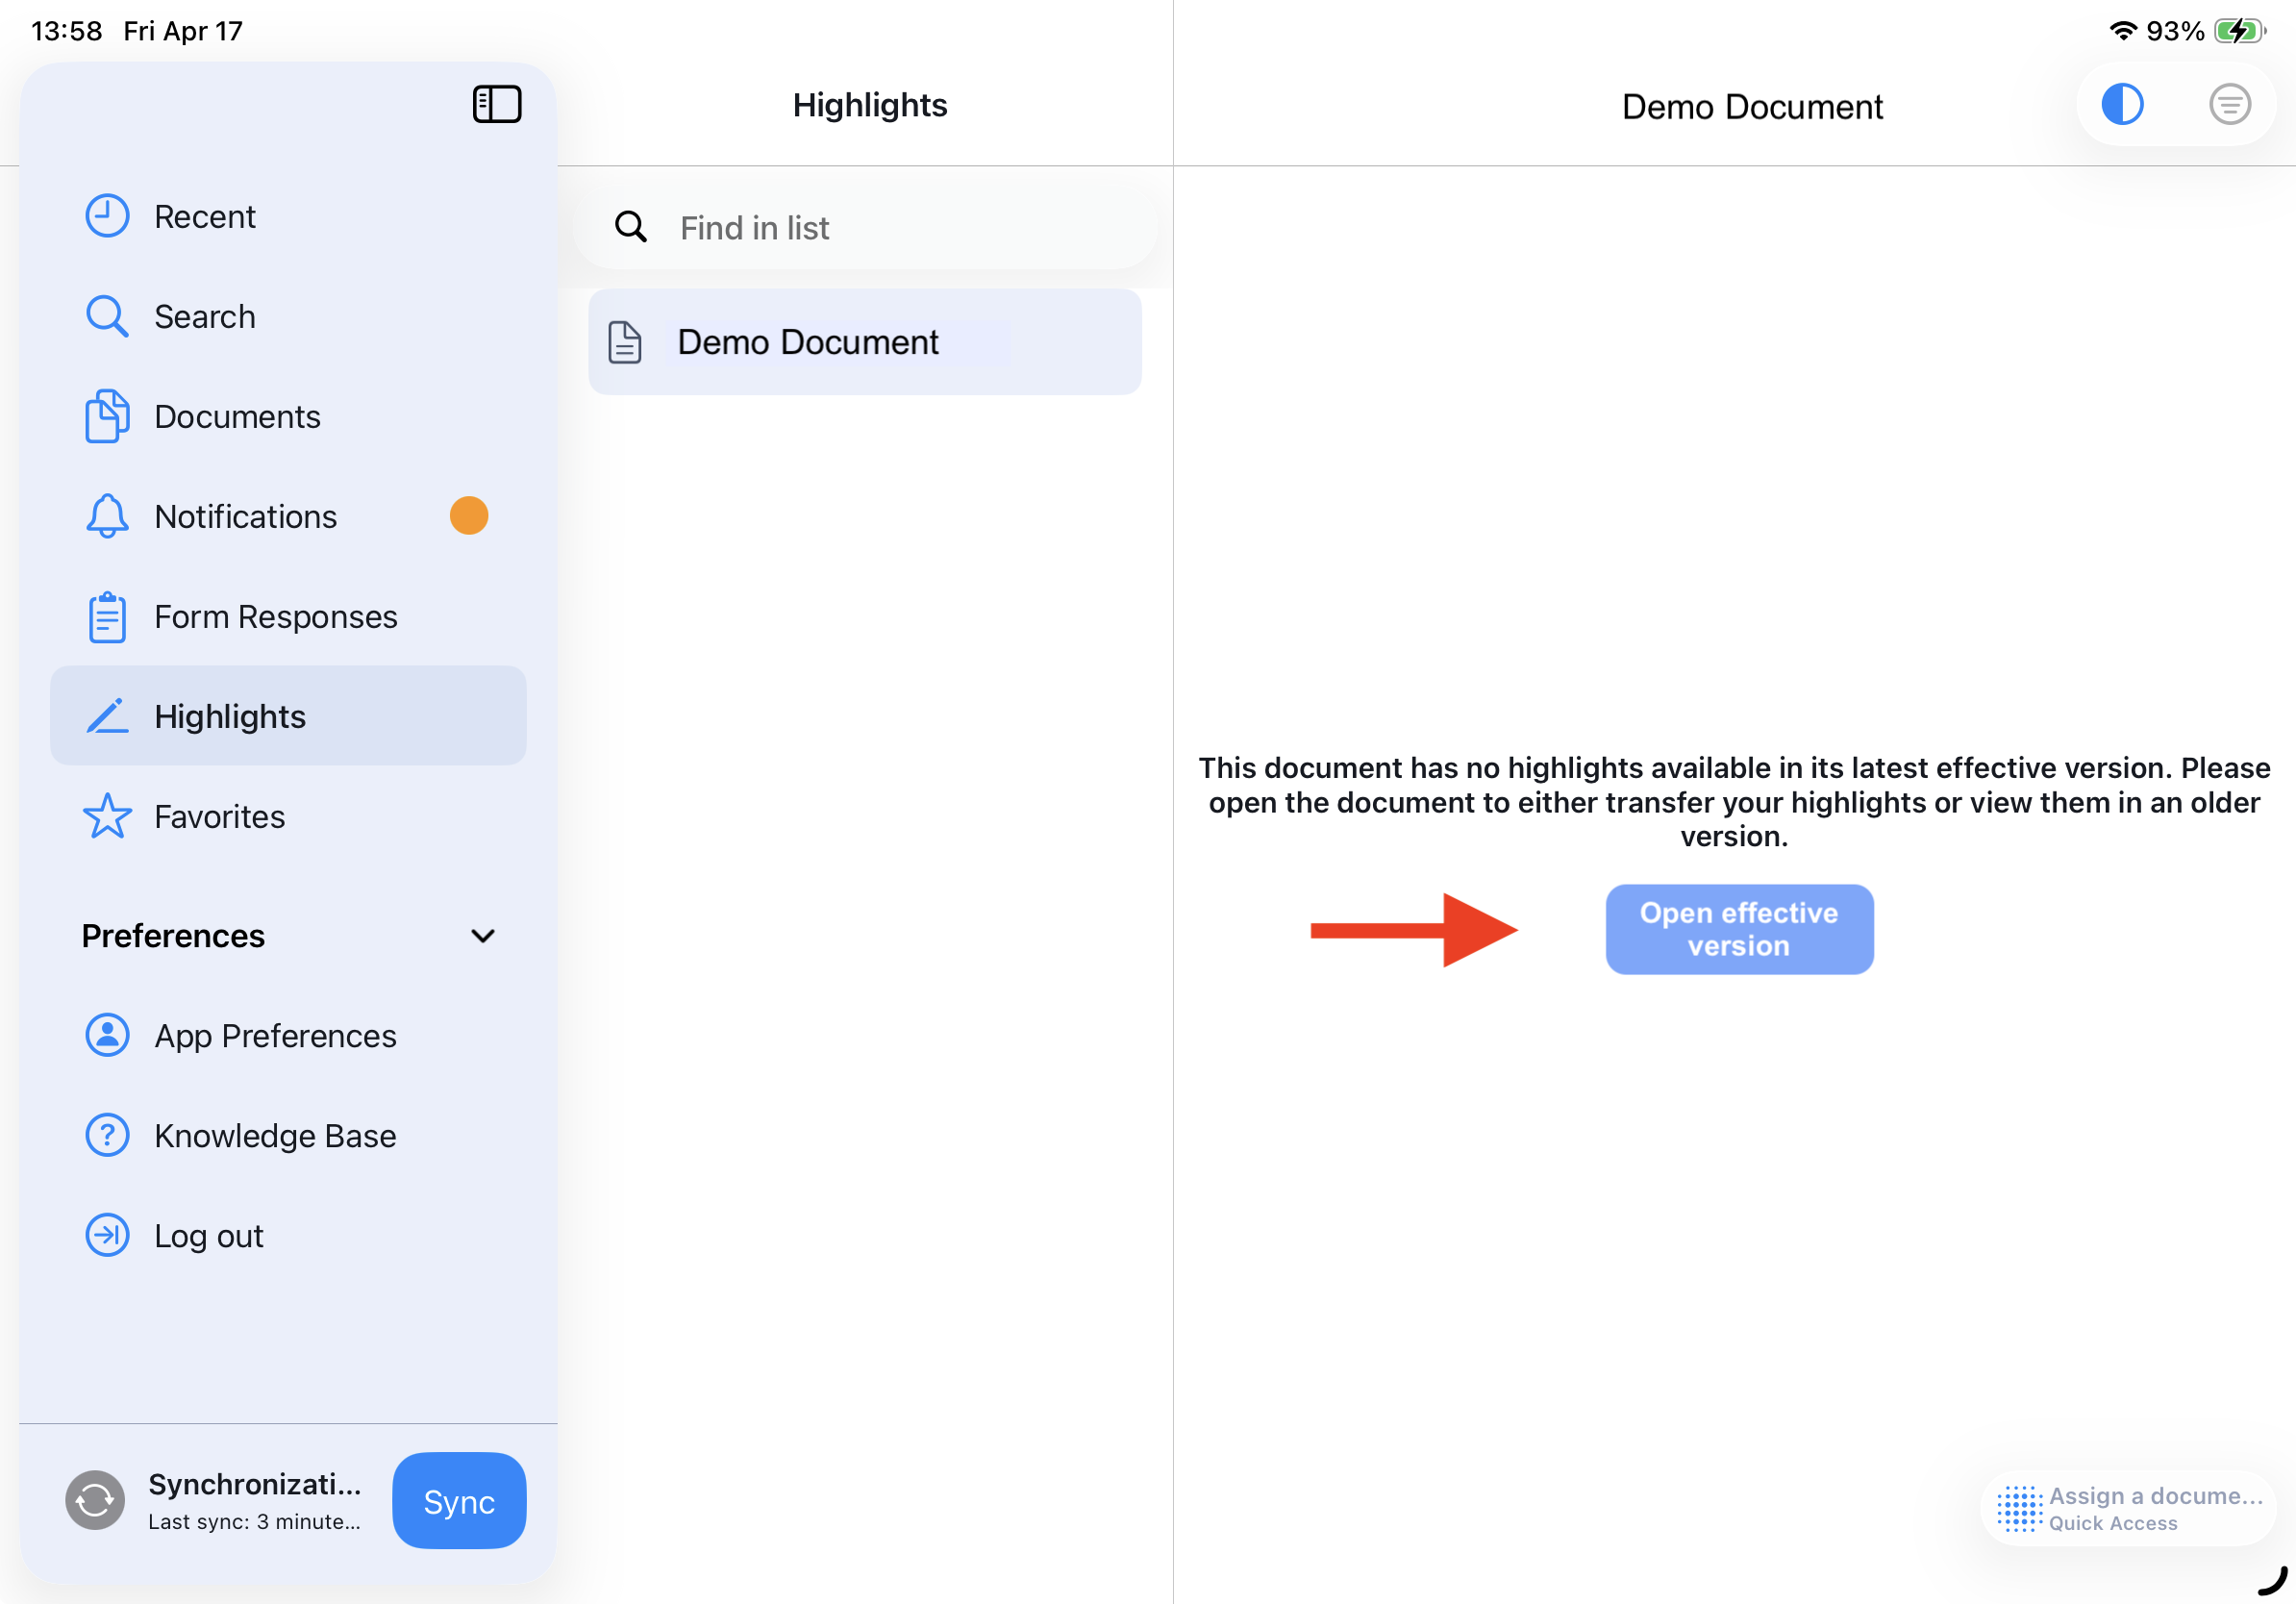
Hightlighted Content not Available in effective Verson
Users can now open the latest effective version of a document directly from the highlight view when the referenced module is no longer available. Highlights can be transferred if needed.
Toggle Highlights / Notes
You can toggle highlights on or off in the viewing settings if they interfere with reading or overlap with other markings, such as in the comparison view.

Transfer of highlights & notes
Automatic transfer
Highlights (and notes) are generally automatically transferred.
Manual transfer
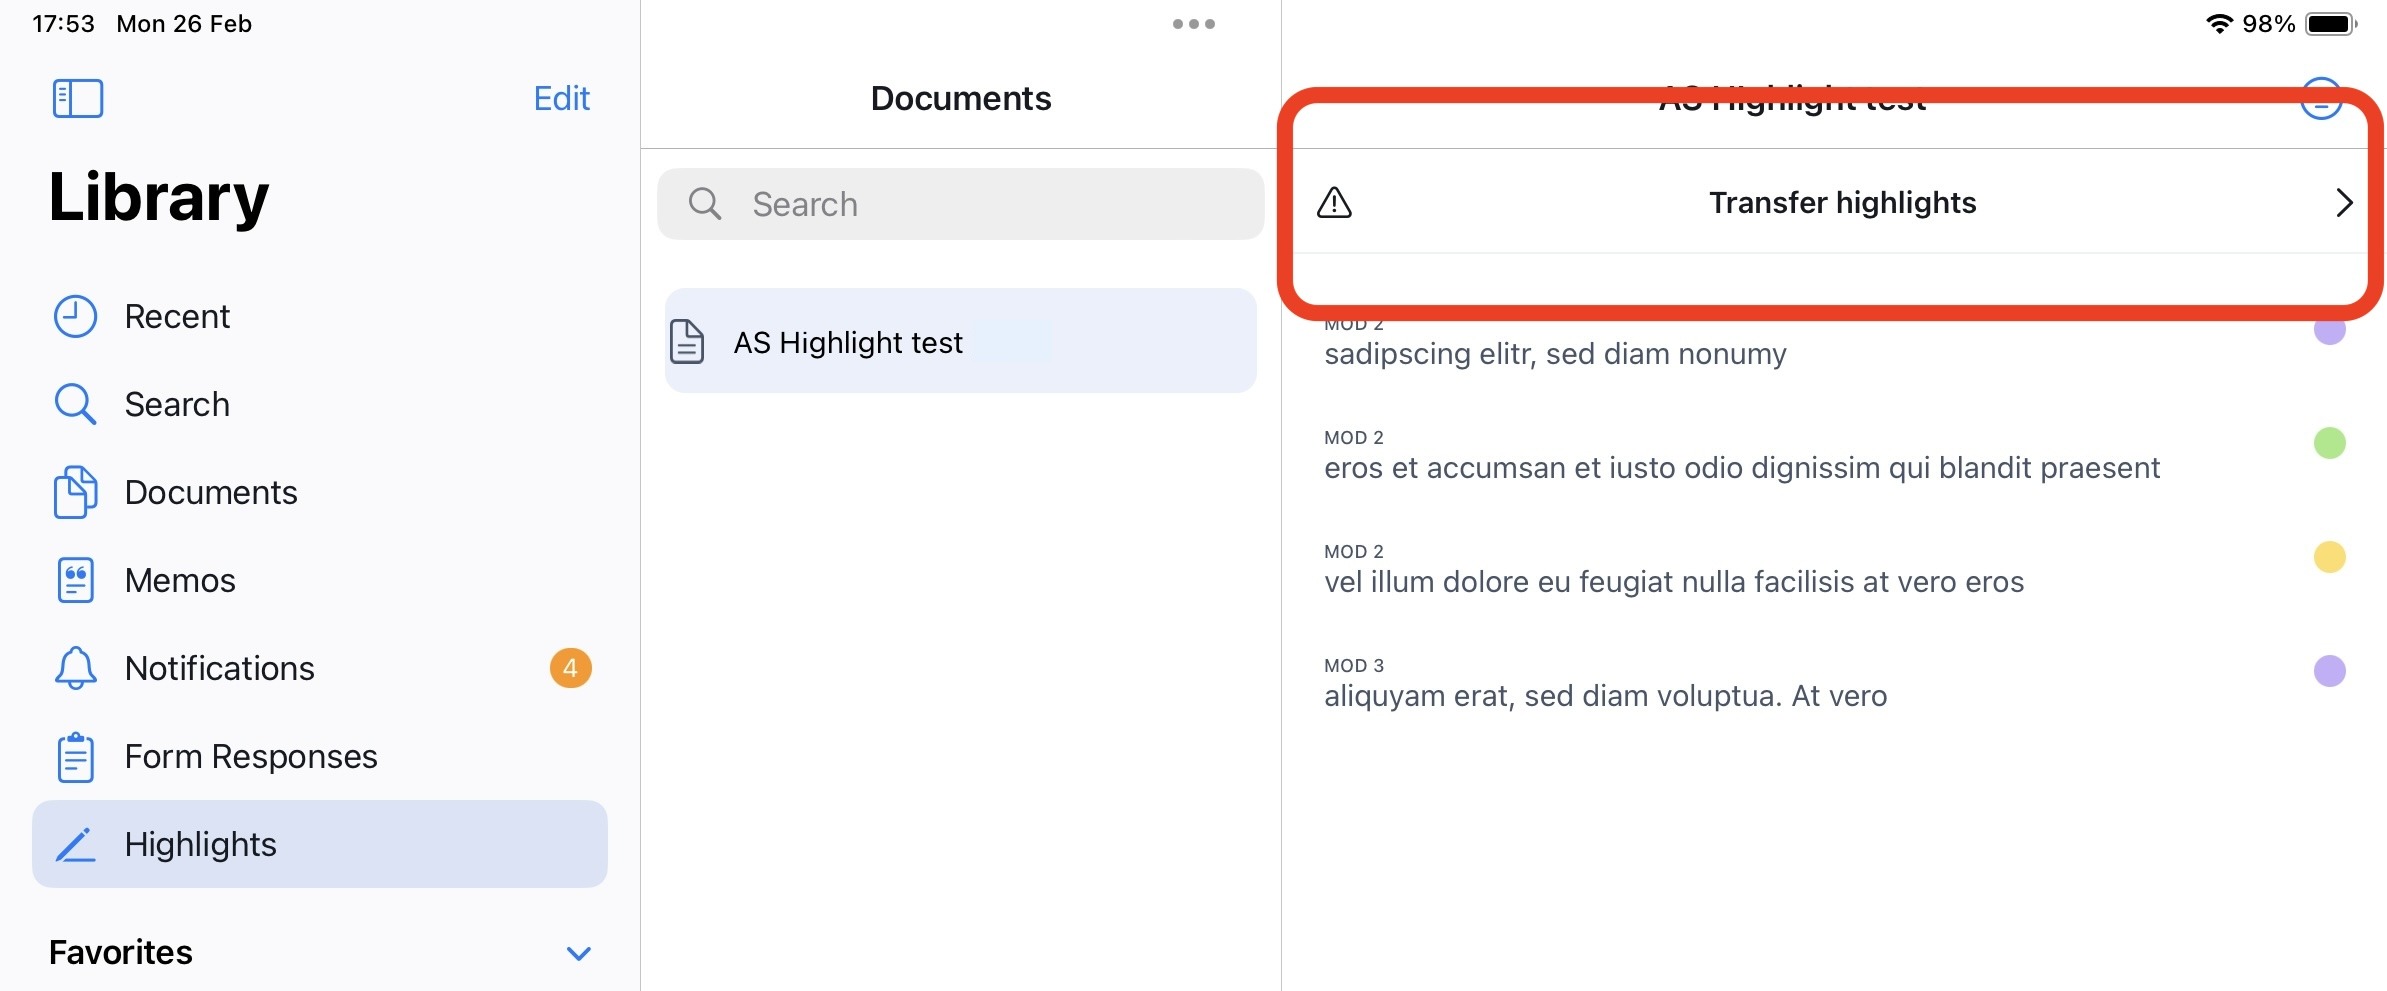
If the content has changed though, the system can not automatically place the highlight in the new revised module. The system will display a warming and indicate that there are highlights to be transfered.
To manually transfer a highlight of revised content please follow below steps.
- Click on the chevron under the section ‘Transfer highlights’
- select the highlight that you intend to replace and click on ‘Transfer’:
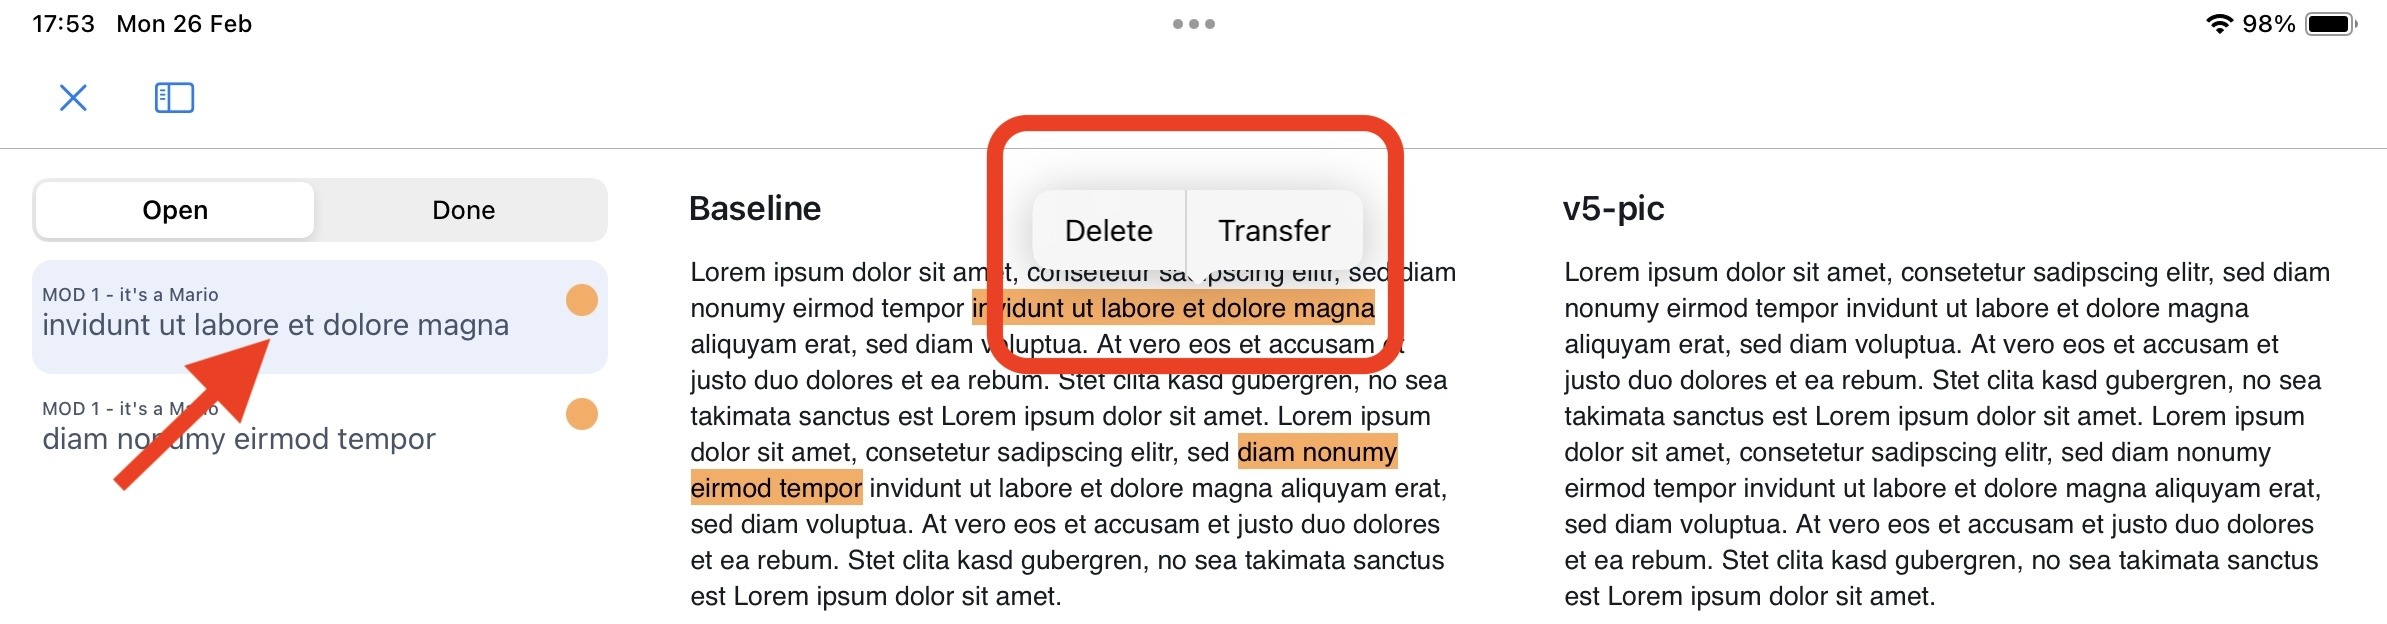
- If you do not like to transfer the highlight select ‘Delete’. The highlight will not be moved to the new revision but still be visible in the old revision.
- Confirm by clicking ‘Transfer’
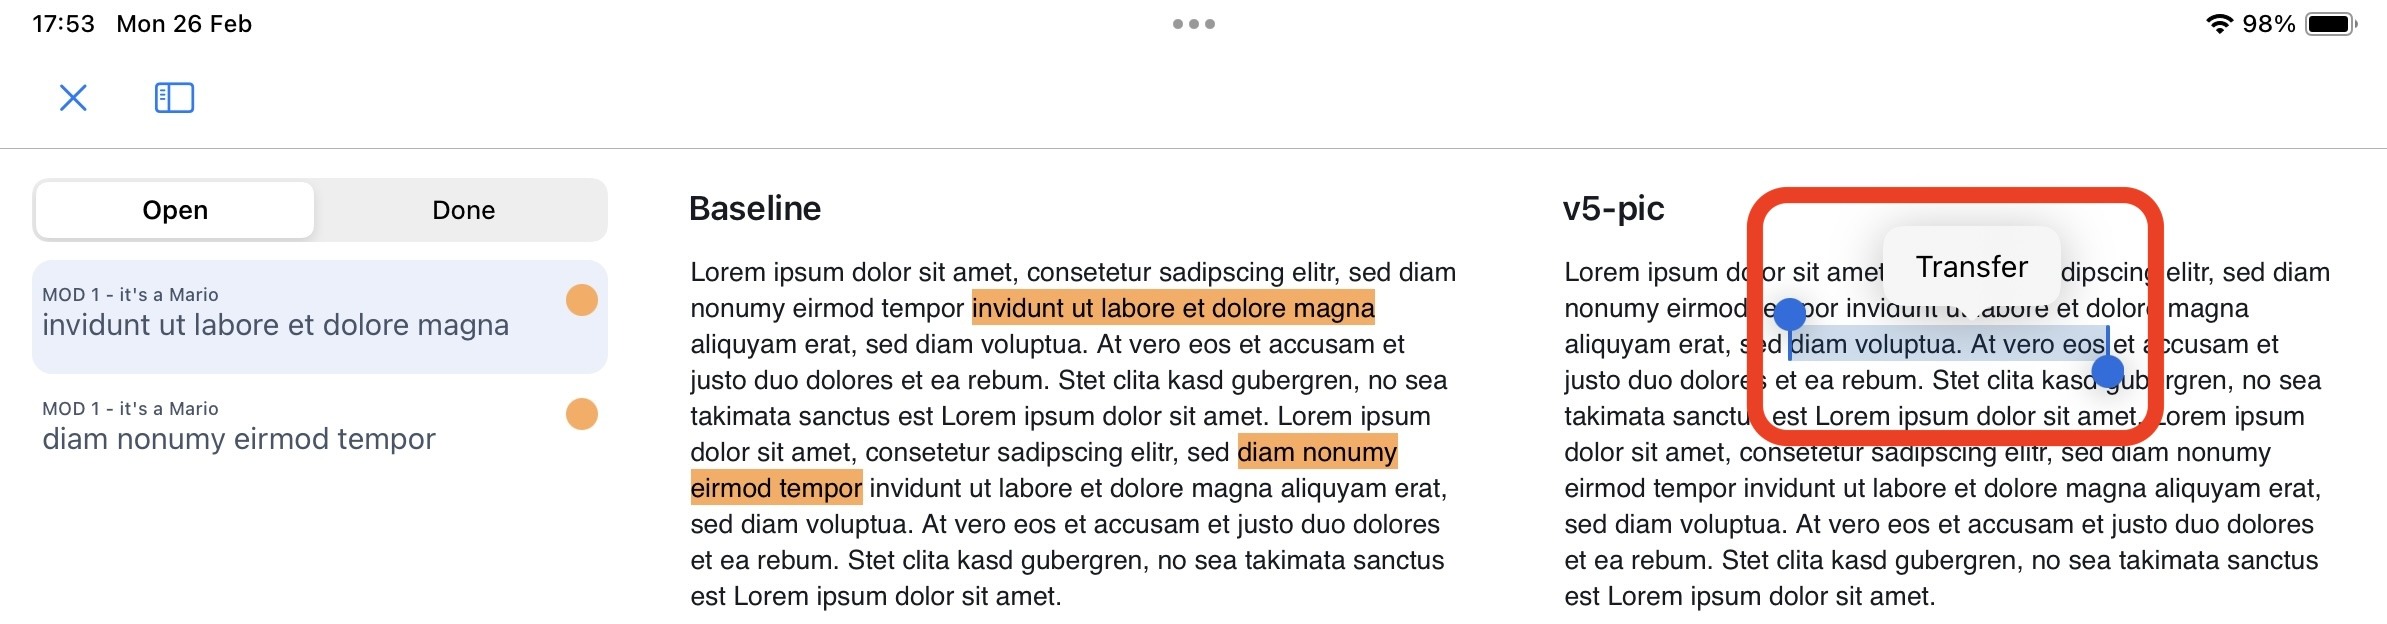
Select the new position where the highlight should be placed.
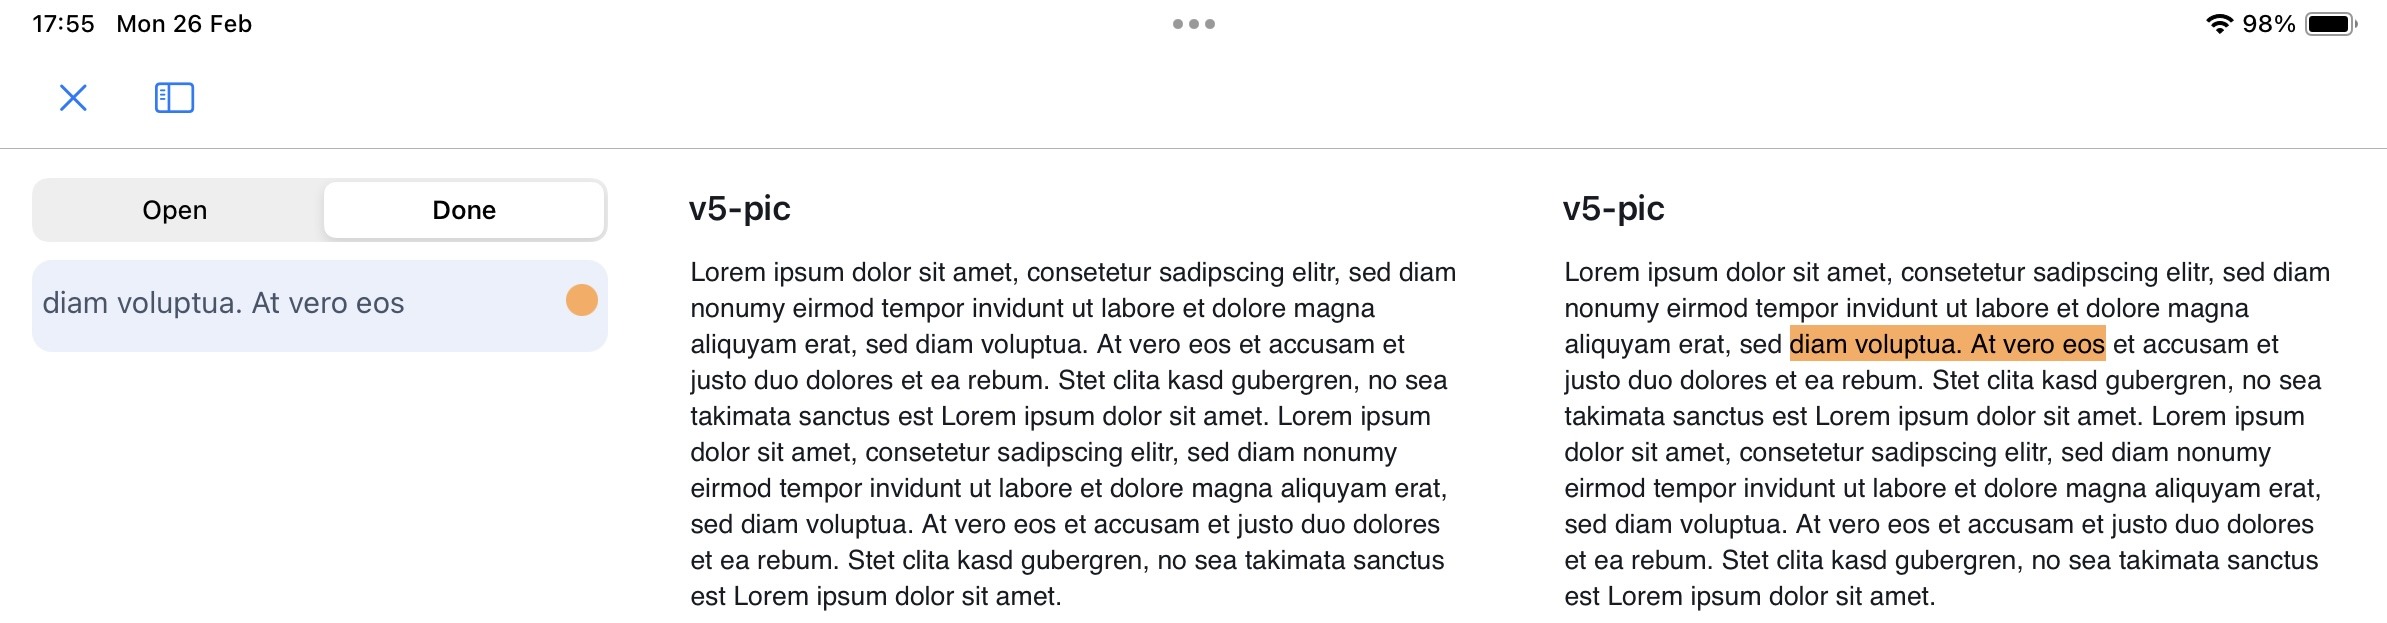
The highlight with all its attributes (such as color and note) will be copied to the new revision:

- You can find your already transfered highlights under the ‘Done’ highlights:
Remarks:
- The highlight on the previous revision will still be accessible in the outdated revision of the document.
- Attributes of a highlight (coler & note) will be transferred with the highlight it belongs to.
Was this article helpful?
That’s Great!
Thank you for your feedback
Sorry! We couldn't be helpful
Thank you for your feedback
Feedback sent
We appreciate your effort and will try to fix the article