TABLE OF CONTENTS
Create a Memo
The illustrations below demonstrate how a memo is created and points to how it can be modified.
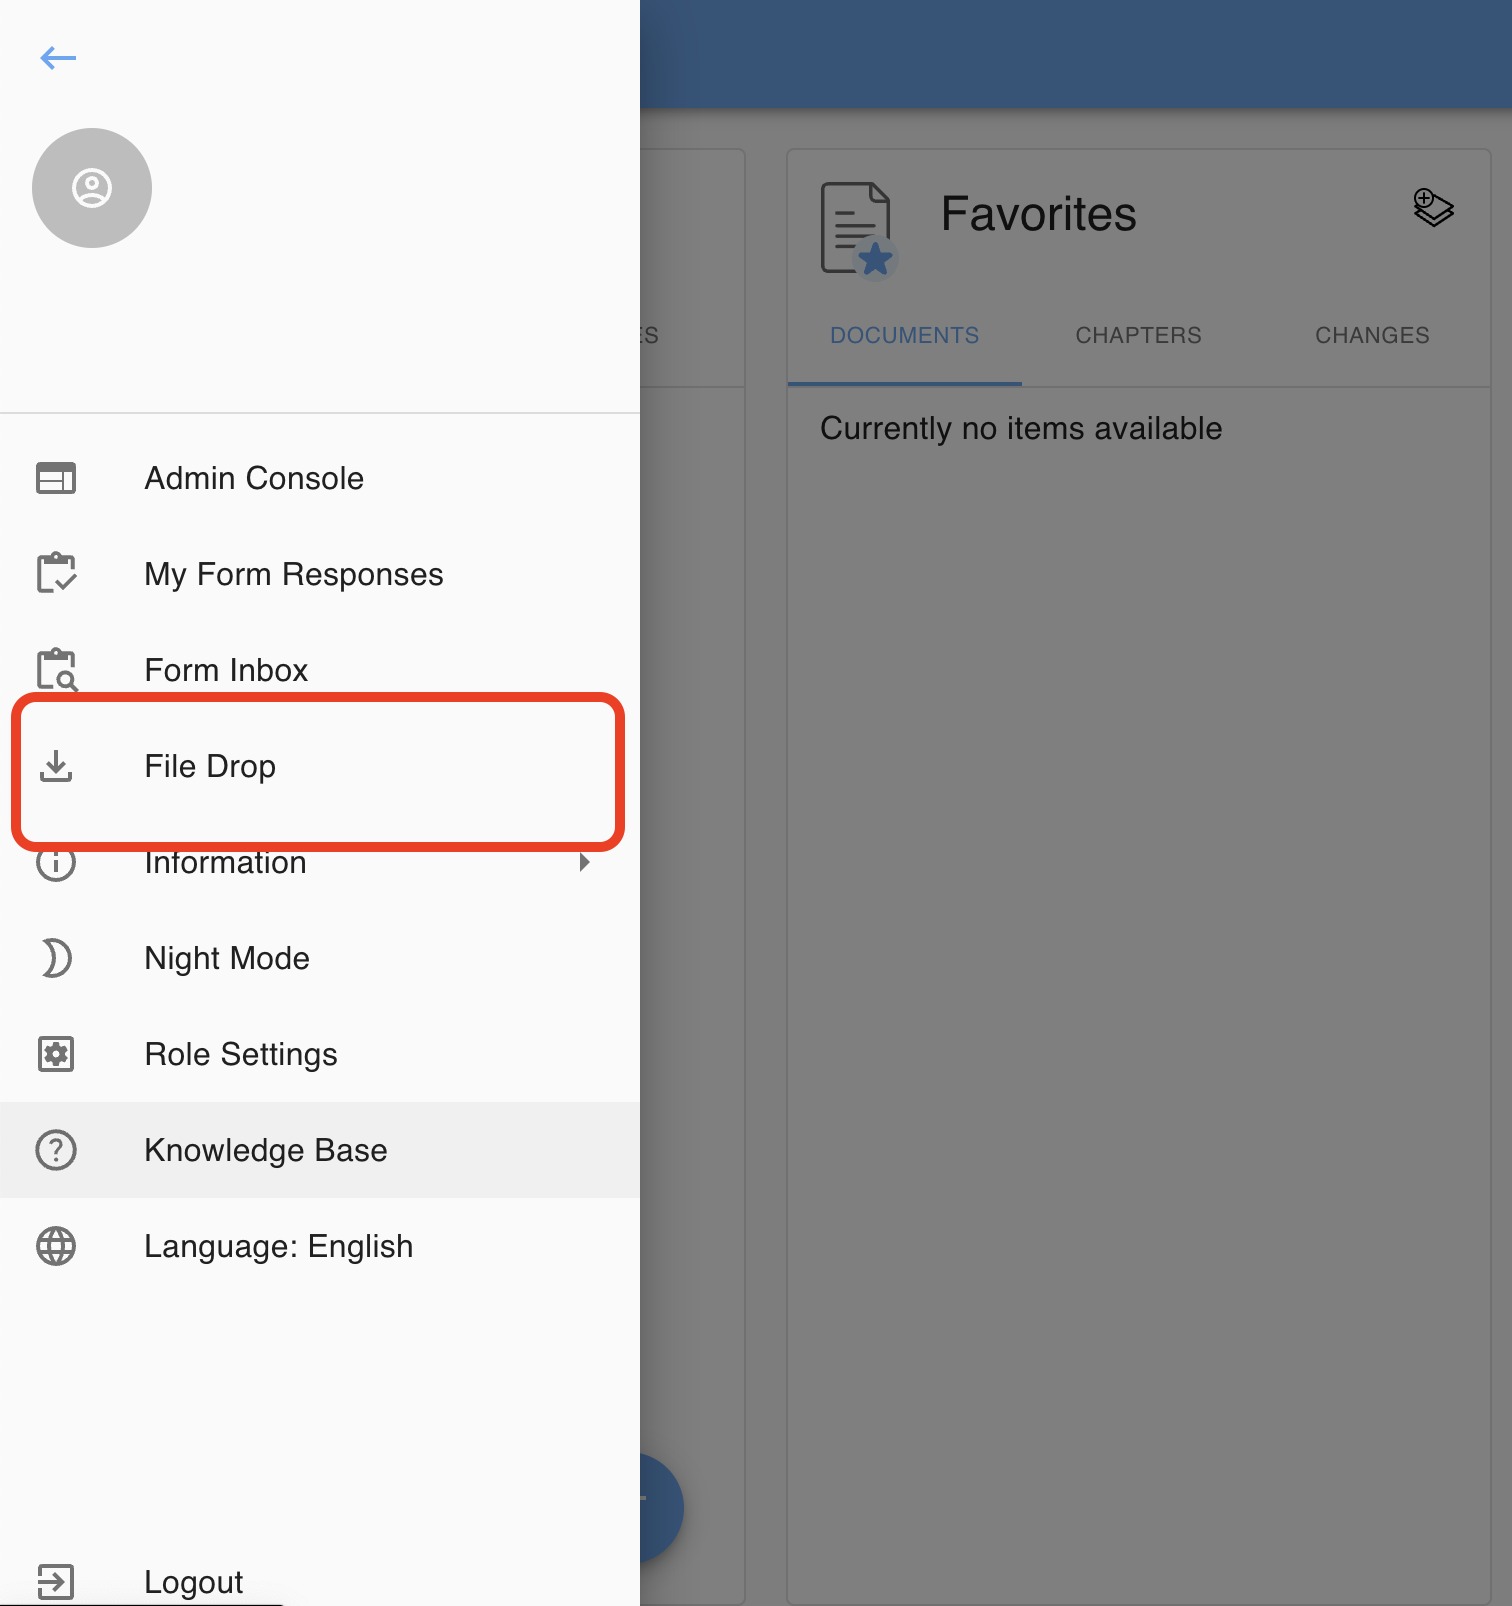
- Access the Memo editor via the Hamburger menue in the Yonder Reader via the File Drop entry:
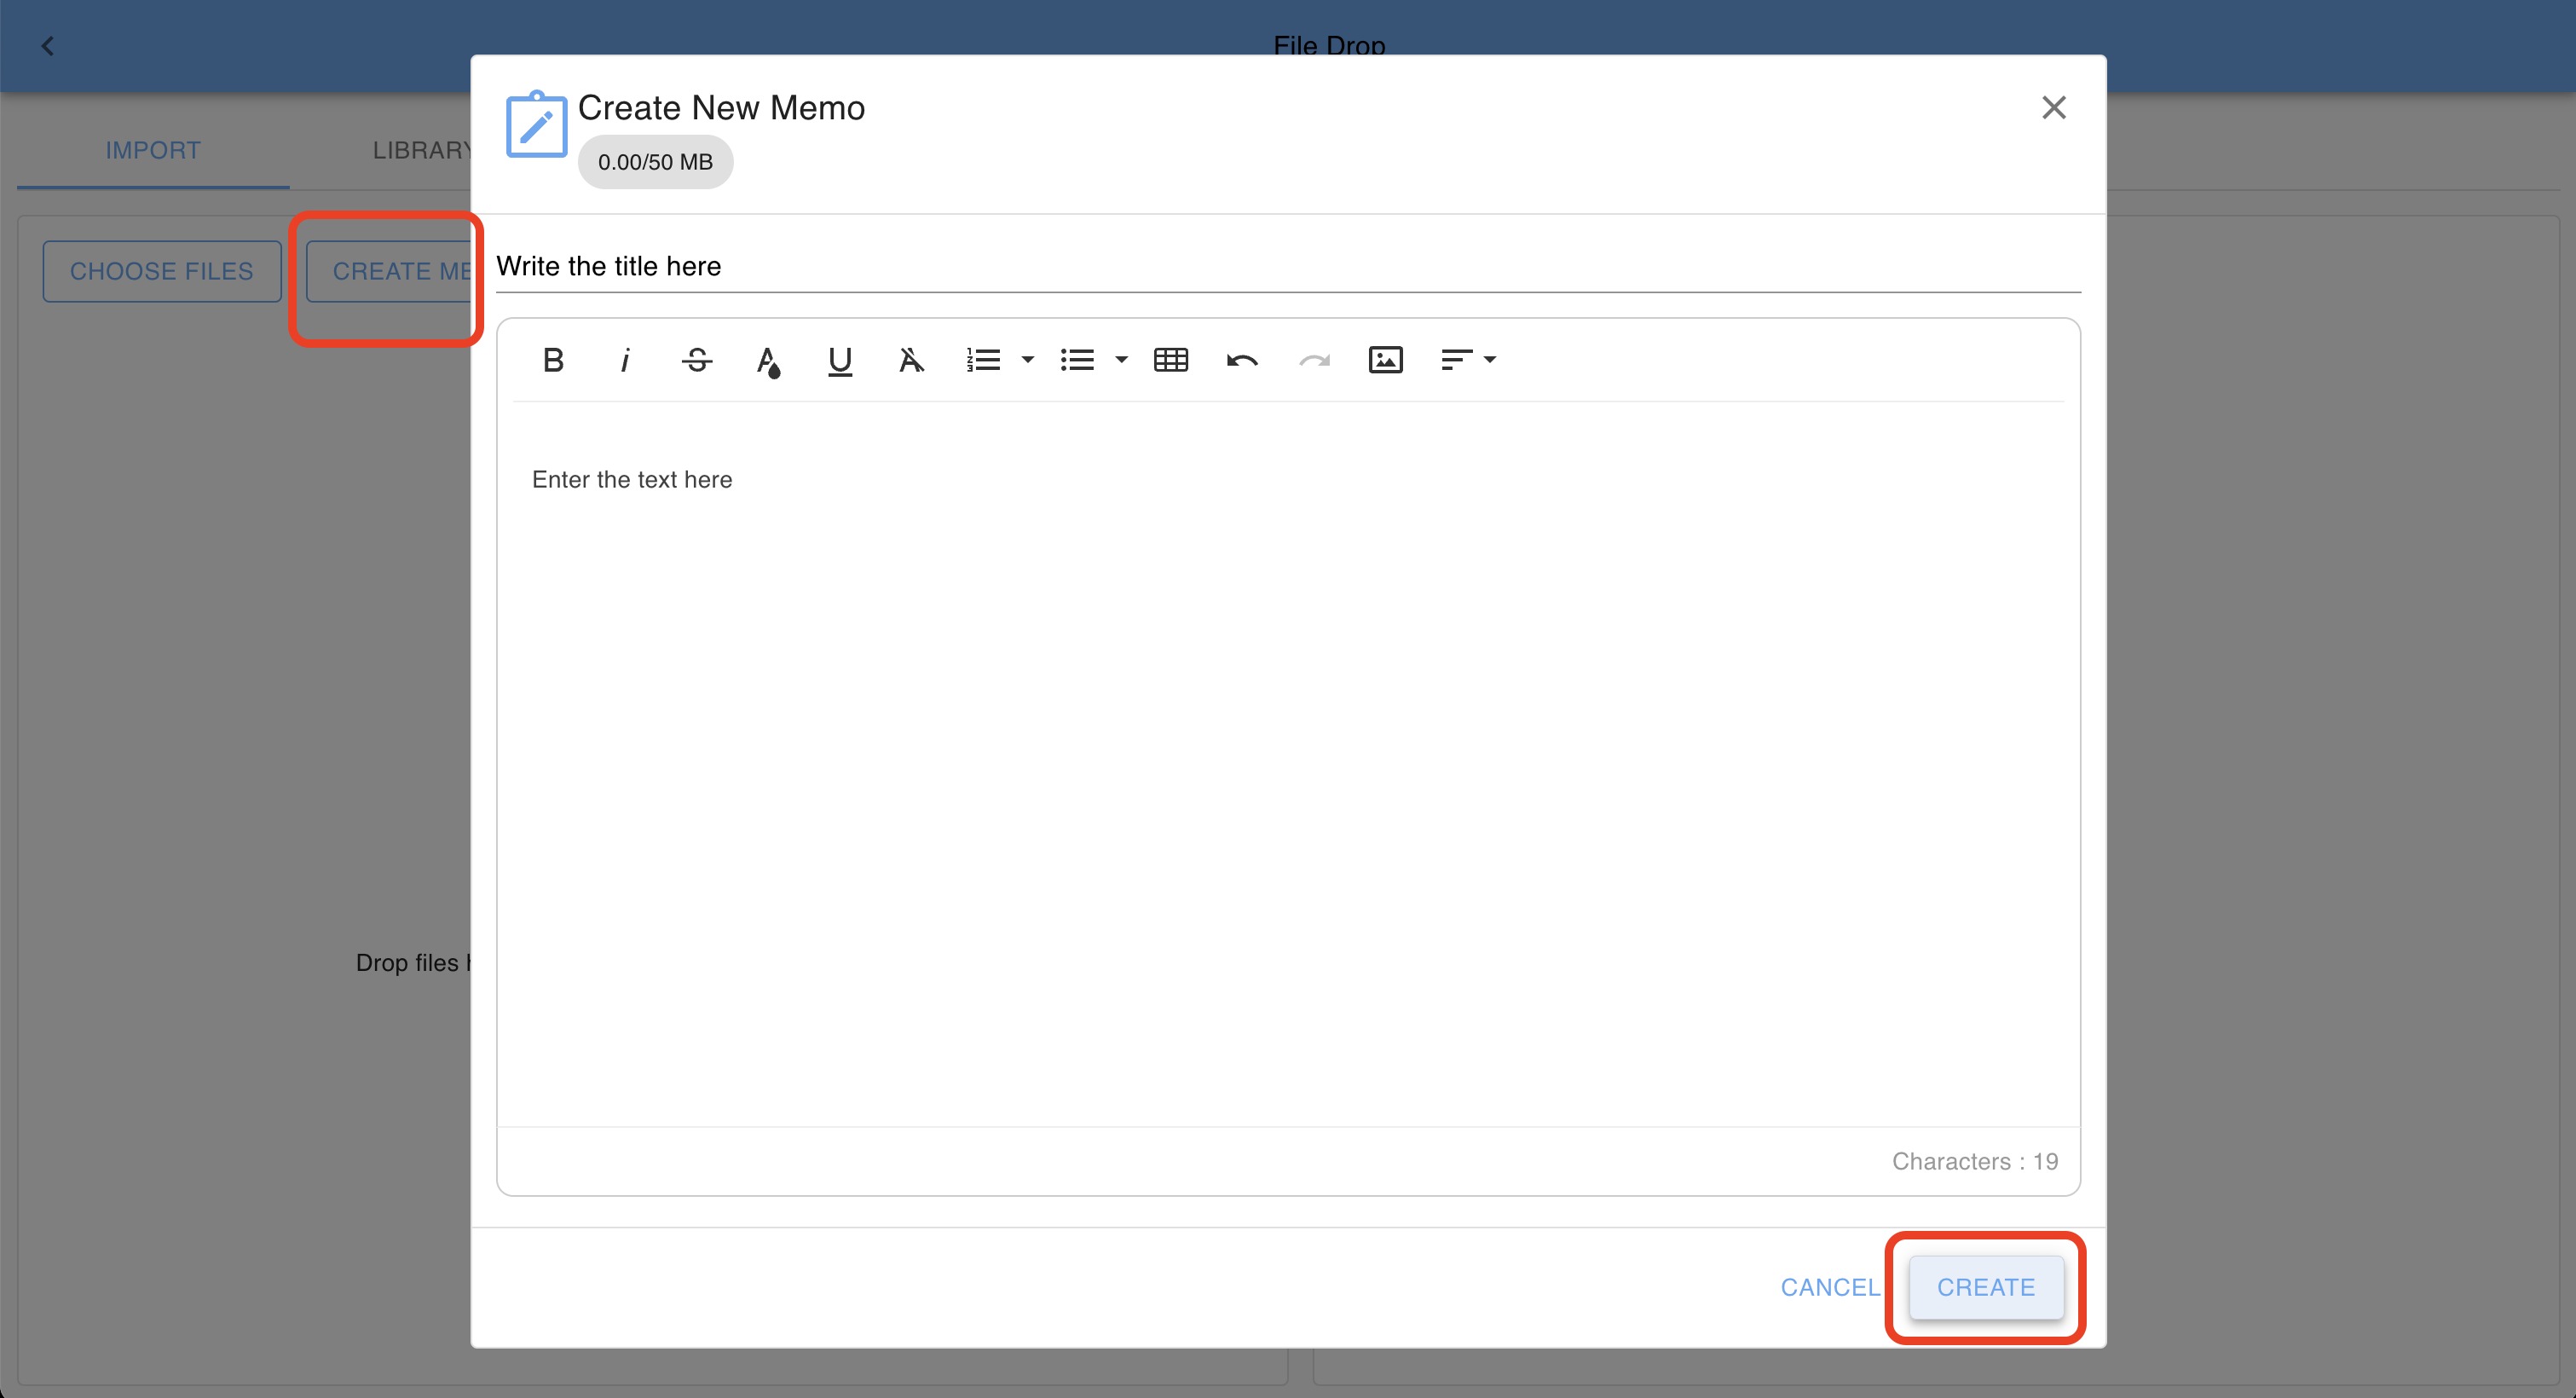
- Select CREATE MEMO
- In the Memo editor enter:
- title
- text
- Click CREATE
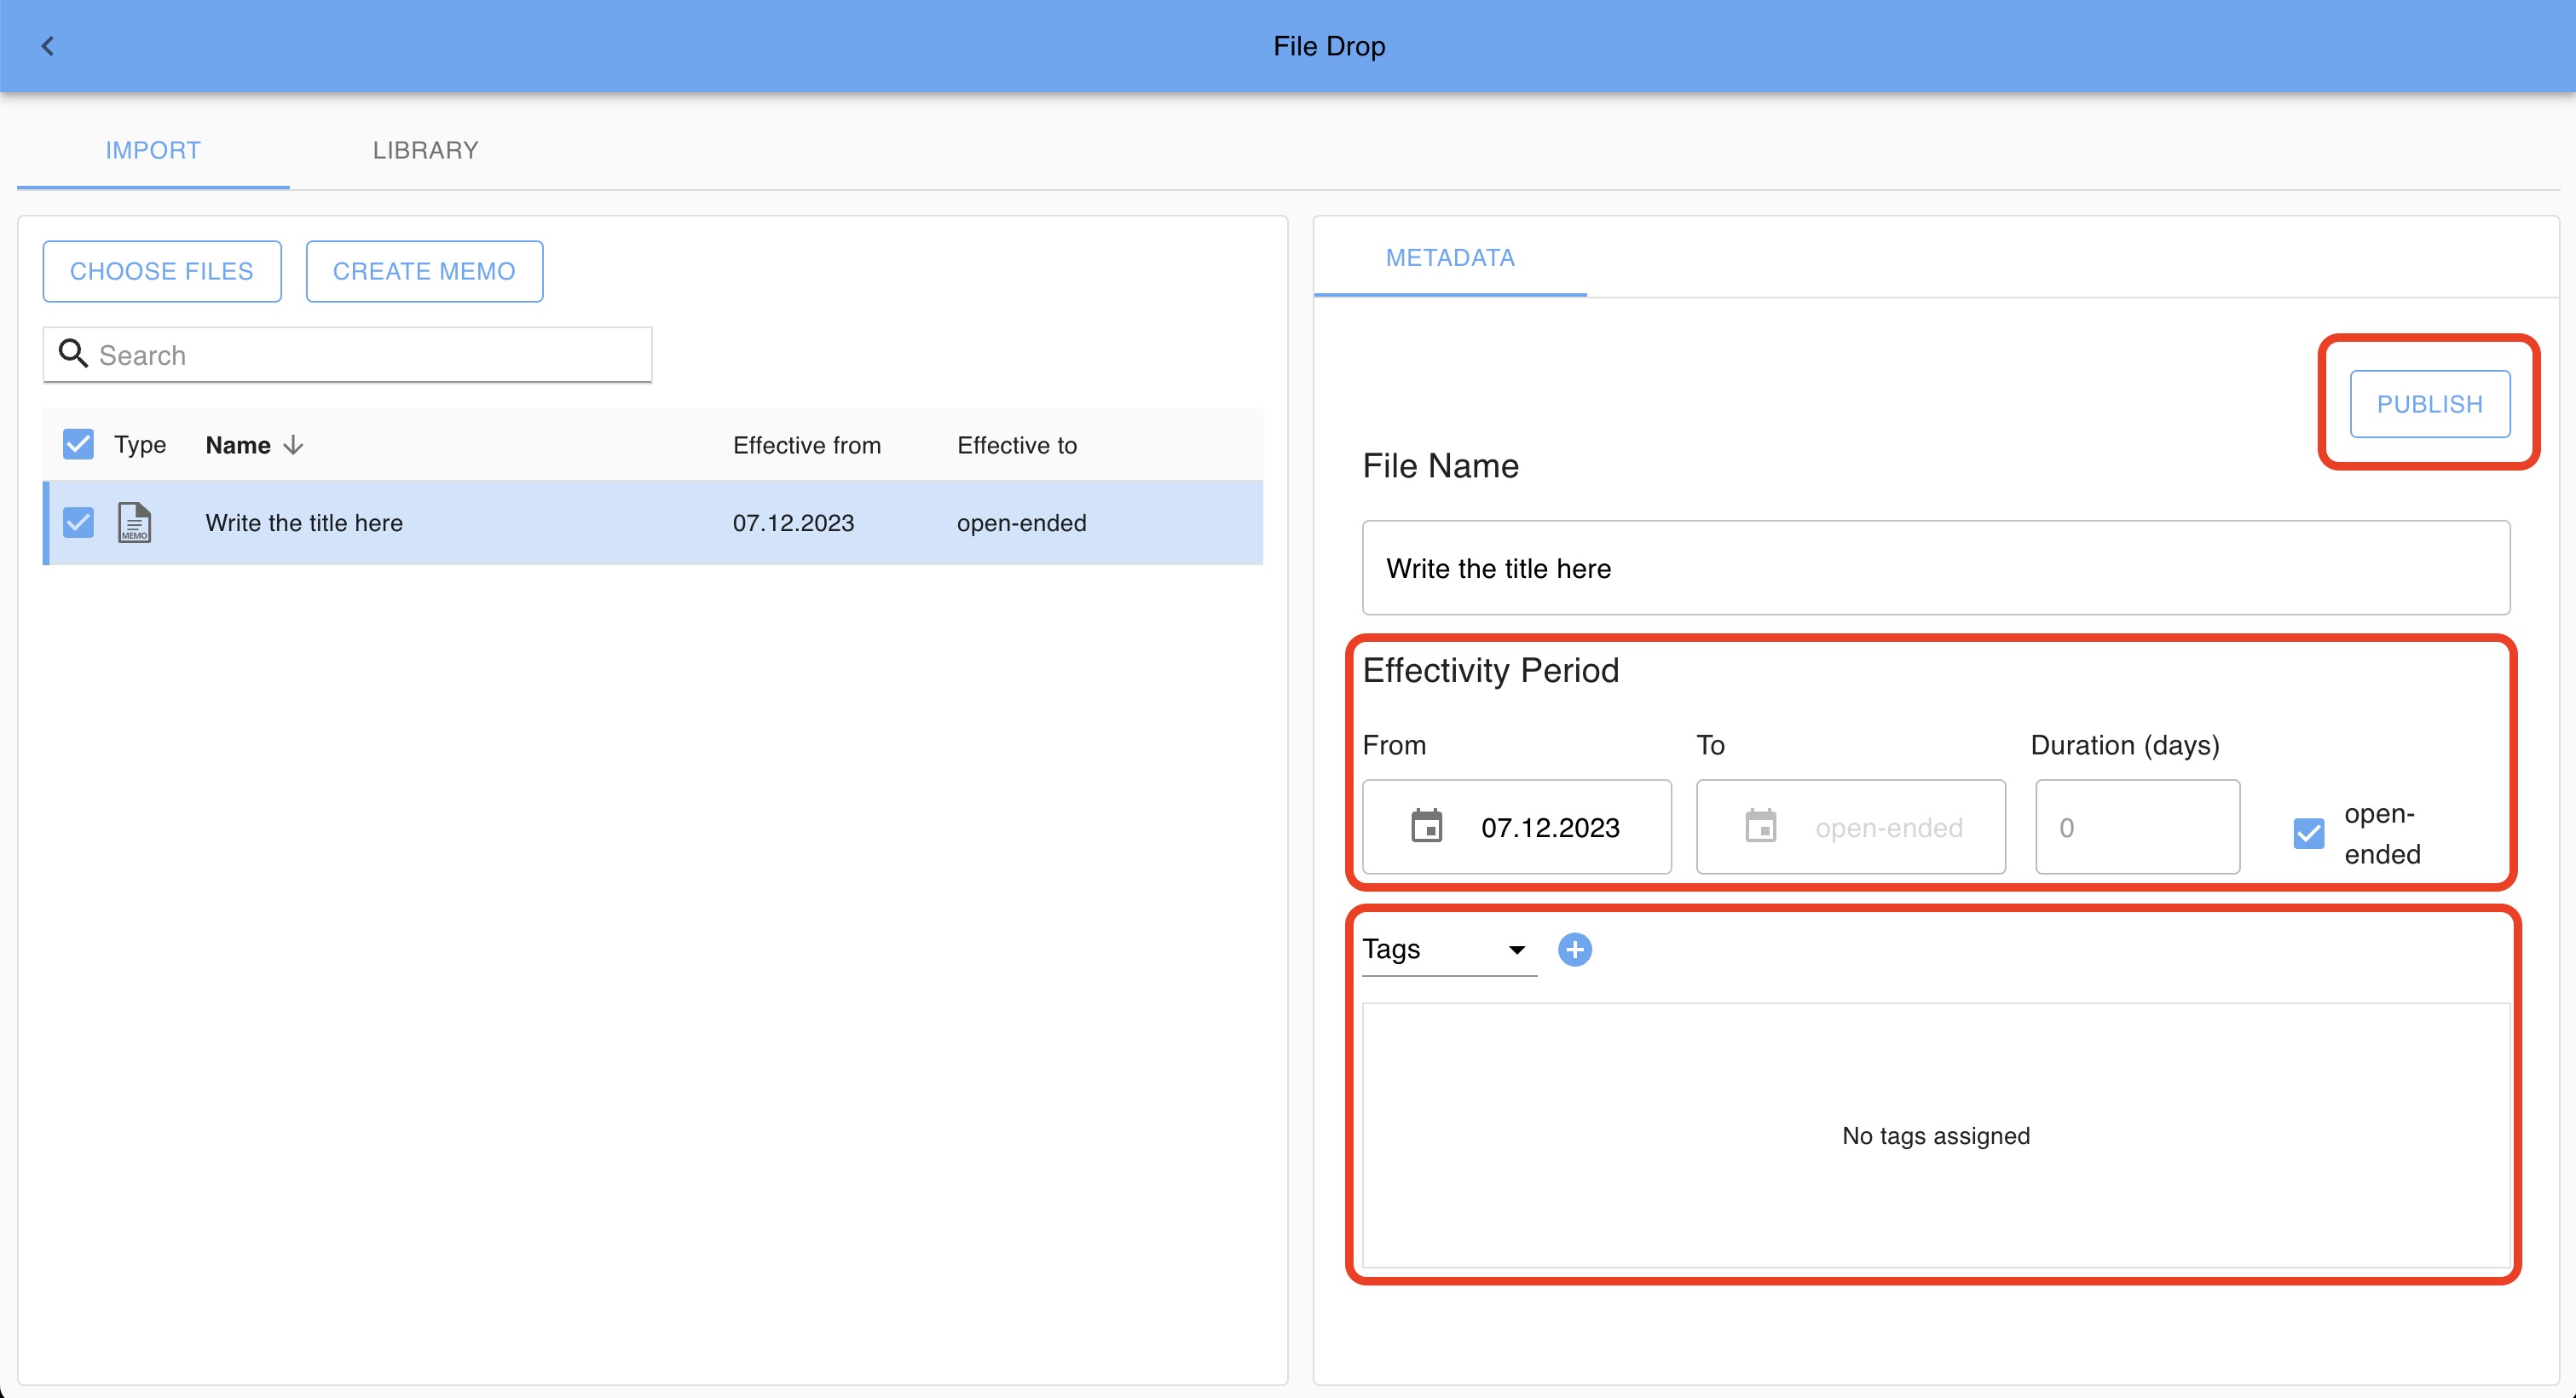
- Assign the required meta data
- define the Effectivity Period
- Assign Tag or selected Users
- Click PUBLISH
Enable Tag Domains for tagging
If you want to tag your memos and have the tags available, please enable them in the admin console.
Required permissions: filedrop_admin, filedrop_view, md_tag_admin
The in file drop available tag domains have to be selected via the admin interface. To do so, navigate to Definitions > Tag Domains, as illustrated below.
Notes:
- Removing a file will delete the files (and all its revisions).
- Either individual users or tags can be assigned to files and memos.
Memo View
You can access your Memos in the Library card in the Yonder dashboard:
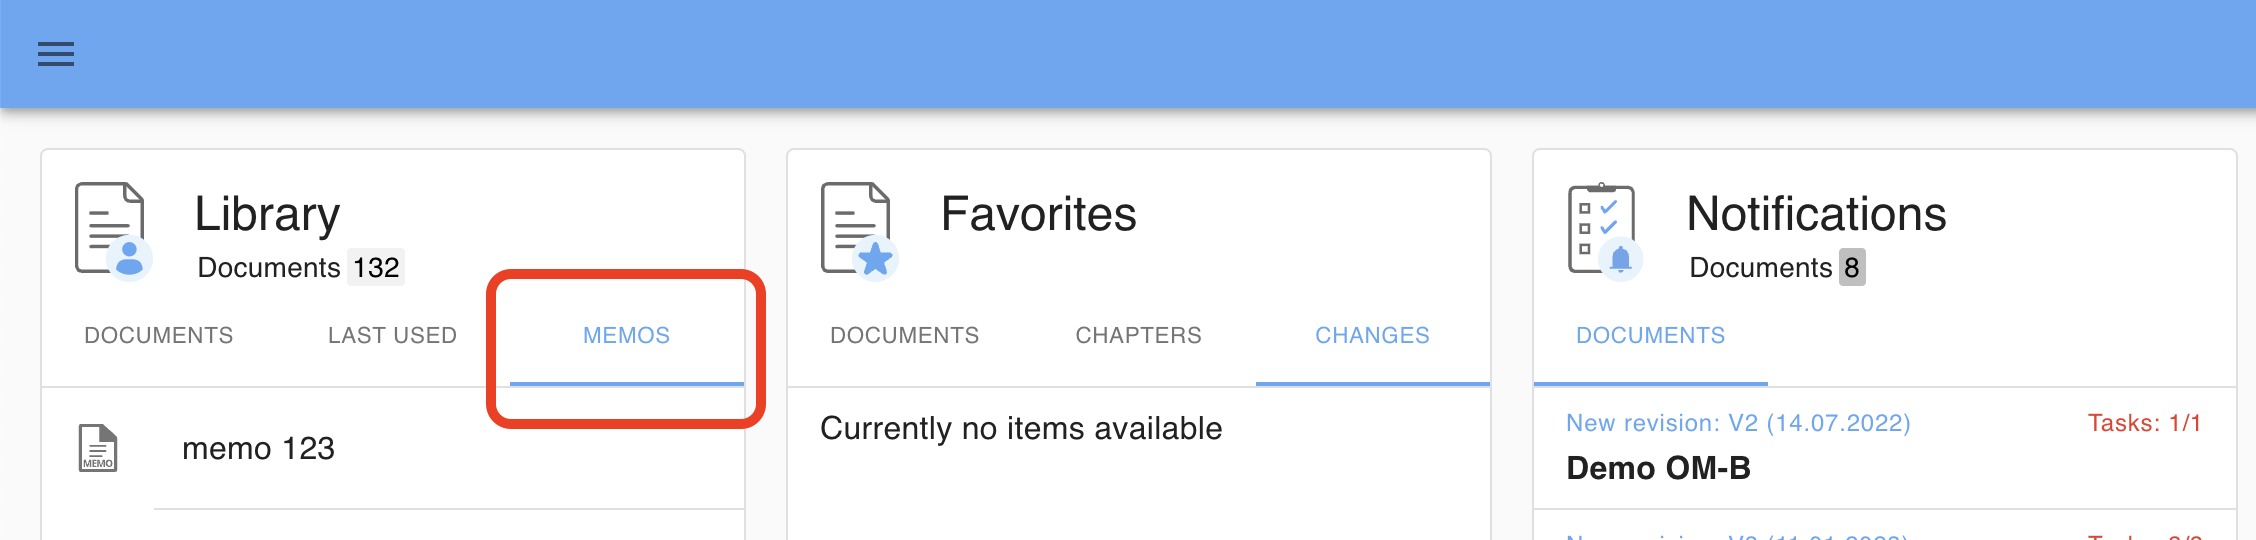
Simply scroll through the list and select the desired Memo.
Was this article helpful?
That’s Great!
Thank you for your feedback
Sorry! We couldn't be helpful
Thank you for your feedback
Feedback sent
We appreciate your effort and will try to fix the article